Foxconn AT-5250 User manual - Page 17
Install Windows 7 - linux
 |
View all Foxconn AT-5250 manuals
Add to My Manuals
Save this manual to your list of manuals |
Page 17 highlights
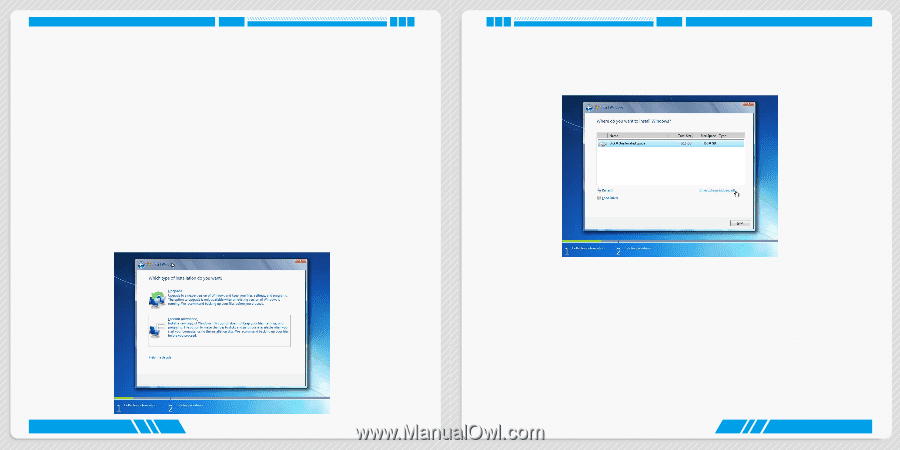
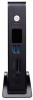
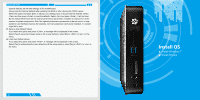
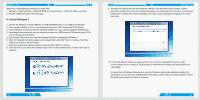
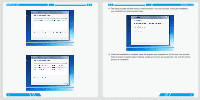
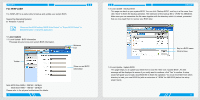
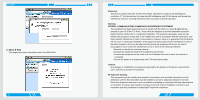
INSTALL OS What kinds of hardware and software you need here: 1. Windows 7 Install USB Disk / USB DVD-ROM drive and Windows 7 Install CD (Other purchase) 2. NanoPC USB Flash Disk (In this package) 4-1 Install Windows 7 1. Connect the Windows 7 Install USB Disk (or USB DVD-ROM drive) to one USB port of NanoPC. 2. Press power on button to turn on your computer, then press key to enter BIOS Setup. 3. Put the Windows 7 Install CD into the USB DVD-ROM drive. (If you use the USB DVD-ROM drive) 4. According to the devices you use, set the first boot device to USB device or DVD drives, press to save changes and exit BIOS. 5. The computer will reboot, and it will start loading the files for installing the Windows 7. 6. When the installation windows popup, set the related items and click "Next" to continue, then click "Install now" button to start the setup. 7. When the license terms appear, choose accept and click "Next" to continue. 8. It will then ask you to select the installation type. Click "Custom (advanced)" to install a new copy of Windows. 26 INSTALL OS 9. The setup will display the hard disk partitions (160GB, in this example) of your system. If there were other systems (such as Linux) installed previously, you need select them and click "Drive options (advanced)" to delete them. When all partitions are clean, setup will display the biggest size of your hard drive. 10. In the hard disk size screen, you can click the "new" button to create partitions as you need. In this example we are creating a 70GB partition to install Windows. Make your modifications and click "Apply". To ensure that all Windows features work correctly, Windows might create additional partitions for system files. So you will see a 100MB partition reserved by system after you create a partition. Select the 70GB partition and click "Next" to continue. 27
-
 1
1 -
2
-
3
-
4
-
5
-
6
-
7
-
8
-
9
-
10
-
11
-
 12
12 -
 13
13 -
 14
14 -
 15
15 -
 16
16 -
 17
17 -
 18
18 -
 19
19 -
 20
20 -
 21
21 -
 22
22
 |
 |