Garmin Edge 520 Owners Manual - Page 20
Improving GPS Satellite Reception - battery replacement
 |
View all Garmin Edge 520 manuals
Add to My Manuals
Save this manual to your list of manuals |
Page 20 highlights
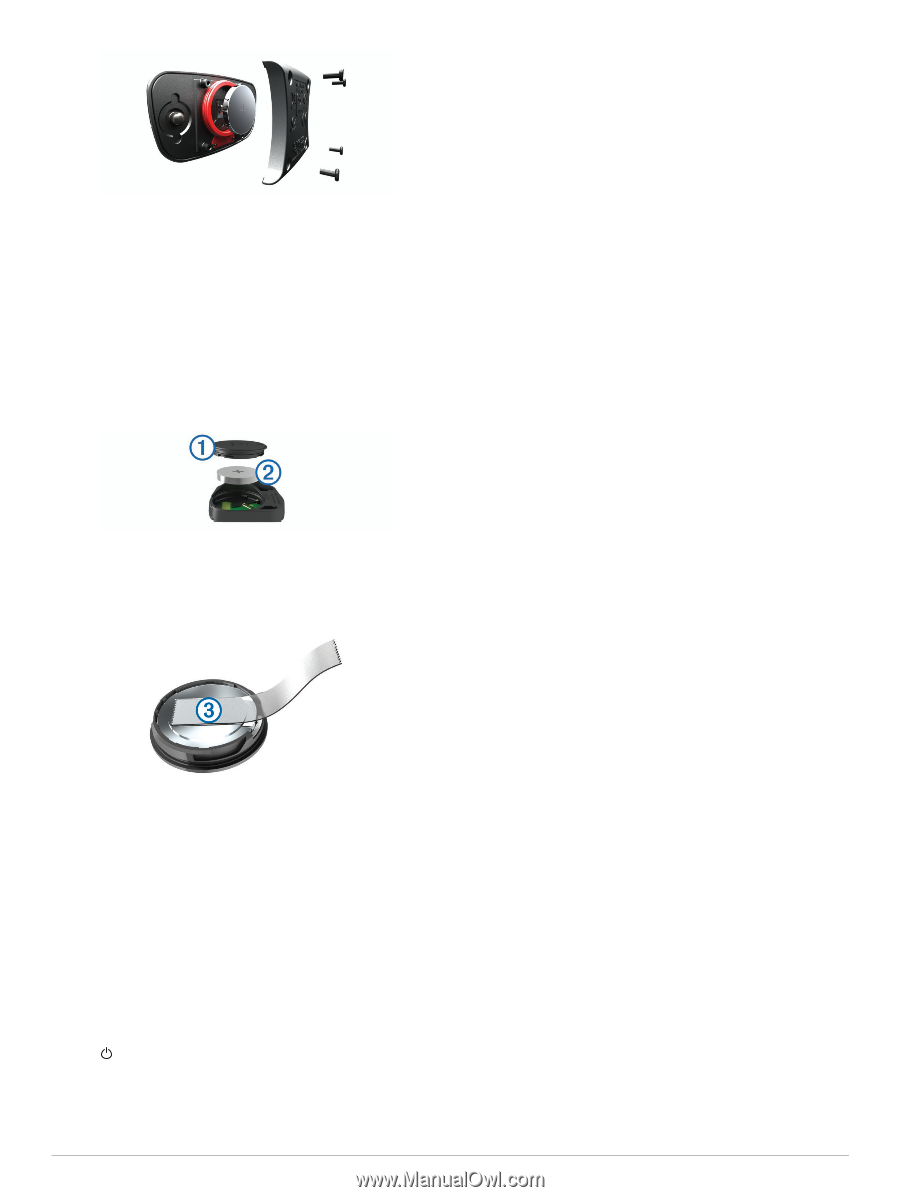
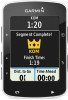
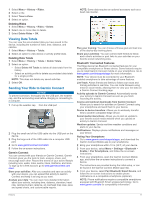
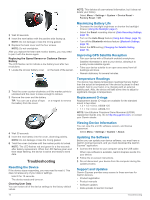
NOTE: This deletes all user-entered information, but it does not delete your history. Select Menu > Settings > System > Device Reset > Factory Reset > OK. 3 Wait 30 seconds. 4 Insert the new battery with the positive side facing up. NOTE: Do not damage or lose the O-ring gasket. 5 Replace the back cover and the four screws. NOTE: Do not overtighten. After you replace the heart rate monitor battery, you may need to pair it with the device again. Replacing the Speed Sensor or Cadence Sensor Battery The LED flashes red to indicate a low battery level after two revolutions. 1 Locate the circular battery cover on the back of the sensor. À Maximizing Battery Life • Decrease the backlight brightness or shorten the backlight timeout (Using the Backlight, page 2). • Select the Smart recording interval (Data Recording Settings, page 14). • Turn on the Auto Sleep feature (Using Auto Sleep, page 14). • Turn off the Bluetooth wireless feature (Bluetooth Settings, page 14). • Select the GPS setting (Changing the Satellite Setting, page 13). Improving GPS Satellite Reception • Pair your device with a Bluetooth enabled smartphone. Satellite information is sent to your device, allowing it to quickly locate satellite signals. • Take your device outside to an open area away from tall buildings and trees. • Remain stationary for several minutes. 2 Twist the cover counter-clockwise until the marker points to unlocked and the cover is loose enough to remove. 3 Remove the cover and the battery . Á TIP: You can use a piece of tape or a magnet to remove  the battery from the cover. Temperature Readings The device may display temperature readings that are higher than the actual air temperature if the device is placed in direct sunlight, held in your hand, or is charging with an external battery pack. Also, the device will take some time to adjust to significant changes in temperature. Replacement O-rings Replacement bands (O-rings) are available for the standard mount in two sizes: • 1.3 × 1.5 × 0.9 in. AS568-125 • 1.7 × 1.9 × 0.9 in. AS568-131 NOTE: Use Ethylene Propylene Diene Monomer (EPDM) replacement bands only. Go to http://buy.garmin.com, or contact your Garmin dealer. 4 Wait 30 seconds. 5 Insert the new battery into the cover, observing polarity. NOTE: Do not damage or lose the O-ring gasket. 6 Twist the cover clockwise until the marker points to locked. NOTE: The LED flashes red and green for a few seconds after battery replacement. When the LED flashes green and then stops flashing, the device is active and ready to send data. Troubleshooting Resetting the Device If the device stops responding, you may need to reset it. This does not erase any of your data or settings. Hold for 10 seconds. The device resets and turns on. Clearing User Data You can restore all of the device settings to the factory default values. Viewing Device Information You can view the unit ID, software version, and license agreement. Select Menu > Settings > System > About. Updating the Software Before you can update your device software, you must have a Garmin Connect account, and you must download the Garmin Express™ application. 1 Connect the device to your computer using the USB cable. When new software is available, Garmin Express sends it to your device. 2 Follow the on-screen instructions. 3 Do not disconnect your device from the computer during the update process. Support and Updates Garmin Express provides easy access to these services for Garmin devices. • Product registration • Product manuals • Software updates • Data uploads to Garmin Connect 16 Troubleshooting
-
 1
1 -
2
-
3
-
4
-
5
-
6
-
7
-
8
-
9
-
10
-
11
-
12
-
13
-
14
-
 15
15 -
 16
16 -
 17
17 -
 18
18 -
 19
19 -
 20
20 -
 21
21 -
 22
22 -
 23
23 -
 24
24 -
 25
25 -
26
 |
 |