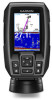
Garmin STRIKER 4 Owners Manual - Page 7
Creating a Waypoint on the Sonar Screen
 |
View all Garmin STRIKER 4 manuals
Add to My Manuals
Save this manual to your list of manuals |
Page 7 highlights
Logs Å Distance from the side of the vessel Æ Water between the vessel and the bottom Ç Split-Screen Frequency You can view two frequencies from the split frequency screen. Flasher The flasher shows sonar information on a circular depth scale, indicating what is beneath your boat. It is organized as a ring that starts at the top and progresses clockwise. Depth is indicated by the scale inside the ring. Sonar information flashes on the ring when it is received at the depth indicated. The colors indicate different strengths of the sonar return. Select Flasher. Depth at your present location À Depth scale Á Split-Zoom View On the split-zoom page, you can see a full-view graph of sonar readings on the right side of the screen, and a magnified portion of that graph on the left side of the screen. From a sonar screen, select > Split Zoom. Zoomed depth scale À Zoom window Á Depth range  Selecting the Transducer Type If you are not using the included transducer, you must set the transducer type to enable the sonar to function optimally. If you are using the included transducer, you do not need to complete these steps. Sonar 1 Select Settings > My Vessel > Transducer Type. 2 Select the type of transducer you are using. Creating a Waypoint on the Sonar Screen Using Your Present Location 1 From a sonar view, select . 2 If necessary, edit the waypoint information. Pausing the Sonar Not all options are available on all models. Select an option: • From the Traditional or DownVü sonar screen, select or . • From the SideVü sonar screen, select or . Creating a Waypoint on the Sonar Screen Using a Different Location 1 From a sonar view, pause the sonar. 2 Select a location. 3 Select . 4 If necessary, edit the waypoint information. Overlay Number Settings You can customize the data shown on the sonar screen. NOTE: Not all features are available on all devices. From a sonar screen, select > Overlay Numbers. Navigation Inset: Shows the navigation inset when the vessel is navigating to a destination. Device Voltage: Shows the voltage of the device. Speed: Shows the vessel's current speed. Time of Day: Shows the current time of day. Compass Tape: Shows the compass tape data bar. Depth: Shows the transducer's current depth. Water Temp.: Shows the current water temperature. Sonar Gain and Noise Settings You can adjust the amount of gain and noise on a sonar screen. The gain setting controls the sensitivity of the sonar receiver to compensate for water depth and water clarity. Increasing the gain shows more detail, and decreasing the gain reduces screen clutter. NOTE: Setting the gain on one page applies the setting to all the pages. Setting the Gain Manually 1 From a sonar screen, select > Gain. 2 Select or until you begin to see noise in the water portion of the screen. 3 Select or to decrease the gain. Setting the Gain Automatically NOTE: To set the gain on the split-frequency screen, you must set each frequency separately. 1 Select > Gain. 2 Select Enable Auto Gain, if applicable. 3 Select an option: • To display higher-sensitivity, weaker sonar returns with more noise automatically, select Auto High. • To display medium-sensitivity sonar returns with moderate noise automatically, select Auto Med. 3
-
 1
1 -
 2
2 -
 3
3 -
 4
4 -
 5
5 -
 6
6 -
 7
7 -
 8
8 -
 9
9 -
 10
10 -
 11
11 -
 12
12 -
13
-
14
-
15
-
16
 |
 |
