Garmin eTrex 22x/32x Owners Manual - Page 6
Routes, Tracks - review
 |
View all Garmin eTrex 22x/32x manuals
Add to My Manuals
Save this manual to your list of manuals |
Page 6 highlights
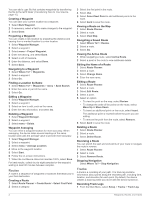
You can add a .gpx file that contains waypoints by transferring the file to the GPX folder (Transferring Files to Your Device, page 10). Creating a Waypoint You can save your current location as a waypoint. 1 Select Mark Waypoint. 2 If necessary, select a field to make changes to the waypoint. 3 Select Done. Projecting a Waypoint You can create a new location by projecting the distance and bearing from a marked location to a new location. 1 Select Waypoint Manager. 2 Select a waypoint. 3 Select menu > Project Waypoint. 4 Enter the bearing, and select Done. 5 Select a unit of measure. 6 Enter the distance, and select Done. 7 Select Save. Navigating to a Waypoint 1 Select Where To? > Waypoints. 2 Select a waypoint. 3 Select Go. Finding a Location by Name 1 Select Where To? > Waypoints > menu > Spell Search. 2 Enter the name or part of the name. 3 Select Go. Editing a Waypoint 1 Select Waypoint Manager. 2 Select a waypoint. 3 Select an item to edit, such as the name. 4 Enter the new information, and select Go. Deleting a Waypoint 1 Select Waypoint Manager. 2 Select a waypoint. 3 Select menu > Delete. Waypoint Averaging You can refine a waypoint location for more accuracy. When averaging, the device takes several readings at the same location and uses the average value to provide more accuracy. 1 Select Waypoint Manager. 2 Select a waypoint. 3 Select menu > Average Location. 4 Move to the waypoint location. 5 Select Start. 6 Follow the on-screen instructions. 7 When the confidence status bar reaches 100%, select Save. For best results, collect four to eight samples for the waypoint, waiting at least 90 minutes between samples. Routes A route is a sequence of waypoints or locations that leads you to your final destination. Creating a Route 1 Select Route Planner > Create Route > Select First Point. 2 Select a category. 3 Select the first point in the route. 4 Select Use. 5 Select Select Next Point to add additional points to the route. 6 Select back to save the route. Viewing a Route on the Map 1 Select Route Planner. 2 Select a route. 3 Select View Map. Navigating a Saved Route 1 Select Where To? > Routes. 2 Select a route. 3 Select Go. Viewing the Active Route 1 While navigating a route, select Active Route. 2 Select a point in the route to view additional details. Editing the Name of a Route 1 Select Route Planner. 2 Select a route. 3 Select Change Name. 4 Enter the new name. Editing a Route 1 Select Route Planner. 2 Select a route. 3 Select Edit Route. 4 Select a point. 5 Select an option: • To view the point on the map, select Review. • To change the order of the points on the route, select Move Up or Move Down. • To insert an additional point on the route, select Insert. The additional point is inserted before the point you are editing. • To remove the point from the route, select Remove. 6 Select back to save the route. Deleting a Route 1 Select Route Planner. 2 Select a route. 3 Select Delete Route. Reversing a Route You can switch the start and end points of your route to navigate the route in reverse. 1 Select Route Planner. 2 Select a route. 3 Select Reverse Route. Stopping Navigation Select Where To? > Stop Navigation. Tracks A track is a recording of your path. The track log contains information about points along the recorded path, including time, location, and elevation for each point. By default, the device creates a track log while you move with the device turned on. Recording Track Logs 1 From the Main Menu, select Setup > Tracks > Track Log. 2 Waypoints, Routes, and Tracks
-
 1
1 -
 2
2 -
 3
3 -
 4
4 -
 5
5 -
 6
6 -
 7
7 -
 8
8 -
 9
9 -
 10
10 -
 11
11 -
 12
12 -
13
-
14
-
15
-
16
-
17
-
18
 |
 |