GE 27958GE1 User Guide - Page 14
Set Tone/pulse, 1tone, Pulse, Or, Pulse, Set Day, Set Time, 00 Am - a manual
 |
UPC - 044319202373
View all GE 27958GE1 manuals
Add to My Manuals
Save this manual to your list of manuals |
Page 14 highlights
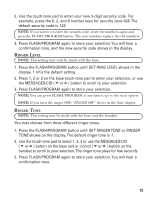
TONE/PULSE NOTE: This setting may only be made with the base. Most telephone systems use tone dialing, however, some may still use pulse dialing. Depending on your telephone system, set the dialing mode as follows: 1. Press the FLASH/PROGRAM button until SET TONE/PULSE shows on the display.The default setting is TONE. 2. Use the touch-tone pad to select 1TONE or 2 PULSE, or press the MESSAGES/CID ( or ) button to scroll to 1TONE or 2 PULSE. 3. Press FLASH/PROGRAM again to store your selection. You will hear a confirmation tone. NOTE: If you aren't sure which dialing system you have, set the telephone to tone dialing and make a test call. If the call connects, the setting is correct. If the call does not connect, set the telephone to pulse dialing. SETTING DAY/TIME NOTE: This setting may only be made with the base. Time is transmitted automatically by your local phone company as part of Caller ID service. If you are subscribed to Caller ID service, the current time is set automatically when you receive your first CID call. Otherwise, you can set the time manually. The day of week is not set automatically by Caller ID. The day of week must be set manually through base. 1. Press the FLASH/PROGRAM button until SET DAY shows in the display. Monday is the default setting. 2. Use the MESSAGES/CID ( or ) button to select the current day. 3. Press FLASH/PROGRAM until SET TIME shows on the display. 12:00 AM is the default setting. 4. Use the touch-tone pad to enter the first digit of the hour, then enter the second digit of the hour, the first digit of the minute, and the second digit of the minute. 5. Use the MESSAGES/CID ( or ) button to scroll to AM or PM. 14
-
 1
1 -
2
-
3
-
4
-
5
-
6
-
7
-
8
-
 9
9 -
 10
10 -
 11
11 -
 12
12 -
 13
13 -
 14
14 -
 15
15 -
 16
16 -
 17
17 -
 18
18 -
 19
19 -
20
-
21
-
22
-
23
-
24
-
25
-
26
-
27
-
28
-
29
-
30
-
31
-
32
-
33
-
34
-
35
-
36
-
37
-
38
-
39
-
40
-
41
-
42
-
43
-
44
-
45
-
46
-
47
-
48
-
49
-
50
-
51
-
52
-
53
-
54
-
55
-
56
-
57
-
58
-
59
-
60
-
61
-
62
-
63
-
64
-
65
-
66
-
67
-
68
-
69
-
70
-
71
-
72
-
73
-
74
-
75
-
76
-
77
-
78
-
79
-
80
-
81
-
82
-
83
-
84
-
85
-
86
-
87
-
88
-
89
-
90
-
91
-
92
-
93
-
94
-
95
-
96
 |
 |