GE GTS22ISSRSS Owners Manual - Page 20
Installing, The Water Line Cont.
 |
View all GE GTS22ISSRSS manuals
Add to My Manuals
Save this manual to your list of manuals |
Page 20 highlights
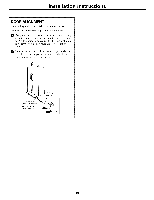
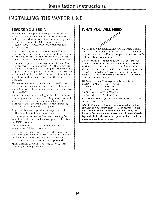
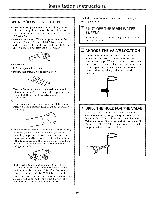
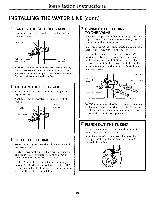
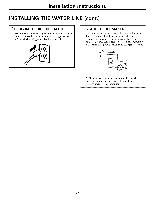
Installation Instructions INSTALLING THE WATER LINE (cont.) [] PLUG IN THE REFRIGERATOR __rranoe the coil of tubing so that it does not _ibrate against the back of the refrigerator or against the wall. Push the refrigerator back to the wall. START THE ICEMAKER Set the icemaker power switch to the I (on) position. The icemaker will not beoin_ to operate until it reaches its oi)erating, temperature of 1:5°_1_(-9°C) or below. It will then begin operation automatically if the icemaker power switch is in the I (On)position. NOTE: In lower water pressure conditions, the wateI" xalxe max tt/i'n on tip to .3 tli"/les to delixer eno//
-
 1
1 -
2
-
3
-
4
-
5
-
6
-
7
-
8
-
9
-
10
-
11
-
12
-
13
-
14
-
 15
15 -
 16
16 -
 17
17 -
 18
18 -
 19
19 -
 20
20 -
 21
21 -
 22
22 -
 23
23 -
 24
24 -
 25
25 -
26
-
27
-
28
-
29
-
30
-
31
-
32
-
33
-
34
-
35
-
36
-
37
-
38
-
39
-
40
-
41
-
42
-
43
-
44
-
45
-
46
-
47
-
48
-
49
-
50
-
51
-
52
-
53
-
54
-
55
-
56
-
57
-
58
-
59
-
60
-
61
-
62
-
63
-
64
-
65
-
66
-
67
-
68
-
69
-
70
-
71
-
72
-
73
-
74
-
75
-
76
-
77
-
78
-
79
-
80
-
81
-
82
-
83
-
84
-
85
-
86
-
87
-
88
 |
 |

Installation
Instructions
INSTALLING
THE WATER LINE (cont.)
[]
PLUG
IN THE REFRIGERATOR
__rranoe
the
coil
of
tubing
so that
it does
not
_ibrate
against
the
back
of
the
refrigerator
or
against
the
wall.
Push
the
refrigerator
back
to
the
wall.
START
THE ICEMAKER
Set
the
icemaker
power
switch
to the
I (on)
position.
The
icemaker
will
not
beoin_
to
operate
until
it
reaches
its
oi)erating,
temperature
of
1:5°_1_(-9°C)
or
below.
It will
then
begin
operation
automatically
if the
icemaker
power
switch
is in
the
I (On)
position.
NOTE:
In
lower
water
pressure
conditions,
the
3
"
wateI"
xalxe
max
tt/i'n
on
tip
to
.
tli/les
to
delixer
eno//<*h
watei"
to
the
icelilakei:
20