Gigabyte GA-8AENXP Dual Graphic Manual - Page 54
Install IEEE 1394 Driver Only for Windows XP SP2
 |
View all Gigabyte GA-8AENXP Dual Graphic manuals
Add to My Manuals
Save this manual to your list of manuals |
Page 54 highlights
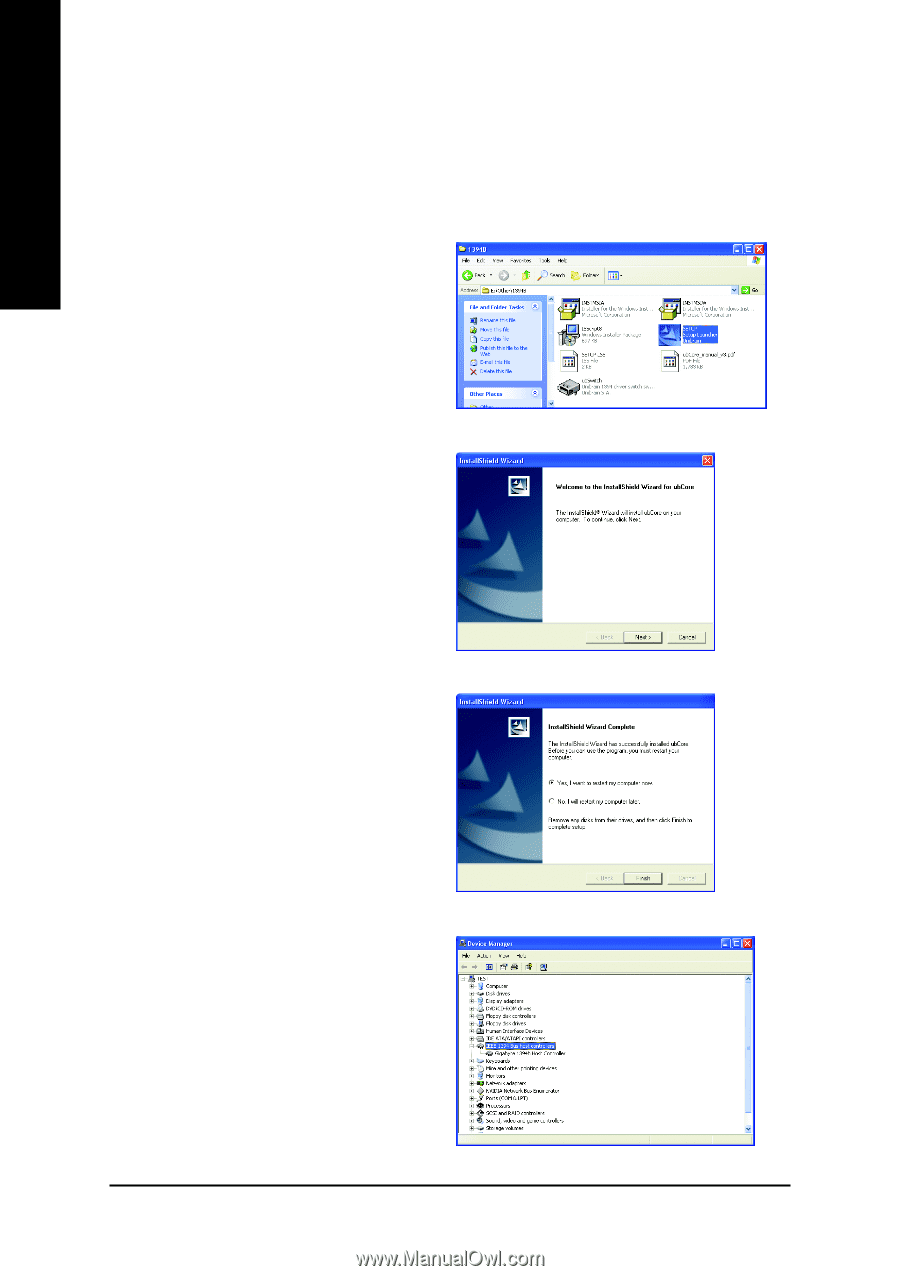
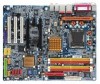
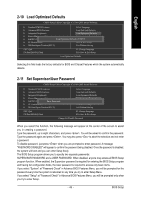
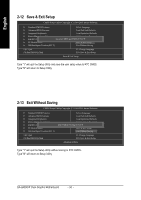
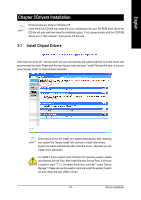
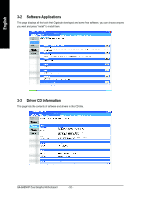
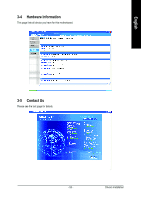
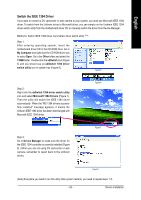
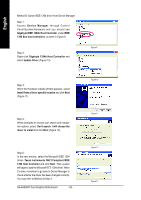
English 3-6 Install IEEE 1394 Driver (Only for Windows XP SP2) If you are using a Windows XP SP2-based computer, you need to install the Unibrain IEEE 1394 driver from the motherboard driver CD when you want to connect IEEE 1394 devices to your system. The steps below explain how to manually install the IEEE 1394 driver. Step 1: After entering operating system, insert the motherboard driver CD in the CD-ROM drive. Go to My Computer and right-click the CD-ROM drive icon to select Open. Go to the Other folder and select the 1394B folder. Double-click Setup.exe (Figure 1) to begin the IEEE 1394 driver installation. Figure 1 Step 2: Follow the on-screen instructions to continue the driver installation (Figure 2). Step 3: Restart your computer when the installation is completed (Figure 3). Figure 2 Step 4: After system restarts, go to Device Manager and check whether the IEEE 1394 driver has been correctly installed. Under IEEE 1394 Bus host controllers, you should see Gigabyte 1394b Host Controller (Figure 4). If you see a yellow exclamation or question mark, reinstall the driver for the IEEE 1394 controller. GA-8AENXP Dual Graphic Motherboard - 54 - Figure 3 Figure 4
-
 1
1 -
2
-
3
-
4
-
5
-
6
-
7
-
8
-
9
-
10
-
11
-
12
-
13
-
14
-
15
-
16
-
17
-
18
-
19
-
20
-
21
-
22
-
23
-
24
-
25
-
26
-
27
-
28
-
29
-
30
-
31
-
32
-
33
-
34
-
35
-
36
-
37
-
38
-
39
-
40
-
41
-
42
-
43
-
44
-
45
-
46
-
47
-
48
-
 49
49 -
 50
50 -
 51
51 -
 52
52 -
 53
53 -
 54
54 -
 55
55 -
 56
56 -
 57
57 -
 58
58 -
 59
59 -
60
-
61
-
62
-
63
-
64
-
65
-
66
-
67
-
68
-
69
-
70
-
71
-
72
-
73
-
74
-
75
-
76
-
77
-
78
-
79
-
80
-
81
-
82
-
83
-
84
-
85
-
86
-
87
-
88
-
89
-
90
-
91
-
92
-
93
-
94
-
95
-
96
 |
 |