Gigabyte GV-R7500L Manual - Page 12
Driver Installation
 |
View all Gigabyte GV-R7500L manuals
Add to My Manuals
Save this manual to your list of manuals |
Page 12 highlights
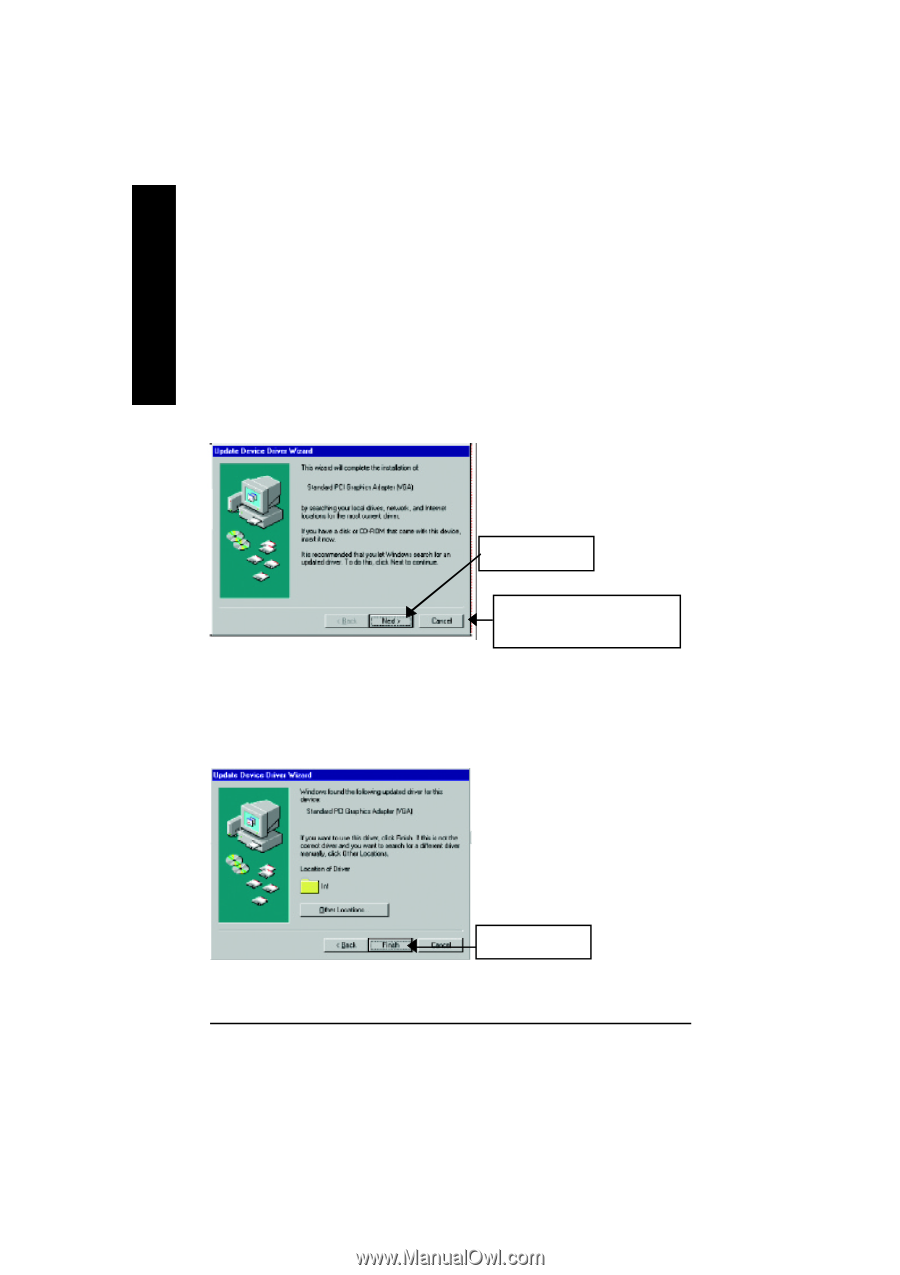
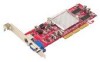
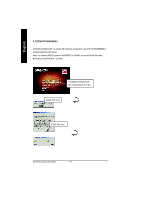
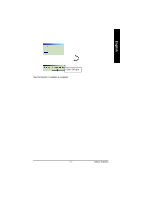
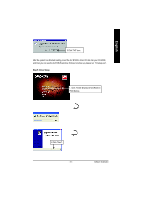
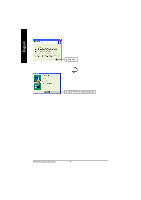
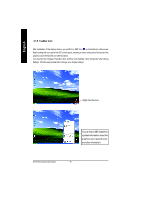
English 3.1.3.Driver Installation The following is the step-by-step installation guide. Step 1: New Hardware Found After GV-R7500L is inserted into your co mputer at the first time, the windows will automatically detecta new hardware in the system and pop outa "New Hardware Found" message. Please select "Do not install a driver" and press OK. Step 2: Update Device Driver Wizard: Standard PCI Graphics Adapter(VGA) 1.Click "Next"icon. MDon't click "Ca ncel", be cause the system will hang if you press it. Step 3: Update Device Driver Wizard: Finish At this time, system will ask for your Windows CD in order to co mplete the VGA driver installation. If you don't have the CD, you can press C:\Windows\System directory. Step 4: System Setting Change 2.Click "Finish"icon. GV-R7500L GraphicsAccelerator - 12 -
-
 1
1 -
2
-
3
-
4
-
5
-
6
-
 7
7 -
 8
8 -
 9
9 -
 10
10 -
 11
11 -
 12
12 -
 13
13 -
 14
14 -
 15
15 -
 16
16 -
 17
17 -
18
-
19
-
20
-
21
-
22
-
23
-
24
-
25
-
26
-
27
-
28
-
29
-
30
-
31
-
32
-
33
-
34
-
35
-
36
-
37
-
38
-
39
-
40
 |
 |