Haier L42S9 User Manual - Page 27
Setting up the PC mode
 |
View all Haier L42S9 manuals
Add to My Manuals
Save this manual to your list of manuals |
Page 27 highlights
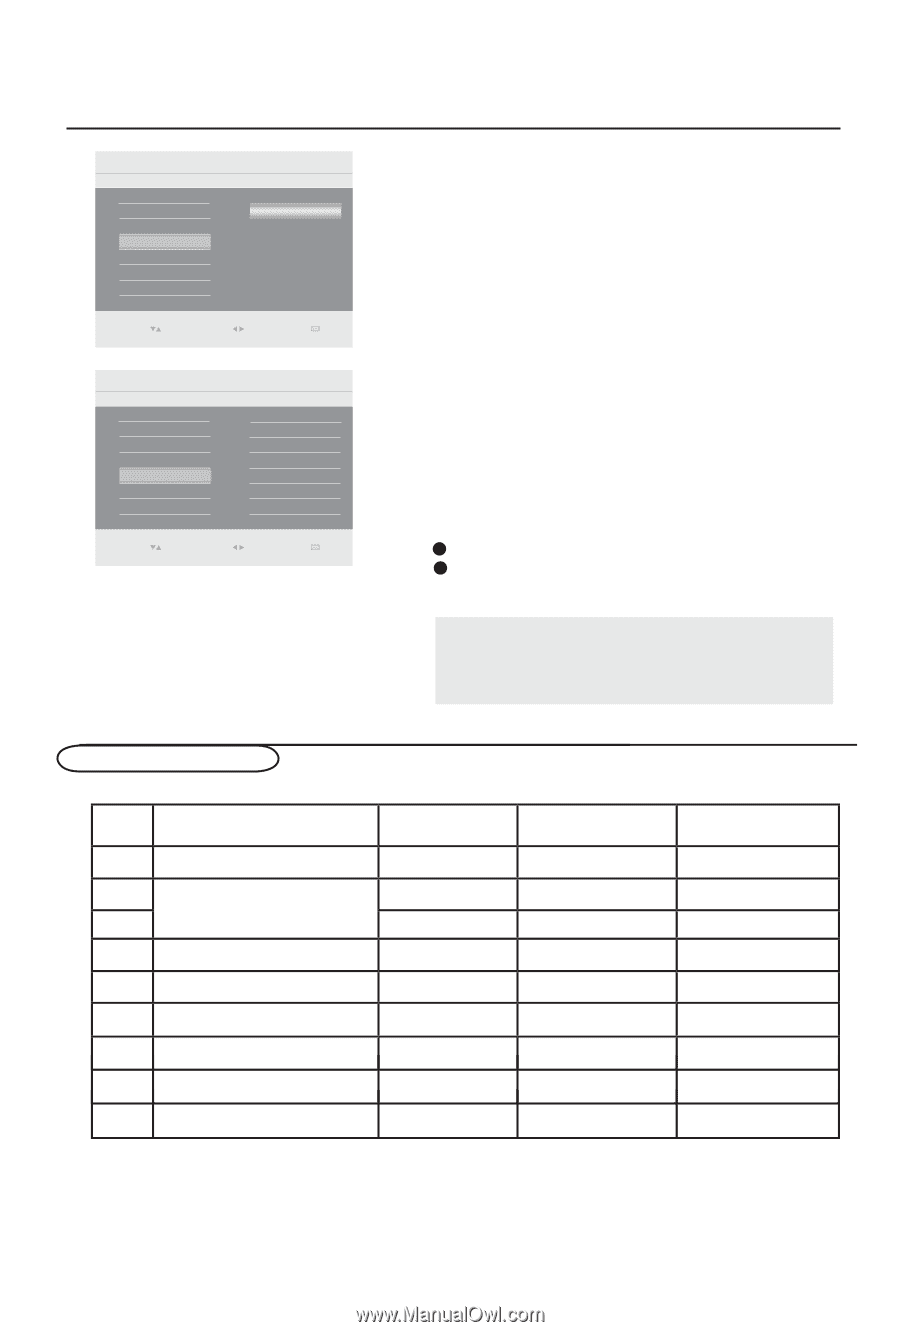
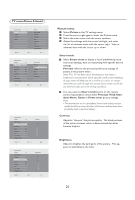
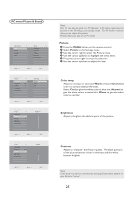
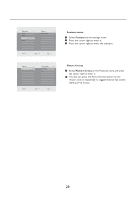
Main Control Picture Color temp Brightness Contrast Auto adjust Manual adjust 5 100 50 Auto adjust Yes Select Enter Exit 0(18 Main Control Picture 5 Color temp Brightness 100 Contrast 50 Auto adjust Manual adjust Manual adjust 4 Phase Clock Horizontal Vertical Select Enter Exit 0(18 Setting up the PC mode No Resolution 1 640 x 480 2 800 x 600 3 4 1024 x 768 5 1280 x 720 6 1280 x 768 7 1360 x 768 8 1280 x 1024 9 1920 x 1080 Auto adjust The PC mode will automatically adjust to the best image position, phase, and clock setting. Manual adjust The Manual adjust control allows you to manually fine tune the image as it appears on the screen. Phase - eliminates the horizontal interfering lines. Clock - eliminates the vertical interfering lines. Horizontal - adjust the horizontal placement of the picture. Vertical - adjust the vertical placement of the picture. 1 Use the cursor up/down to adjust the item. 2 Press the cursor right to confirm. Note: If you are willing to reset adjustment back to original value, please enter to Factory Reset in Install menu. Mode VGA VESA VESA VESA CVT CVT CVT VESA CVT V. Frequency (Hz) 59.940 56.250 60.317 60.004 59.855 59.87 59.799 60 59.934 H. Frequency (kHz) 31.469 35.156 37.879 48.363 44.772 47.776 47.720 63.981 66.587 26
-
 1
1 -
2
-
3
-
4
-
5
-
6
-
7
-
8
-
9
-
10
-
11
-
12
-
13
-
14
-
15
-
16
-
17
-
18
-
19
-
20
-
21
-
 22
22 -
 23
23 -
 24
24 -
 25
25 -
 26
26 -
 27
27 -
 28
28 -
 29
29 -
 30
30 -
 31
31 -
 32
32 -
33
-
34
-
35
 |
 |