Hayward Pool Vac XL All Models - Page 13
Flap Replacement, Bottom Of Cleaner - installation
 |
View all Hayward Pool Vac XL manuals
Add to My Manuals
Save this manual to your list of manuals |
Page 13 highlights
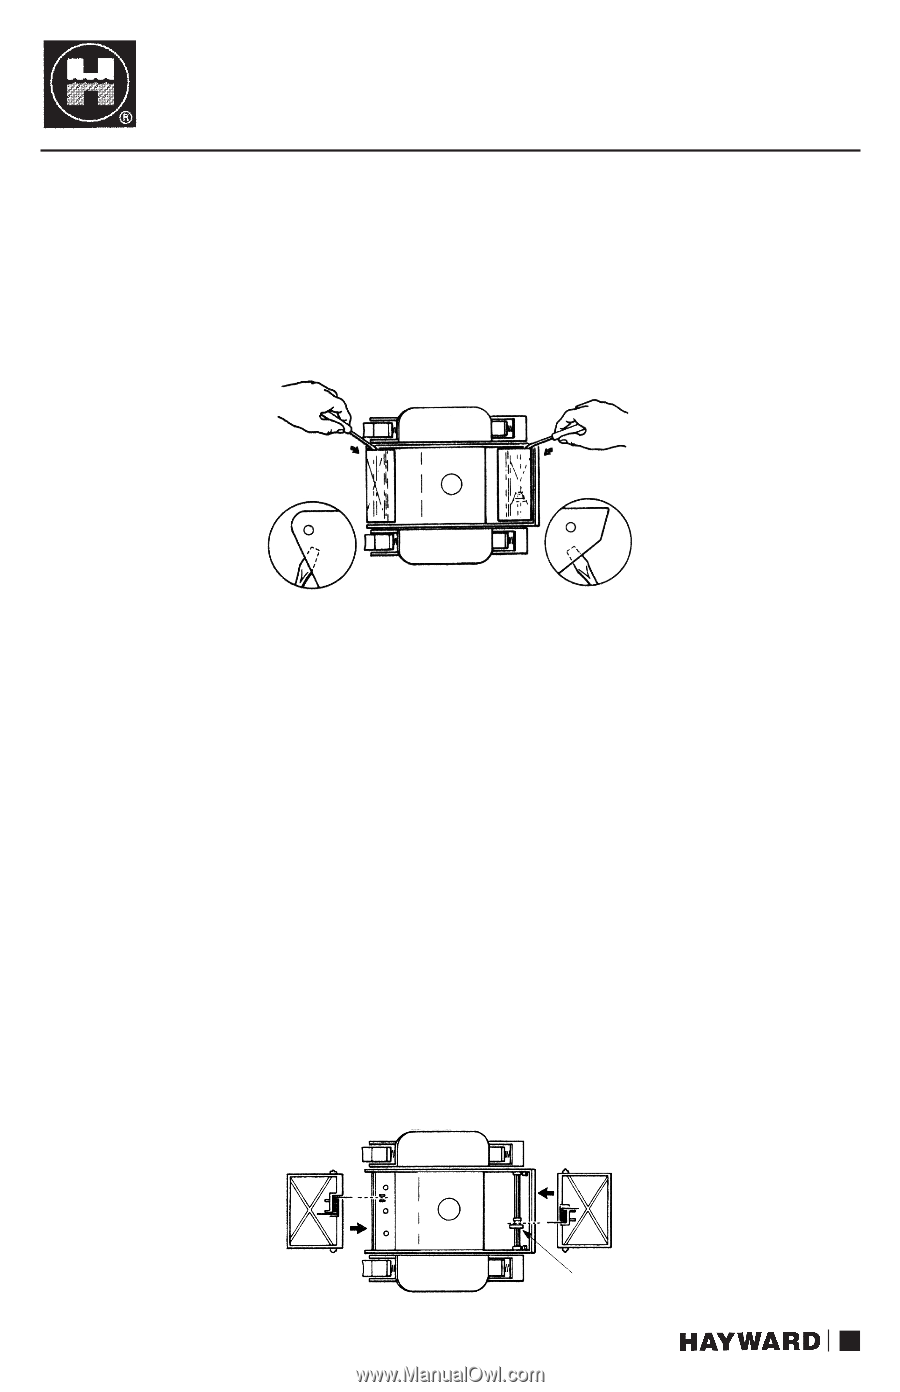
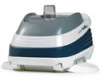
Pool Vac Ultra MAINTENANCE TIPS 4. FLAP REPLACEMENT: a) Remove the front and rear flaps from your Pool Vac Ultra by inserting a small screwdriver between the flap and the lower body near the pivot point of the flaps (see Figure 11). BOTTOM OF CLEANER Figure 11 b) You will notice that your replacement flaps look similar but are marked "Front" and "Rear" on the flap. Because the springs in the flaps are different, it is absolutely necessary to install the proper flap in the front and rear of the unit. Failure to do so will result in unsatisfactory performance of the Pool Vac Ultra. When installing the front flap, be sure that the extended leg of the spring is inserted into the notch an the front of the lower body (see Figure 12). Push the flap in place. You will actually feel and hear a snap when the flap is in place. Fold the flap in towards the bottom of the Pool Vac Ultra. You will feel some resistance at this point (that is normal). As the flap snaps into its normal position, you will feel the spring action and notice that the front flap is now in its normal operating position. When installing the rear flap, the extended leg of the spring must fit against one of the flat surfaces of the cam (see Figure 12). BOTTOM OF CLEANER FRONT REAR CAM Figure 12 11
-
 1
1 -
2
-
3
-
4
-
5
-
6
-
7
-
 8
8 -
 9
9 -
 10
10 -
 11
11 -
 12
12 -
 13
13 -
 14
14 -
 15
15 -
 16
16 -
 17
17 -
 18
18 -
19
-
20
-
21
-
22
-
23
-
24
 |
 |