Hayward Pool Vac XL All Models - Page 14
Pool Vac Ultra Bumper Replacement - repair
 |
View all Hayward Pool Vac XL manuals
Add to My Manuals
Save this manual to your list of manuals |
Page 14 highlights
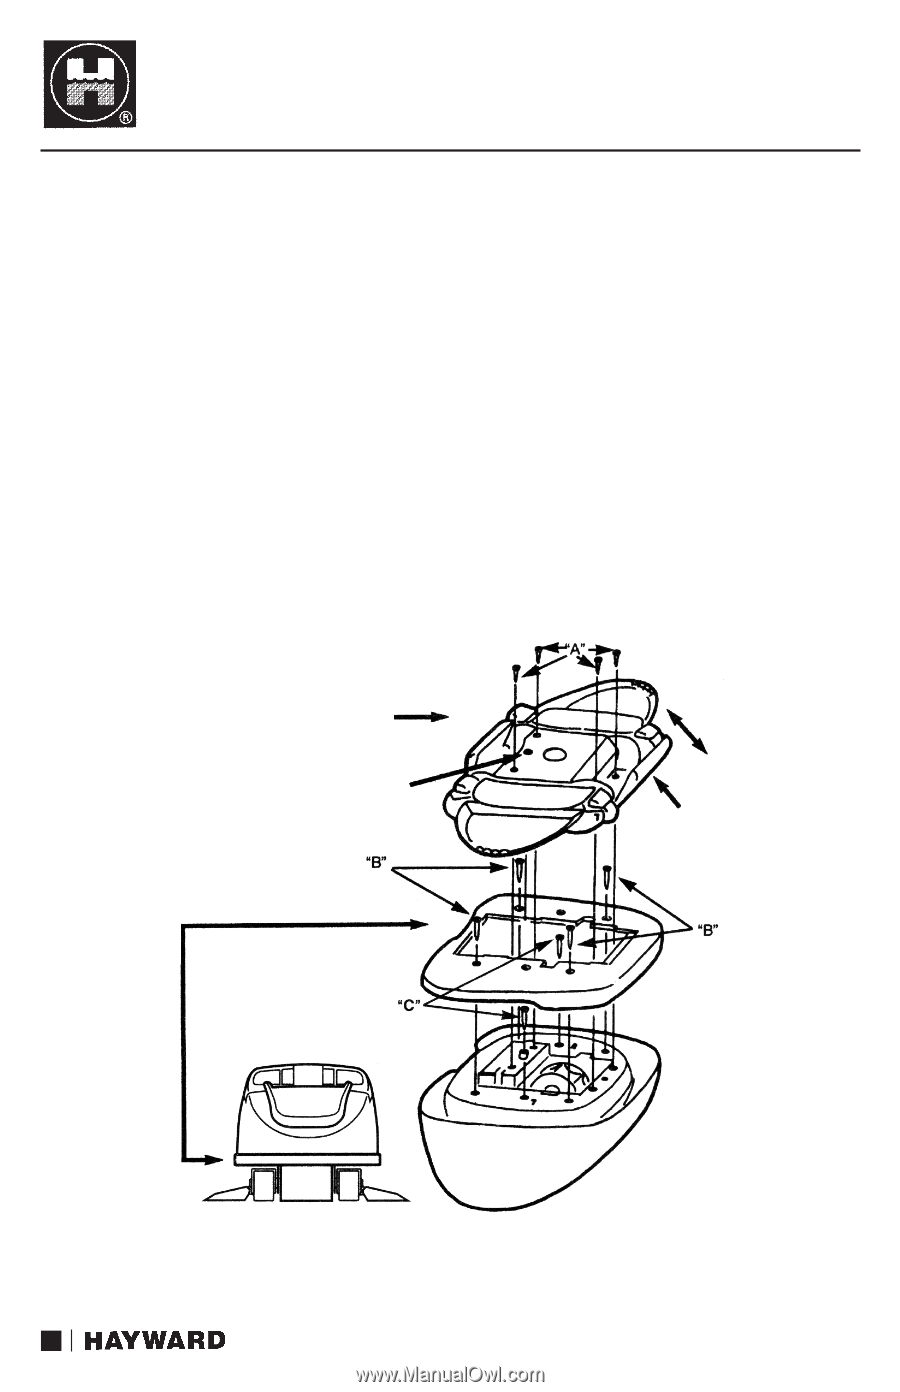
Pool Vac Ultra MAINTENANCE TIPS 5. POOL VAC ULTRA BUMPER REPLACEMENT: Replacement of the Pool Vac Ultra Bumper is not recommended as a "Do It Yourself" repair, because there is a slight possibility that the replacement might cause a problem in the propulsion system. We strongly suggest that you consult your Hayward Pool Vac Ultra dealer for this repair. A #2 Phillips screwdriver is necessary for this repair. a) Turn off pump. b) Remove Pool Vac Ultra from pool. c) Disconnect Pool Vac Ultra from leader hose. d) Turn Pool Vac Ultra upside down, and place it in a position that is steady/firm. e) Locate and loosen the captive screw behind the throat in the center of the bottom (see Figures 13, 14 & 15). LOWER BODY ASSEMBLY CAPTIVE SCREW BUMPER FRONT FLAP Figure 13 12
-
 1
1 -
2
-
3
-
4
-
5
-
6
-
7
-
8
-
 9
9 -
 10
10 -
 11
11 -
 12
12 -
 13
13 -
 14
14 -
 15
15 -
 16
16 -
 17
17 -
 18
18 -
 19
19 -
20
-
21
-
22
-
23
-
24
 |
 |