HealthRider H70e Elliptical English Manual - Page 14
How To Use A Preset Workout
 |
View all HealthRider H70e Elliptical manuals
Add to My Manuals
Save this manual to your list of manuals |
Page 14 highlights
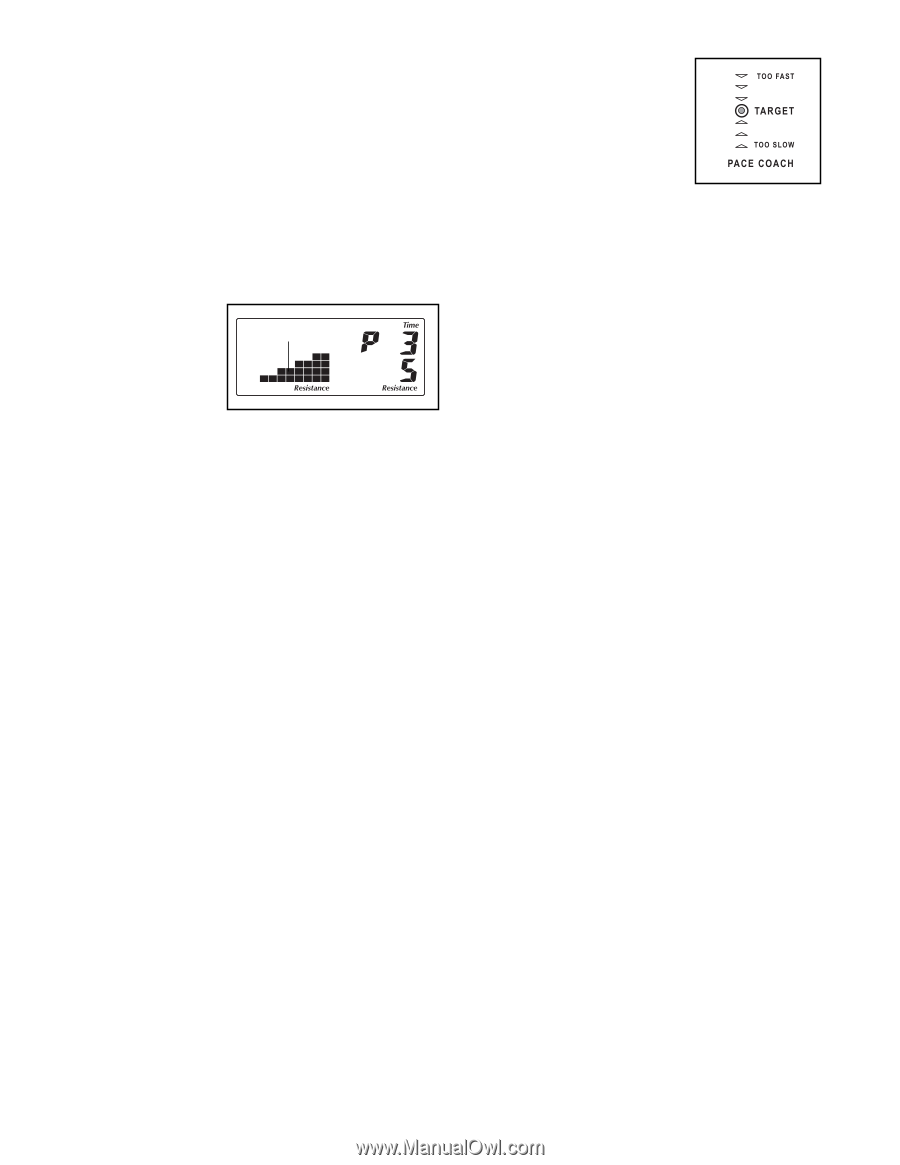
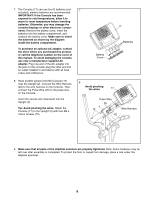
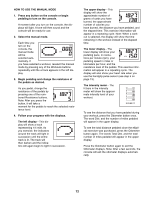
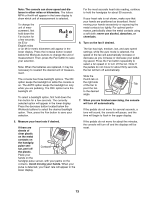
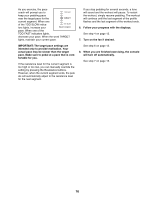
HOW TO USE A PRESET WORKOUT 1. Press any button on the console or begin pedaling to turn on the console. A moment after you turn on the console, the displays will light. A tone will then sound and the console will be ready for use. 2. Select a preset workout. To select one of the preset workouts, press one of the Workouts buttons numbered 3 to 10. When you select a preset workout, the Profile name of the workout will appear in the upper display, a profile of the resistance levels for the workout will scroll across the left display, and the maximum resistance level of the workout will flash in the lower display. A few seconds after you select the workout, the upper display will show the length of the workout. 3. Begin pedaling to start the workout. Each workout is divided into 20, 30, or 45 oneminute segments. One resistance level and one target pace are programmed for each segment. Note: The same resistance level and/or target pace may be programmed for consecutive segments. As you exercise, the pace coach will prompt you to keep your pedaling pace near the target pace for the current segment. When one of the TOO SLOW indicators lights, increase your pace. When one of the TOO FAST indicators lights, decrease your pace. When the word TARGET lights, maintain your current pace. IMPORTANT: The target pace settings are intended only to provide motivation. Your actual pace may be slower than the target pace. Make sure to pedal at a pace that is comfortable for you. If the resistance level for the current segment is too high or too low, you can manually override the setting by pressing the Resistance buttons. However, when the current segment ends, the pedals will automatically adjust to the resistance level for the next segment. If you stop pedaling for several seconds, a tone will sound and the workout will pause. To restart the workout, simply resume pedaling. The workout will continue until the last segment of the profile flashes and the last segment of the workout ends. 4. Follow your progress with the displays. See step 4 on page 12. 5. Measure your heart rate if desired. During the workout, the workout profile will show your progress (see the drawing above). The flashing segment of the profile represents the current segment of the workout. The height of the flashing segment indicates the resistance level for the current segment. At the end of each segment of the workout, a series of tones will sound and the next segment of the profile will begin to flash. If a different resistance level is programmed for the next segment, the resistance level will appear in the display for a few seconds to alert you. The resistance of the pedals will then change. See step 5 on page 13. 6. Turn on the fan if desired. See step 6 on page 13. 7. When you are finished exercising, the console will turn off automatically. See step 7 on page 13. 14
-
 1
1 -
2
-
3
-
4
-
5
-
6
-
7
-
8
-
 9
9 -
 10
10 -
 11
11 -
 12
12 -
 13
13 -
 14
14 -
 15
15 -
 16
16 -
 17
17 -
 18
18 -
 19
19 -
20
-
21
-
22
-
23
-
24
 |
 |