HealthRider Hotel Fitness Rb9800-e Bike English Manual - Page 19
How To Create A Custom Program
 |
View all HealthRider Hotel Fitness Rb9800-e Bike manuals
Add to My Manuals
Save this manual to your list of manuals |
Page 19 highlights
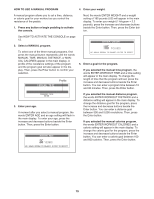
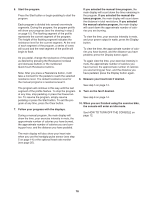
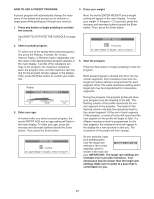
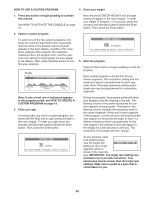
HOW TO CREATE A CUSTOM PROGRAM 4. Program the desired program settings. A custom program allows you to create your own workouts and store them in memory for future use. 1. Press any button or begin pedaling to activate the console. See HOW TO ACTIVATE THE CONSOLE on page 12. 2. Select the maintenance mode. Hold down the Clear button and the Enter button simultaneously for a few seconds to select the maintenance mode. Note: For more information about the maintenance mode, see page 24. When the maintenance mode is selected, the words MAINTENANCE MODE SCREEN 1 will appear in the main display. Press the Display button repeatedly until the words MAINTENANCE MODE SCREEN 4 and a menu of custom programs appears in the main display. You can now select and change the settings for a custom program. 3. Select a custom program. To select one of the two custom programs, press the Display button repeatedly until the name of the desired custom program is highlighted, and then press the Enter button. The name of the custom program and a profile of the resistance settings for the program will then appear in the main display. The resistance level, the program time, and the target rpm will also appear in the main display. Each custom workout is divided into 30 one-minute segments. You can program one resistance level and one target rpm (pace) setting for each segment. To program a resistance level for the first segment, simply adjust the resistance of the pedals by pressing the Resistance increase and decrease buttons or the numbered QuickTouch Resistance buttons. To program a target rpm setting for the first segment, press the increase and decrease buttons beside the Enter button. Then, press the Enter button to move to the next segment of the profile. Program a resistance level and a target rpm setting for the second segment as described above. Continue to program resistance levels and target rpm settings until all segments of the custom program have been programmed. Note: While programming segments, press the Enter button to move to the right in the profile; press the Back button to move to the left in the profile. 5. Exit the custom program and program other custom programs as desired. When you program settings for the last segment of the program and press the Enter button, the console will automatically exit the custom program and return to the menu of custom programs. Repeat steps 3 and 4 to select and program another custom program, if desired. 6. Exit the maintenance mode. Press the Display button repeatedly to exit the maintenance mode. When you exit the maintenance mode, the custom program will be saved in memory. 19
-
 1
1 -
2
-
3
-
4
-
5
-
6
-
7
-
8
-
9
-
10
-
11
-
12
-
13
-
 14
14 -
 15
15 -
 16
16 -
 17
17 -
 18
18 -
 19
19 -
 20
20 -
 21
21 -
 22
22 -
 23
23 -
 24
24 -
25
-
26
-
27
-
28
-
29
-
30
-
31
-
32
 |
 |
