HP 1000-1200 Maintenance and Service Guide 1 - Page 54
IR board, Remove the IR board sensor cable by turning over the system board and removing it.
 |
View all HP 1000-1200 manuals
Add to My Manuals
Save this manual to your list of manuals |
Page 54 highlights
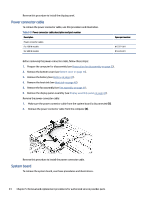
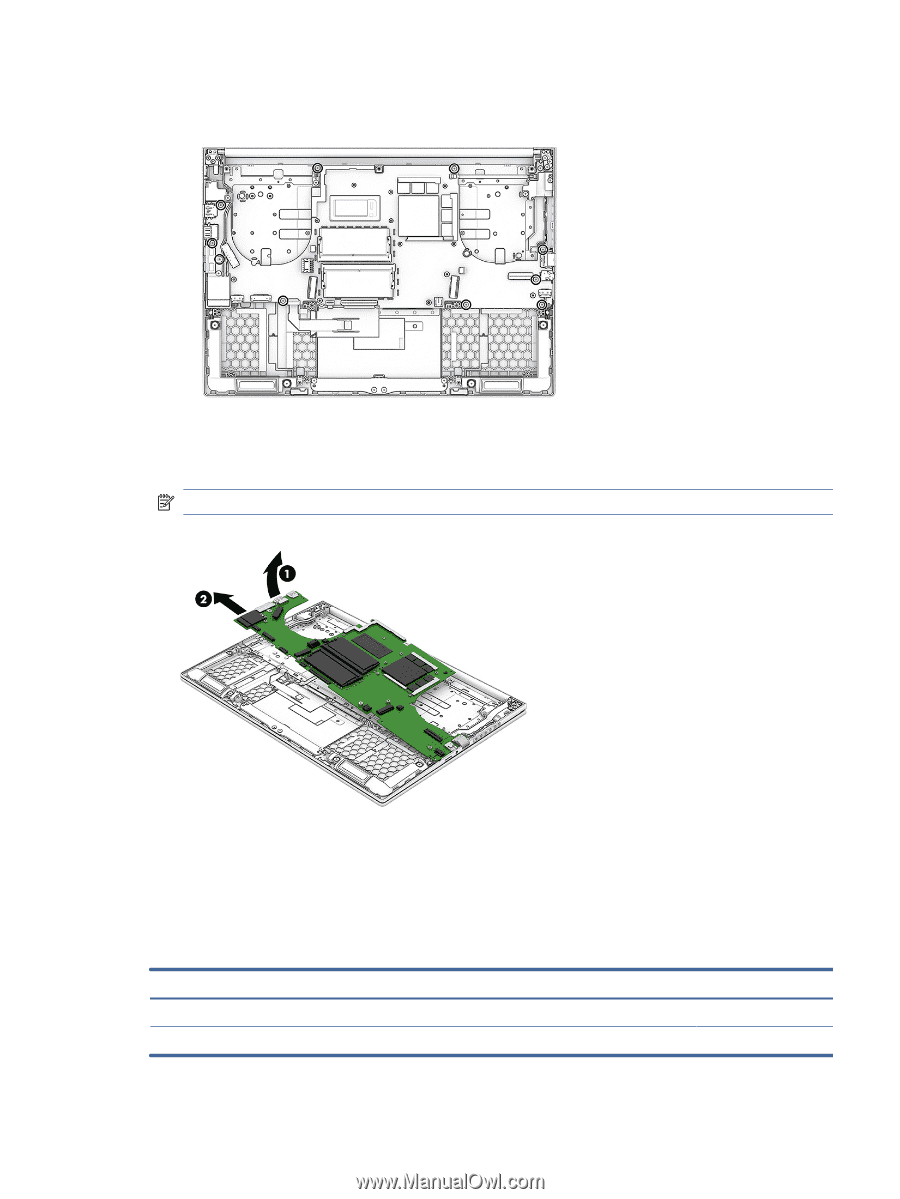
2. Remove the 10 Phillips M2.0 × 3.5 screws that secure the system board to the computer. 3. Lift the side of the system board upwards (1), and then pull the system board away from the connectors on the side of the computer to remove it (2). NOTE: Remove the IR board sensor cable by turning over the system board and removing it. Reverse this procedure to install the system board. IR board To remove the IR board, use this procedure and illustration. Table 5-11 IR board description and part number Description IR sensor board IR sensor board cable Spare part number N13373-001 N13374-001 IR board 47
-
 1
1 -
2
-
3
-
4
-
5
-
6
-
7
-
8
-
9
-
10
-
11
-
12
-
13
-
14
-
15
-
16
-
17
-
18
-
19
-
20
-
21
-
22
-
23
-
24
-
25
-
26
-
27
-
28
-
29
-
30
-
31
-
32
-
33
-
34
-
35
-
36
-
37
-
38
-
39
-
40
-
41
-
42
-
43
-
44
-
45
-
46
-
47
-
48
-
 49
49 -
 50
50 -
 51
51 -
 52
52 -
 53
53 -
 54
54 -
 55
55 -
 56
56 -
 57
57 -
 58
58 -
 59
59 -
60
-
61
-
62
-
63
-
64
-
65
-
66
-
67
-
68
-
69
-
70
-
71
-
72
-
73
-
74
-
75
-
76
-
77
-
78
-
79
-
80
-
81
-
82
-
83
-
84
-
85
-
86
-
87
-
88
-
89
-
90
 |
 |
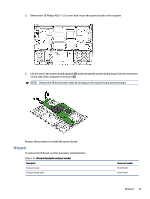
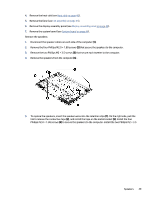
2.
Remove the 10 Phillips M2.0 × 3.5 screws that secure the system board to the computer.
3.
Lift the side of the system board upwards
(1)
, and then pull the system board away from the connectors
on the side of the computer to remove it
(2)
.
NOTE:
Remove the IR board sensor cable by turning over the system board and removing it.
Reverse this procedure to install the system board.
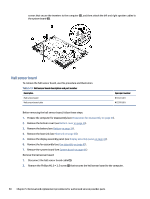
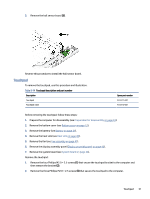
IR board
To remove the IR board, use this procedure and illustration.
Table 5-11
IR board description and part number
Description
Spare part number
IR sensor board
N13373-001
IR sensor board cable
N13374-001
IR board
47