HP BL2x220c HP ProLiant BL2x220c Generation 5 Server Blade Maintenance and Ser - Page 24
Access the internal server components, Remove server B assembly
 |
View all HP BL2x220c manuals
Add to My Manuals
Save this manual to your list of manuals |
Page 24 highlights
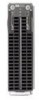
3. Remove the server blade. 4. Place the server blade on a flat, level work surface. WARNING: To reduce the risk of personal injury from hot surfaces, allow the drives and the internal system components to cool before touching them. CAUTION: To prevent damage to electrical components, properly ground the server blade before beginning any installation procedure. Improper grounding can cause ESD. Access the internal server components To access internal server components, remove server B assembly from server A assembly. WARNING: To reduce the risk of personal injury from hot surfaces, allow the drives and the internal system components to cool before touching them. CAUTION: To prevent damage to electrical components, properly ground the server blade before beginning any installation procedure. Improper grounding can cause ESD. Remove server B assembly For access component identification, see "Access components (on page 59)." To remove the component: 1. Power down the server blade (on page 23). 2. Remove the server blade (on page 23). 3. Place the server blade on a flat, level work surface with the bezel facing away from you. 4. Extend the server B serial label pull tab. CAUTION: The jackscrews control the unseating and seating of critical system connectors. Failure to use the jackscrews to remove and install the server B assembly can cause the system boards to fail. Removal and replacement procedures 24
-
 1
1 -
2
-
3
-
4
-
5
-
6
-
7
-
8
-
9
-
10
-
11
-
12
-
13
-
14
-
15
-
16
-
17
-
18
-
 19
19 -
 20
20 -
 21
21 -
 22
22 -
 23
23 -
 24
24 -
 25
25 -
 26
26 -
 27
27 -
 28
28 -
 29
29 -
30
-
31
-
32
-
33
-
34
-
35
-
36
-
37
-
38
-
39
-
40
-
41
-
42
-
43
-
44
-
45
-
46
-
47
-
48
-
49
-
50
-
51
-
52
-
53
-
54
-
55
-
56
-
57
-
58
-
59
-
60
-
61
-
62
-
63
-
64
-
65
-
66
-
67
-
68
 |
 |
