HP Business Inkjet 3000 HP Business Inkjet 3000 series printers - (English) Us - Page 35
Auto-duplex unit, Installing the auto-duplex unit
 |
View all HP Business Inkjet 3000 manuals
Add to My Manuals
Save this manual to your list of manuals |
Page 35 highlights
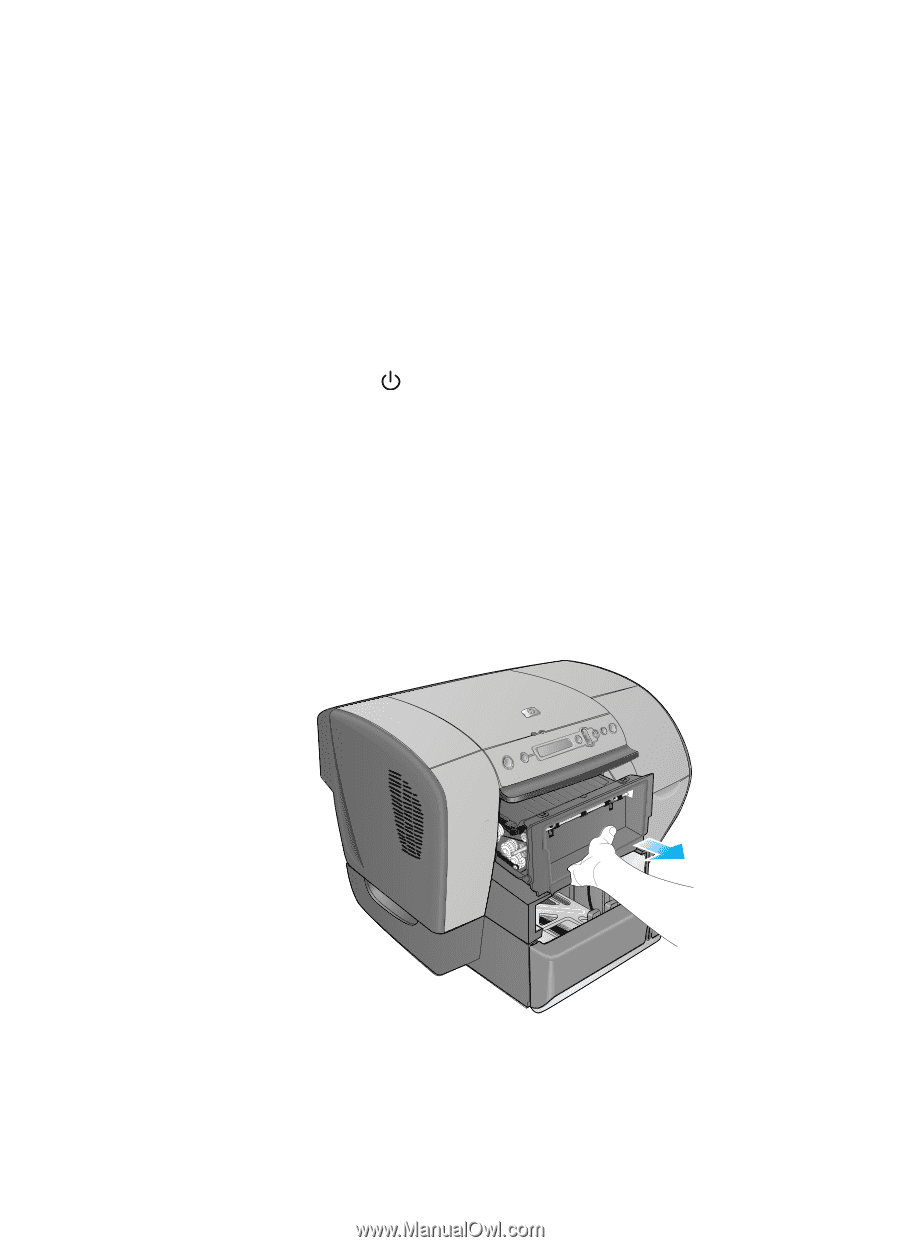
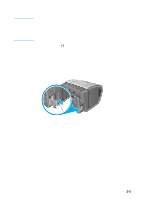
Auto-duplex unit The printer can automatically print on both sides of paper with the auto-duplex unit. If your printer does not have an auto-duplex unit, one can be purchased separately. For information about using the auto-duplex unit, see "Printing on both sides of the page." Installing the auto-duplex unit Two-sided printing (duplexing) might require additional memory. For more information, see "Additional printer memory and font DIMMs." 1 Press and hold (power button) to turn off the printer. 2 Grasp the output bin by both sides and pull it straight out of the printer. Do not lift or tilt the output bin while removing it. Set the output bin aside. 3 Grasp the handle under the front of Tray 2. Pull out Tray 2 until it catches. Slightly lift up Tray 2, or move the tray counterclockwise, and pull it completely out of the printer. Set Tray 2 aside. 4 Grasp the handle under the front of the simplex unit. Avoid touching the star wheels. Pull the simplex unit straight out of the printer, and set it aside. Keep the simplex unit for future use. 5 Look for the two guides inside the printer. Insert the rails of the auto-duplex unit into these guides. Slide the auto-duplex unit into the printer until it locks into place. ENWW 3-3
-
 1
1 -
2
-
3
-
4
-
5
-
6
-
7
-
8
-
9
-
10
-
11
-
12
-
13
-
14
-
15
-
16
-
17
-
18
-
19
-
20
-
21
-
22
-
23
-
24
-
25
-
26
-
27
-
28
-
29
-
 30
30 -
 31
31 -
 32
32 -
 33
33 -
 34
34 -
 35
35 -
 36
36 -
 37
37 -
 38
38 -
 39
39 -
 40
40 -
41
-
42
-
43
-
44
-
45
-
46
-
47
-
48
-
49
-
50
-
51
-
52
-
53
-
54
-
55
-
56
-
57
-
58
-
59
-
60
-
61
-
62
-
63
-
64
-
65
-
66
-
67
-
68
-
69
-
70
-
71
-
72
-
73
-
74
-
75
-
76
-
77
-
78
-
79
-
80
-
81
-
82
-
83
-
84
-
85
-
86
-
87
-
88
-
89
-
90
-
91
-
92
-
93
-
94
-
95
-
96
-
97
-
98
-
99
-
100
-
101
-
102
-
103
-
104
-
105
-
106
-
107
-
108
-
109
-
110
-
111
-
112
-
113
-
114
-
115
-
116
-
117
-
118
-
119
-
120
-
121
-
122
-
123
-
124
-
125
-
126
-
127
-
128
-
129
-
130
-
131
-
132
-
133
-
134
-
135
-
136
-
137
-
138
-
139
-
140
-
141
-
142
-
143
-
144
-
145
-
146
-
147
-
148
-
149
-
150
-
151
-
152
-
153
-
154
-
155
-
156
-
157
-
158
-
159
-
160
-
161
-
162
-
163
-
164
-
165
-
166
-
167
-
168
-
169
-
170
-
171
-
172
-
173
-
174
-
175
-
176
-
177
-
178
-
179
-
180
-
181
-
182
-
183
-
184
-
185
-
186
-
187
-
188
-
189
-
190
-
191
-
192
-
193
-
194
-
195
-
196
-
197
-
198
 |
 |