HP D4260 User Guide - Page 34
Advanced color settings, Exif Print, Color Tone - printer install
 |
UPC - 808736800457
View all HP D4260 manuals
Add to My Manuals
Save this manual to your list of manuals |
Page 34 highlights
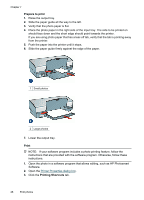
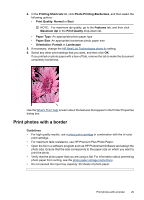
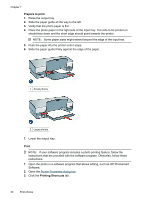
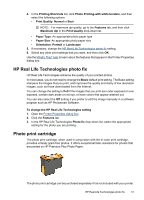
Chapter 7 To install the photo print cartridge ▲ To install the photo print cartridge, remove the black print cartridge from the printer, and then install the photo print cartridge in the right side of the print cartridge cradle. NOTE: To learn how to install a print cartridge, see Installation instructions. To protect a print cartridge when it is not in the printer, follow the Maintain print cartridges guidelines. To use the photo print cartridge 1. Open the Printer Properties dialog box. 2. Click the Printing Shortcuts tab. 3. In the Printing Shortcuts list, click either Photo Printing-Borderless or Photo Printing-with white borders. 4. In the Print Quality drop-down list, click Normal or Best. NOTE: For maximum dpi quality, go to the Features tab, and then click Maximum dpi in the Print Quality drop-down list. 5. In the Paper Type drop-down list, select the appropriate photo paper type. 6. Select any other print settings that you want, and then click OK. Advanced color settings Use the More color options dialog box to adjust how printed colors appear in your photos. Adjusting these settings causes the printed colors to differ from the colors that appear on your computer monitor. To specify advanced color settings 1. Open the Printer Properties dialog box. 2. Click the Color tab, and then click the More color options button. The More color options dialog box is displayed. 3. You can adjust the following settings: • Adjust the Brightness, Saturation, and Color Tone to affect how overall colors are printed. • Adjust the Cyan, Magenta, Yellow, and Black sliders to specify the level of each color that is used in printing. NOTE: When you adjust color settings, the changes are reflected in the Preview box. 4. After specifying the color settings, click OK. 5. Select any other print settings that you want, and then click OK. Exif Print Exif Print (Exchangeable Image File Format 2.2) is an international digital imaging standard that simplifies digital photography and enhances printed photos. When a photo is taken with an Exif Print-enabled digital camera, Exif Print captures information such as 32 Print photos
-
 1
1 -
2
-
3
-
4
-
5
-
6
-
7
-
8
-
9
-
10
-
11
-
12
-
13
-
14
-
15
-
16
-
17
-
18
-
19
-
20
-
21
-
22
-
23
-
24
-
25
-
26
-
27
-
28
-
 29
29 -
 30
30 -
 31
31 -
 32
32 -
 33
33 -
 34
34 -
 35
35 -
 36
36 -
 37
37 -
 38
38 -
 39
39 -
40
-
41
-
42
-
43
-
44
-
45
-
46
-
47
-
48
-
49
-
50
-
51
-
52
-
53
-
54
-
55
-
56
-
57
-
58
-
59
-
60
-
61
-
62
-
63
-
64
-
65
-
66
-
67
-
68
-
69
-
70
-
71
-
72
-
73
-
74
-
75
-
76
-
77
-
78
-
79
-
80
-
81
-
82
-
83
-
84
-
85
-
86
-
87
-
88
-
89
-
90
-
91
-
92
-
93
-
94
-
95
-
96
-
97
-
98
-
99
-
100
-
101
-
102
-
103
-
104
-
105
-
106
-
107
-
108
-
109
-
110
-
111
-
112
-
113
-
114
-
115
-
116
 |
 |