HP Dc5750 RAID on HP Compaq dc5750 Business PCs - Page 10
Configuring RAID on non-factory preinstalled configurations - bios update
 |
UPC - 883585056446
View all HP Dc5750 manuals
Add to My Manuals
Save this manual to your list of manuals |
Page 10 highlights
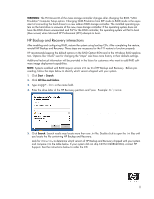
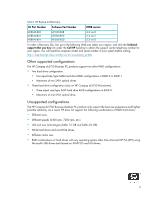
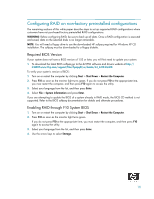
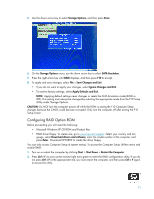
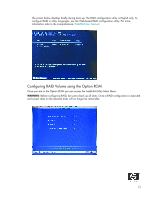
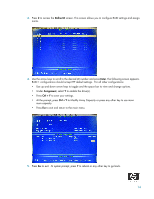
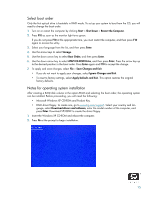
Configuring RAID on non-factory preinstalled configurations The remaining sections of this white paper describe steps to set up supported RAID configurations where customers have not purchased factory preinstalled RAID configurations. WARNING: Before configuring RAID, be sure to back up all data. Once a RAID configuration is executed and saved, data on the selected disks is no longer retrievable. NOTE: You will need a floppy drive to use the downloaded HP softpaq required for Windows XP CD installation. The softpaq must be downloaded to a floppy diskette. Required BIOS Version If your system does not have a BIOS version of 1.53 or later, you will first need to update your system. 1. To download the latest BIOS softpaq go to the dc5750 software and drivers website at http:// h18007.www1.hp.com/support/files/hpcpqdt/us/locate/64_6313.html#0. To verify your system's version of BIOS: 1. Turn on or restart the computer by clicking Start > Shut Down > Restart the Computer. 2. Press F10 as soon as the monitor light turns green. If you do not press F10 at the appropriate time, you must restart the computer, and then press F10 again to access the utility. 3. Select your language from the list, and then press Enter. 4. Select File > System Information and press Enter. If you are attempting to update the BIOS of a system already in RAID mode, the BIOS CD method is not supported. Refer to the BIOS softpaq documentation for details and alternate procedures. Enabling RAID through F10 System BIOS 1. Turn on or restart the computer by clicking Start > Shut Down > Restart the Computer. 2. Press F10 as soon as the monitor light turns green. If you do not press F10 at the appropriate time, you must restart the computer, and then press F10 again to access the utility. 3. Select your language from the list, and then press Enter. 4. Use the arrow keys to select Storage. 10
-
 1
1 -
2
-
3
-
4
-
 5
5 -
 6
6 -
 7
7 -
 8
8 -
 9
9 -
 10
10 -
 11
11 -
 12
12 -
 13
13 -
 14
14 -
 15
15 -
16
-
17
-
18
-
19
-
20
 |
 |