HP Designjet 815mfp HP Designjet 4200 Scanner - Quick Reference Guide - Page 19
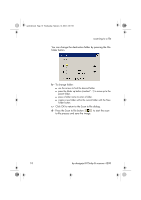
In the Scan Options dialog, select the Scanner Setup
 |
View all HP Designjet 815mfp manuals
Add to My Manuals
Save this manual to your list of manuals |
Page 19 highlights
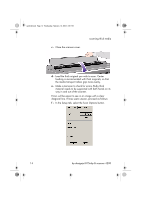
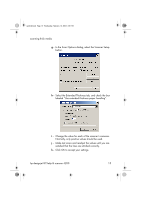
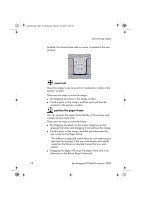
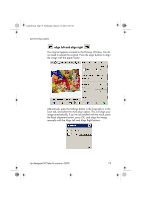
quickref.book Page 15 Wednesday, February 12, 2003 2:01 PM scanning thick media g - In the Scan Options dialog, select the Scanner Setup button. h - Select the Extended Thickness tab, and check the box labeled "Use extended thickness paper handling". i - Change the value for each of the scanner's cameras. Normally, only positive values should be used. j - Make test scans and readjust the values until you are satisfied that the lines are stitched correctly. k - Click OK to accept your settings. hp designjet 815mfp & scanner 4200 15
-
 1
1 -
2
-
3
-
4
-
5
-
6
-
7
-
8
-
9
-
10
-
11
-
12
-
13
-
 14
14 -
 15
15 -
 16
16 -
 17
17 -
 18
18 -
 19
19 -
 20
20 -
 21
21 -
 22
22 -
 23
23 -
 24
24 -
25
-
26
-
27
-
28
-
29
-
30
-
31
-
32
-
33
-
34
-
35
-
36
 |
 |
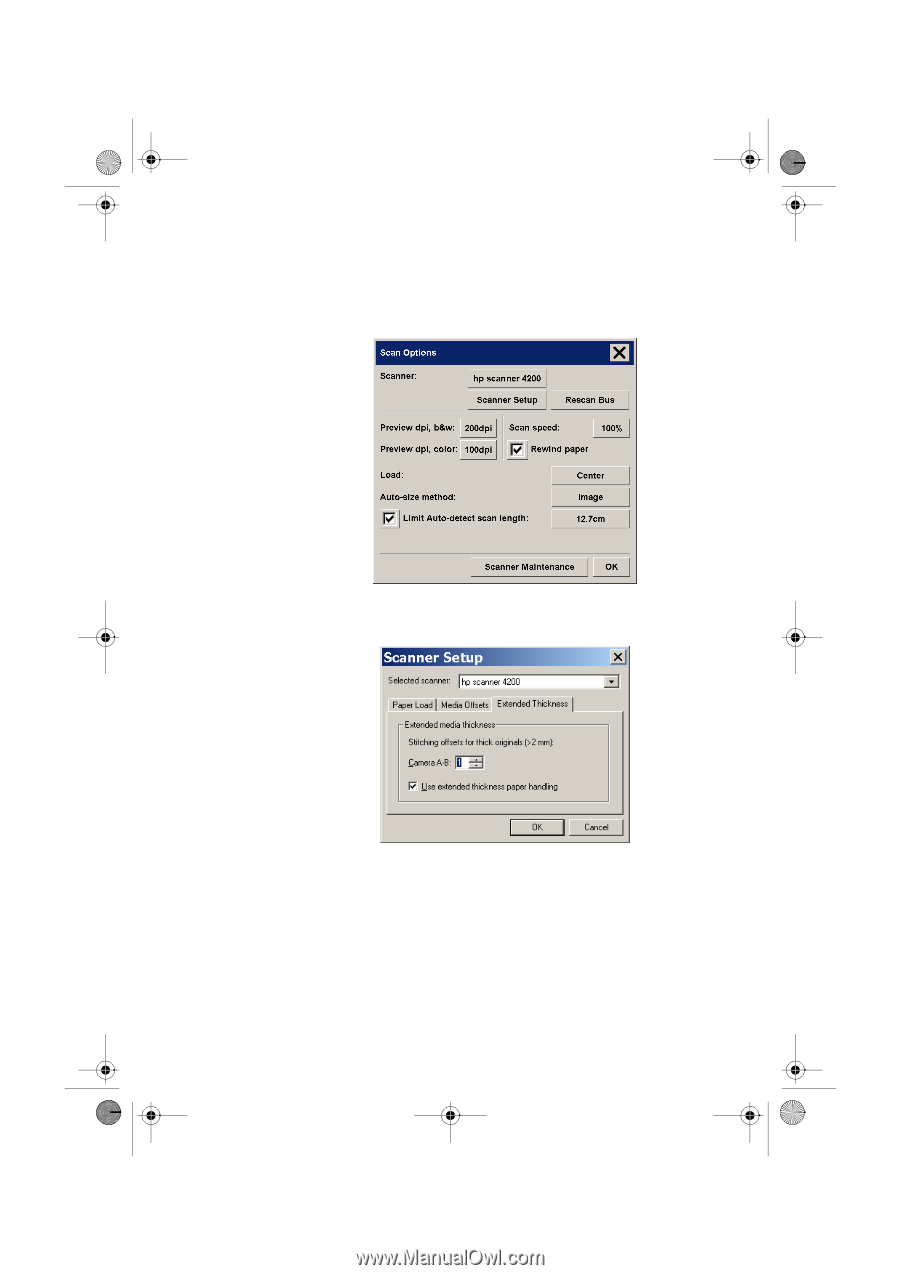
scanning thick media
hp designjet 815mfp & scanner 4200
15
g -
In the Scan Options dialog, select the Scanner Setup
button.
h -
Select the Extended Thickness tab, and check the box
labeled “Use extended thickness paper handling”.
i -
Change the value for each of the scanner’s cameras.
Normally, only positive values should be used.
j -
Make test scans and readjust the values until you are
satisfied that the lines are stitched correctly.
k -
Click OK to accept your settings.
quickref.book
Page 15
Wednesday, February 12, 2003
2:01 PM