HP DeskJet Ink Advantage 4670 User Guide - Page 124
Appendix B, B-8
 |
View all HP DeskJet Ink Advantage 4670 manuals
Add to My Manuals
Save this manual to your list of manuals |
Page 124 highlights
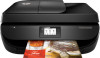
NOTE: If your computer has only one phone port, you need to purchase a parallel splitter (also called a coupler), as shown in the illustration. (A parallel splitter has one RJ-11 port on the front and two RJ-11 ports on the back. Do not use a two-line phone splitter, a serial splitter, or a parallel splitter which has two RJ-11 ports on the front and a plug on the back.) Figure B-8 Example of a parallel splitter Figure B-9 Back view of the printer 1 Telephone wall jack 2 Parallel splitter 3 Use the phone cord supplied in the box with the printer to connect to the 1-LINE port. 4 Computer with modem 5 Telephone To set up the printer on the same phone line as a computer with two phone ports 1. Remove the white plug from the port labeled 2-EXT on the back of the printer. 2. Find the phone cord that connects from the back of your computer (your computer dial-up modem) to a telephone wall jack. Disconnect the cord from the telephone wall jack and plug it into the port labeled 2-EXT on the back of the printer. 3. Connect a phone to the "OUT" port on the back of your computer dial-up modem. 4. Using the phone cord supplied in the box with the printer, connect one end to your telephone wall jack, then connect the other end to the port labeled 1-LINE on the back of the printer. NOTE: You might need to connect the phone cord to your country/region adapter. 5. If your modem software is set to receive faxes to your computer automatically, turn off that setting. NOTE: If you do not turn off the automatic fax reception setting in your modem software, the printer cannot receive faxes. 118 Appendix B Additional fax setup ENWW
-
 1
1 -
2
-
3
-
4
-
5
-
6
-
7
-
8
-
9
-
10
-
11
-
12
-
13
-
14
-
15
-
16
-
17
-
18
-
19
-
20
-
21
-
22
-
23
-
24
-
25
-
26
-
27
-
28
-
29
-
30
-
31
-
32
-
33
-
34
-
35
-
36
-
37
-
38
-
39
-
40
-
41
-
42
-
43
-
44
-
45
-
46
-
47
-
48
-
49
-
50
-
51
-
52
-
53
-
54
-
55
-
56
-
57
-
58
-
59
-
60
-
61
-
62
-
63
-
64
-
65
-
66
-
67
-
68
-
69
-
70
-
71
-
72
-
73
-
74
-
75
-
76
-
77
-
78
-
79
-
80
-
81
-
82
-
83
-
84
-
85
-
86
-
87
-
88
-
89
-
90
-
91
-
92
-
93
-
94
-
95
-
96
-
97
-
98
-
99
-
100
-
101
-
102
-
103
-
104
-
105
-
106
-
107
-
108
-
109
-
110
-
111
-
112
-
113
-
114
-
115
-
116
-
117
-
118
-
 119
119 -
 120
120 -
 121
121 -
 122
122 -
 123
123 -
 124
124 -
 125
125 -
 126
126 -
 127
127 -
 128
128 -
 129
129 -
130
-
131
-
132
-
133
-
134
-
135
-
136
-
137
 |
 |
