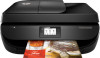
HP DeskJet Ink Advantage 4670 User Guide - Page 49
Print fax confirmation reports, On Fax Send, On Fax Send and Fax Receive, Scan and Fax, Setup, Reports
 |
View all HP DeskJet Ink Advantage 4670 manuals
Add to My Manuals
Save this manual to your list of manuals |
Page 49 highlights
NOTE: Ensure that the printheads and ink cartridges are in good conditions and installed properly. For more information, see Work with cartridges on page 50. This section contains the following topics: ● Print fax confirmation reports ● Print fax error reports ● Print and view the fax log ● Clear the fax log ● Print the details of the last fax transaction ● Print a Caller ID Report ● View the Call History Print fax confirmation reports You can print a confirmation report either when a fax is sent, or when any fax is sent or received. The default setting is On (Fax Send). When turned off, a confirmation message appears briefly on the control panel after each fax is sent or received. NOTE: You can include an image of the first page of the fax on the Fax Sent Confirmation report if you select On (Fax Send) or On (Fax Send and Fax Receive) , and if you scan the fax to send from memory or use the Scan and Fax option. To enable fax confirmation 1. From the printer control panel display, touch Setup . 2. Touch Setup . 3. Touch Reports and touch Fax Confirmation . 4. Touch to select one of the following options. Off On (Fax Send) On (Fax Receive) On (Fax Send and Fax Receive) Does not print a fax confirmation report when you send and receive faxes successfully. This is the default setting. Prints a fax confirmation report for every fax you send. Prints a fax confirmation report for every fax you receive. Prints a fax confirmation report for every fax you send and receive. To include an image of the fax on the report 1. From the printer control panel display, touch Fax . 2. Touch Setup . 3. Touch Reports and touch Fax Confirmation . 4. Touch On (Fax Send) or On (Fax Send and Fax Receive) . 5. Touch Confirmation with image. 6. Touch OK. ENWW Use reports 43
-
 1
1 -
2
-
3
-
4
-
5
-
6
-
7
-
8
-
9
-
10
-
11
-
12
-
13
-
14
-
15
-
16
-
17
-
18
-
19
-
20
-
21
-
22
-
23
-
24
-
25
-
26
-
27
-
28
-
29
-
30
-
31
-
32
-
33
-
34
-
35
-
36
-
37
-
38
-
39
-
40
-
41
-
42
-
43
-
 44
44 -
 45
45 -
 46
46 -
 47
47 -
 48
48 -
 49
49 -
 50
50 -
 51
51 -
 52
52 -
 53
53 -
 54
54 -
55
-
56
-
57
-
58
-
59
-
60
-
61
-
62
-
63
-
64
-
65
-
66
-
67
-
68
-
69
-
70
-
71
-
72
-
73
-
74
-
75
-
76
-
77
-
78
-
79
-
80
-
81
-
82
-
83
-
84
-
85
-
86
-
87
-
88
-
89
-
90
-
91
-
92
-
93
-
94
-
95
-
96
-
97
-
98
-
99
-
100
-
101
-
102
-
103
-
104
-
105
-
106
-
107
-
108
-
109
-
110
-
111
-
112
-
113
-
114
-
115
-
116
-
117
-
118
-
119
-
120
-
121
-
122
-
123
-
124
-
125
-
126
-
127
-
128
-
129
-
130
-
131
-
132
-
133
-
134
-
135
-
136
-
137
 |
 |
