HP ENVY 15-k000 HP ENVY 17 Notebook PC HP ENVY 15 Notebook PC - Maintenance an - Page 57
Disconnect the power from the computer by first unplugging the power cord from the AC outlet
 |
View all HP ENVY 15-k000 manuals
Add to My Manuals
Save this manual to your list of manuals |
Page 57 highlights
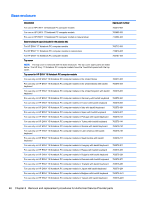
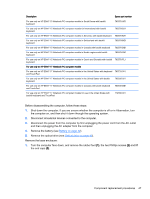
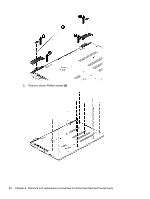
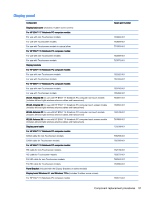
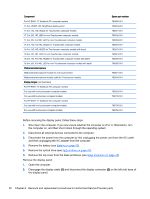
Description Spare part number For use only on HP ENVY 15 Notebook PC computer models in South Korea with backlit keyboard 763578-AD1 For use only on HP ENVY 15 Notebook PC computer models for International with backlit keyboard 763578-B31 For use only on HP ENVY 15 Notebook PC computer models in Slovenia. with backlit keyboard 763578-BA1 For use only on HP ENVY 15 Notebook PC computer models in Switzerland with backlit keyboard 763578-BG1 For use only on HP ENVY 15 Notebook PC computer models in Canada with backlit keyboard 763578-DB1 For use only on HP ENVY 15 Notebook PC computer models in Nordic regions with backlit keyboard 763578-DH1 For use only on HP ENVY 15 Notebook PC computer models in Czech and Slovakia with backlit 763578-FL1 keyboard For use only on HP ENVY 17 Notebook PC computer models For use only on HP ENVY 17 Notebook PC computer models in the United States with keyboard 763733-001 and TouchPad For use only on HP ENVY 17 Notebook PC computer models in the United States with backlit keyboard 763935-001 For use only on HP ENVY 17 Notebook PC computer models in Canada with backlit keyboard and TouchPad 763935-DB1 For use only on HP ENVY 17 Notebook PC computer models for use in the Unted States with backlit keyboard and TouchPad 774556-001 Before disassembling the computer, follow these steps: 1. Shut down the computer. If you are unsure whether the computer is off or in Hibernation, turn the computer on, and then shut it down through the operating system. 2. Disconnect all external devices connected to the computer. 3. Disconnect the power from the computer by first unplugging the power cord from the AC outlet and then unplugging the AC adapter from the computer. 4. Remove the battery (see Battery on page 42). 5. Remove the optical drive (see Optical drive on page 43). Remove the base enclosure: 1. Turn the computer face down, and remove the rubber feet (1), the two Phillips screws (2) and lift the end caps (3). Component replacement procedures 47
-
 1
1 -
2
-
3
-
4
-
5
-
6
-
7
-
8
-
9
-
10
-
11
-
12
-
13
-
14
-
15
-
16
-
17
-
18
-
19
-
20
-
21
-
22
-
23
-
24
-
25
-
26
-
27
-
28
-
29
-
30
-
31
-
32
-
33
-
34
-
35
-
36
-
37
-
38
-
39
-
40
-
41
-
42
-
43
-
44
-
45
-
46
-
47
-
48
-
49
-
50
-
51
-
 52
52 -
 53
53 -
 54
54 -
 55
55 -
 56
56 -
 57
57 -
 58
58 -
 59
59 -
 60
60 -
 61
61 -
 62
62 -
63
-
64
-
65
-
66
-
67
-
68
-
69
-
70
-
71
-
72
-
73
-
74
-
75
-
76
-
77
-
78
-
79
-
80
-
81
-
82
-
83
-
84
-
85
-
86
-
87
-
88
-
89
-
90
-
91
-
92
-
93
-
94
-
95
-
96
-
97
-
98
-
99
-
100
-
101
-
102
-
103
-
104
-
105
-
106
-
107
-
108
-
109
-
110
-
111
-
112
-
113
-
114
-
115
-
116
-
117
-
118
 |
 |