HP EVA P6550 HP P6000 EVA Updating Product Software Guide (XCS 11001100) (5697 - Page 61
Step 7. Entering array passwords, Step 8. Resuming array operation
 |
View all HP EVA P6550 manuals
Add to My Manuals
Save this manual to your list of manuals |
Page 61 highlights
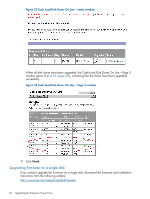
Upgrading firmware on a single disk can be performed online or offline, unless the disk is a member of a disk group that contains Vraid0 virtual disks. To upgrade disks that contain Vraid0 virtual disk data, halt all I/O to Vraid0 virtual disks (other Vraid virtual disks can continue to service host I/O). TIP: Earlier versions of HP P6000 Command View required you to either delete the Vraid0 virtual disks or ungroup the disks individually before upgrading disk drive firmware. Step 7. Entering array passwords Estimated time to complete: 10-15 minutes NOTE: This step is required only if you use password protection on the array. Set the array password by selecting Configure Administrator login options in the P6000 Control Panel (EVA4400, P63x0 EVA, or P65x0 EVA) or using the OCP (EVA6400/8400). Long passwords (up to 16 characters) are supported. The password must meet the following requirements: • Must be 8 to 16 characters • Can include uppercase or lowercase letters • Can include the numbers 0 to 9 • Can include the following characters Cannot include the following characters: space ~ \ Step 8. Resuming array operation Estimated time to complete: Varies depending on your configuration. After the controller software and disk drive firmware have been upgraded successfully, return the array to normal operation: 1. Using HP P6000 Command View, check the overall status of the array to ensure that there are no problems. For instructions, see "Step 1. Checking the health of the Enterprise Virtual Array" (page 42). 2. If you did an offline upgrade, perform the following steps: a. Restart any host servers that were shut down for the upgrade. b. Resume host I/O. 3. When running HP P6000 Continuous Access, set the Failsafe on unavailable member mode to Enabled on all DR groups if it was disabled before the upgrade. For instructions, see "Preparing the HP P6000 Continuous Access environment for an upgrade" (page 38). 4. If you changed any host LUN timeout values, reset them to their original values. 5. If you are running Remote Support software, enable it as follows: a. Save and then clear the application event log file. b. On the management server, open a command window. c. Enter the following command to restart Remote Support software: C:\>net start desta_service d. Enter exit. 6. Update the MIB file after the upgrade to ensure that SNMP notifications are captured correctly. See "Retrieving the Management Information Base" in the HP P6000 Command View User Guide for instructions. Step 7. Entering array passwords 61
-
 1
1 -
2
-
3
-
4
-
5
-
6
-
7
-
8
-
9
-
10
-
11
-
12
-
13
-
14
-
15
-
16
-
17
-
18
-
19
-
20
-
21
-
22
-
23
-
24
-
25
-
26
-
27
-
28
-
29
-
30
-
31
-
32
-
33
-
34
-
35
-
36
-
37
-
38
-
39
-
40
-
41
-
42
-
43
-
44
-
45
-
46
-
47
-
48
-
49
-
50
-
51
-
52
-
53
-
54
-
55
-
 56
56 -
 57
57 -
 58
58 -
 59
59 -
 60
60 -
 61
61 -
 62
62 -
 63
63 -
 64
64 -
 65
65 -
 66
66 -
67
-
68
-
69
-
70
-
71
-
72
-
73
 |
 |