HP Integrity Superdome SX1000 HP Version Control Agent Installation Guide - Page 35
Updating a repository, Updating the repository from the HP SmartStart CD
 |
View all HP Integrity Superdome SX1000 manuals
Add to My Manuals
Save this manual to your list of manuals |
Page 35 highlights
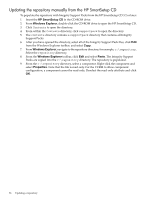
9 Updating a repository The Auto Update feature of the HP Version Control Repository Manager is the preferred solution for updating repositories automatically. The Auto Update feature of the VCRM keeps servers connected to HP for proactive delivery of the latest ProLiant and Integrity Support Packs and components directly to a specified repository. You can configure the automatic population of the repository during the VCRM installation, or in the event you cannot use the Auto Update feature, you can populate the repository from the HP SmartStart CD as indicated in the Updating the repository from the HP SmartStart CD section. If you must update the repository manually, for example, because you deleted a Support Pack from the repository and you later needed it, refer to the Updating the repository manually from the HP SmartStart CD section. Updating the repository from the HP SmartStart CD To populate the repository with ProLiant Support Packs from the HP SmartStart CD 6.0 or later: 1. Insert the HP SmartStart CD in the CD-ROM drive. The SmartStart welcome screen appears. 2. Click Populate a version control repository with the ProLiant Support Pack available on this HP SmartStart CD. A screen appears asking you to enter a machine name. 3. In the Machine Name field, enter the name of the machine that has the repository installed. 4. Click Populate. Click Clear to clear the Machine Name field or Back to return to the previous screen. The SMH appears. 5. In the User field, select the appropriate login from the dropdown menu. 6. In the Password field, enter the password associated with the login that you selected. 7. Click OK. The Upload Support Pack(s) page appears. 8. To upload a ProLiant Support Pack, refer to the Updating the repository manually from the HP SmartStart CD. Updating the repository manually from the HP SmartStart CD To populate the repository manually with ProLiant Support Packs from the HP SmartStart CD version 6.0 or later: 1. Insert the HP SmartStart CD in the CD-ROM drive. 2. From Windows Explorer, double-click the CD-ROM drive to open the HP SmartStart CD. 3. Click Compaq to open the directory. 4. From within the Compaq directory, click CSP to open the directory. 5. The CSP directory contains a NW directory that contains the Netware-related Support Packs, a Linux directory for Linux-related Support Packs, and a Windows NT® directory that contains all of the components and support packs and an XML file for each supported Microsoft operating system. Click Linux or NT depending on the type of Support Packs with which you want to populate your repository. 6. After you have opened one of the directories, select all of the Support Pack files, click Edit from the Windows Explorer toolbar, and select Copy. 7. From Windows Explorer, navigate to the repository directory, for example, c:\repository. Click the repository directory. 8. From the Microsoft Windows Explorer toolbar, click Edit and select Paste. The Support Packs are copied into the c:\repository directory. The repository is now populated. 9. From the c:\repository directory, select a component. Right-click the component and select Properties. Note that the file is read-only. For the VCRM to allow component configuration, a component cannot be read-only. Deselect the read-only attribute and click OK. Updating the repository from the HP SmartStart CD 35
-
 1
1 -
2
-
3
-
4
-
5
-
6
-
7
-
8
-
9
-
10
-
11
-
12
-
13
-
14
-
15
-
16
-
17
-
18
-
19
-
20
-
21
-
22
-
23
-
24
-
25
-
26
-
27
-
28
-
29
-
 30
30 -
 31
31 -
 32
32 -
 33
33 -
 34
34 -
 35
35 -
 36
36 -
 37
37 -
 38
38 -
 39
39 -
 40
40 -
41
-
42
-
43
-
44
-
45
 |
 |
