HP Integrity cx2600 HP Integrity cx2600 Operations and Maintenance Guide - Page 129
Supported DIMM Sizes, Removing DIMMs, Supported DIMM sizes are 256 MB, 512 MB, 1 GB
 |
View all HP Integrity cx2600 manuals
Add to My Manuals
Save this manual to your list of manuals |
Page 129 highlights
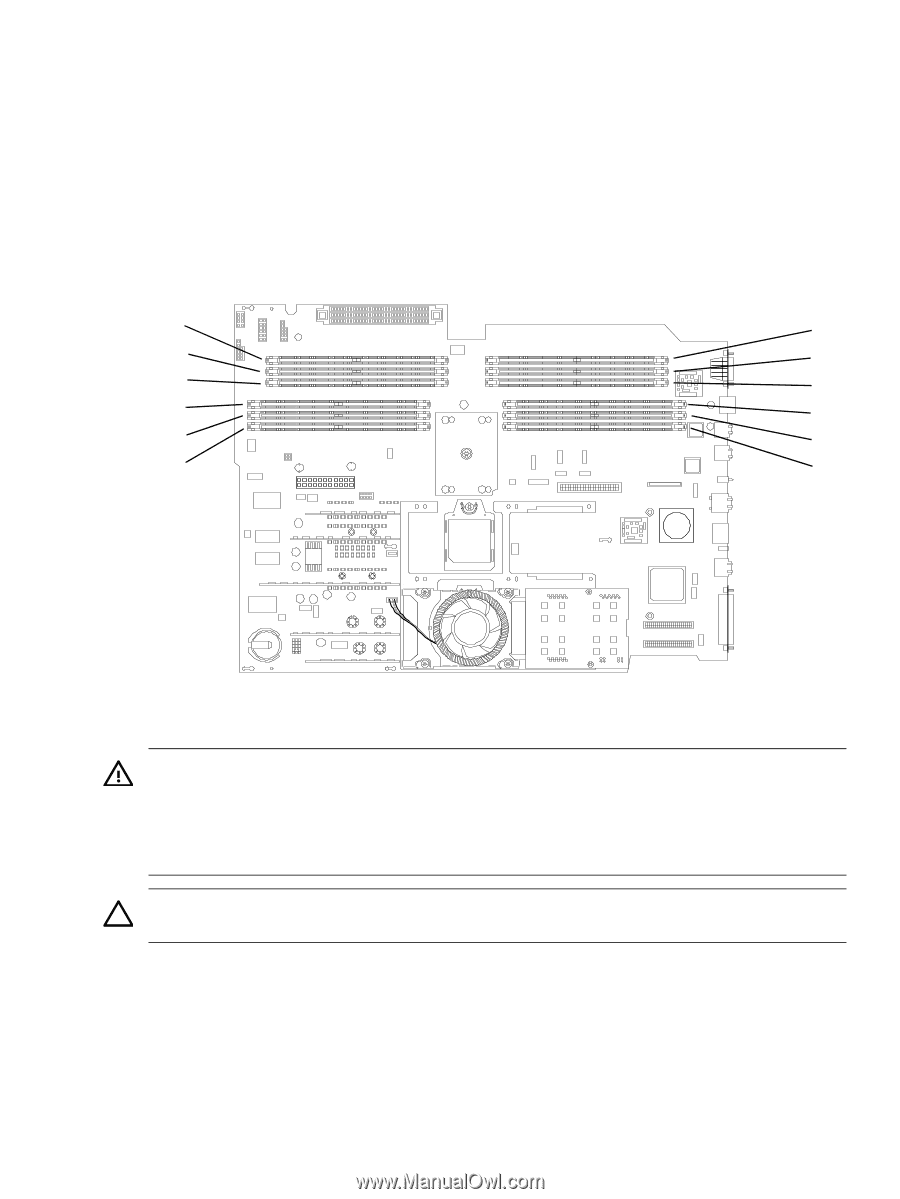
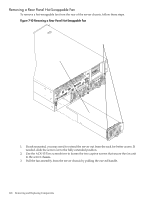
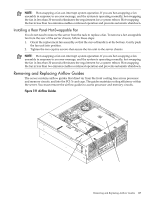
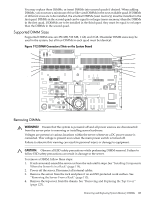
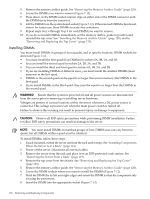
You may replace these DIMMs, or insert DIMMs into unused quads if desired. When adding DIMMs, you must use a minimum of four like-sized DIMMs in the next available quad. If DIMMs of different sizes are to be installed, the smallest DIMMs (least memory) must be installed in the first quad. DIMMs in the second quad can be equal to or larger (more memory) than the DIMMs in the first quad. If DIMMs are to be installed in the third quad, they must be equal to or larger than the DIMMs in the second quad. Supported DIMM Sizes Supported DIMM sizes are 256 MB, 512 MB, 1 GB, and 2 GB. Dissimilar DIMM sizes may be used in the system, but all four DIMMs in each quad must be identical. Figure 7-12 DIMM Connectors/Slots on the System Board 0B 1B 4B 5B 2B 3B 0A 1A 4A 5A 2A 3A sysbrd1cpu Removing DIMMs WARNING! Ensure that the system is powered off and all power sources are disconnected from the server prior to removing or installing server hardware. Voltages are present at various locations within the server whenever a DC power source is connected. This voltage is present even when the main power switch is turned off. Failure to observe this warning can result in personal injury or damage to equipment. CAUTION: Observe all ESD safety precautions while performing DIMM removal. Failure to follow ESD safety precautions can result in damage to the server. To remove a DIMM, follow these steps: 1. If rack-mounted, extend the server out from the rack until it stops. See "Installing Components When the Server Is in a Rack" (page 114). 2. Power off the server. Disconnect all external cables. 3. Remove the server from the rack and place it on an ESD-protected work surface. See "Removing the Server From a Rack" (page 115). 4. Remove the top cover from the chassis. See "Removing and Replacing the Top Cover" (page 123). Removing and Replacing System Memory DIMMs 129
-
 1
1 -
2
-
3
-
4
-
5
-
6
-
7
-
8
-
9
-
10
-
11
-
12
-
13
-
14
-
15
-
16
-
17
-
18
-
19
-
20
-
21
-
22
-
23
-
24
-
25
-
26
-
27
-
28
-
29
-
30
-
31
-
32
-
33
-
34
-
35
-
36
-
37
-
38
-
39
-
40
-
41
-
42
-
43
-
44
-
45
-
46
-
47
-
48
-
49
-
50
-
51
-
52
-
53
-
54
-
55
-
56
-
57
-
58
-
59
-
60
-
61
-
62
-
63
-
64
-
65
-
66
-
67
-
68
-
69
-
70
-
71
-
72
-
73
-
74
-
75
-
76
-
77
-
78
-
79
-
80
-
81
-
82
-
83
-
84
-
85
-
86
-
87
-
88
-
89
-
90
-
91
-
92
-
93
-
94
-
95
-
96
-
97
-
98
-
99
-
100
-
101
-
102
-
103
-
104
-
105
-
106
-
107
-
108
-
109
-
110
-
111
-
112
-
113
-
114
-
115
-
116
-
117
-
118
-
119
-
120
-
121
-
122
-
123
-
 124
124 -
 125
125 -
 126
126 -
 127
127 -
 128
128 -
 129
129 -
 130
130 -
 131
131 -
 132
132 -
 133
133 -
 134
134 -
135
-
136
-
137
-
138
-
139
-
140
-
141
-
142
-
143
-
144
-
145
-
146
-
147
-
148
-
149
-
150
-
151
-
152
-
153
-
154
-
155
-
156
-
157
-
158
-
159
-
160
-
161
-
162
-
163
-
164
-
165
-
166
-
167
-
168
 |
 |