HP Kayak XA 05xx HP Kayak XA Series 05xx, Chassis Component Replacement Instru
HP Kayak XA 05xx Manual
 |
View all HP Kayak XA 05xx manuals
Add to My Manuals
Save this manual to your list of manuals |
HP Kayak XA 05xx manual content summary:
- HP Kayak XA 05xx | HP Kayak XA Series 05xx, Chassis Component Replacement Instru - Page 1
Kayak XA Series 05xx Main Part Replacement Instructions Instructions de remplacement des pièces principales Austauschanweisungen yourself, please contact your local dealer or HP representative to purchase repair services. WARNING AS WITH ANY ELECTRICAL EQUIPMENT IMPROPER HANDLING CAN CAUSE SEVERE - HP Kayak XA 05xx | HP Kayak XA Series 05xx, Chassis Component Replacement Instru - Page 2
vous pensez ne pas être en mesure de le faire vous-même, contactez votre distributeur local ou un agent HP pour acquérir un service de réparation. AVERTISSEMENT COMME AVEC TOUT EQUIPEMENT ELECTRIQUE, UNE MAUVAISE MANIPULATION PEUT ETRE A L'ORIGINE D'UN ACCIDENT OU ENTRAINER LA MORT. SOYEZ DONC TRES - HP Kayak XA 05xx | HP Kayak XA Series 05xx, Chassis Component Replacement Instru - Page 3
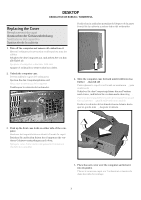
oben. Spingere verso l'alto i fermi del pannello frontale sui due lati del computer. ‚ ƒ 5. Place the new cover over the computer and lower it into its guides. Placez le nouveau capot sur l'ordinateur et insérez-le dans les rails de montage. 3 - HP Kayak XA 05xx | HP Kayak XA Series 05xx, Chassis Component Replacement Instru - Page 4
Führungen ab. Mettere il nuovo coperchio sul computer e abbassarlo sulle sue guide. Sitúe la nueva cubierta sobre el ordenador y déjela sobre sus löst. Far scivolare la scatola in avanti finché non esce completamente dalle guide. Deslice el panel LCD a la izquierda para que salga de sus guías - HP Kayak XA 05xx | HP Kayak XA Series 05xx, Chassis Component Replacement Instru - Page 5
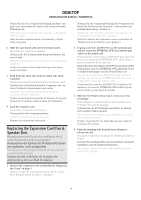
DESKTOP ORDINATEUR DE BUREAU / SOBREMESA Presione las pestañas de retención del chasis frontal para liberar la unidad. 5. Replace the expansion card fan & speaker unit, ensuring the LCD panel cables do not get in the way. Replacez l'unité du ventilateur de la carte d'extension et du haut-parleur, - HP Kayak XA 05xx | HP Kayak XA Series 05xx, Chassis Component Replacement Instru - Page 6
DESKTOP ORDINATEUR DE BUREAU / SOBREMESA Abschnitt "Austauschen der Einheit mit Ventilator für Erweiterungskarten und Lautsprecher" auf Seite 4. Togliere il gruppo scheda di espansione/ventola/altoparlante come descritto in "Sostituzione del gruppo Scheda di espansione/ventola/altoparlante" a - HP Kayak XA 05xx | HP Kayak XA Series 05xx, Chassis Component Replacement Instru - Page 7
rigido Ventilador del disco duro The hard disk fan is not actually necessary, and only appeared on early desktop models. There is no need to service this part. Le ventilateur du disque dur n'est pas géré par le BIOS sur les machines Desktop. Seul certain modèles DT de la première - HP Kayak XA 05xx | HP Kayak XA Series 05xx, Chassis Component Replacement Instru - Page 8
‚ y tire de la cubierta hacia delante utilizando como referencia la parte frontal del CD-ROM ƒ. ƒ ‚ ‚ 4. Slide the case forward until it is free of its guide rails. Faites glisser le capot vers l'avant pour le sortir des rails. Schieben Sie die Gehäuseabdeckung nach vorne, bis sie sich aus ihren - HP Kayak XA 05xx | HP Kayak XA Series 05xx, Chassis Component Replacement Instru - Page 9
MINITOWER MINI-TOUR / MINITORRE 7. Push down the front case locks on either side of the computer. Abaissez les taquets latéraux placés à l'avant du capot. Drücken Sie auf beiden Seiten des Computers die vorderen Gehäuseverriegelungen nach unten. Spingere in giù i due fermi del pannello frontale su - HP Kayak XA 05xx | HP Kayak XA Series 05xx, Chassis Component Replacement Instru - Page 10
MINITOWER MINI-TOUR / MINITORRE slide it back down into place (ensure the retaining tab clicks). Placez l'unité comme indiqué ‚, faites-la pivoter vers le châssis avant ƒ (veillez à ne coincer aucun câble) et remettez-la en place (le taquet de fixation doit s'enclencher). Positionieren Sie die - HP Kayak XA 05xx | HP Kayak XA Series 05xx, Chassis Component Replacement Instru - Page 11
MINITOWER MINI-TOUR / MINITORRE 3. Slide the LCD Panel to the right and lift off the chassis. Faites glisser le panneau du LCD vers la droite et soulevez le châssis. Schieben Sie die LCD-Anzeige nach rechts aus dem Gehäuse. Spingere il pannello LCD verso destra e sollevarlo dallo chassis. Deslice - HP Kayak XA 05xx | HP Kayak XA Series 05xx, Chassis Component Replacement Instru - Page 12
disco rigido Ventilador del disco duro The hard disk fan is not actually necessary, and only appeared on early models. There is no need to service this part. Make sure you always use the latest BIOS (which ignores this fan). Le ventilateur du disque dur n'est pas géré par le BIOS. Seul - HP Kayak XA 05xx | HP Kayak XA Series 05xx, Chassis Component Replacement Instru - Page 13
MINITOWER MINI-TOUR / MINITORRE Retire el panel multimedia presionando sobre los extremos superior e inferior y extrayéndolo (ponga cuidado en no enganchar ningún cable). 5. Replace the Multimedia Panel, remembering to feed the cables through the slot in the front chassis first. Remplacez le - HP Kayak XA 05xx | HP Kayak XA Series 05xx, Chassis Component Replacement Instru - Page 14
MINITOWER MINI-TOUR / MINITORRE 14 Part No. D6738-90910
-
 1
1 -
 2
2 -
 3
3 -
 4
4 -
 5
5 -
 6
6 -
 7
7 -
8
-
9
-
10
-
11
-
12
-
13
-
14
 |
 |
1
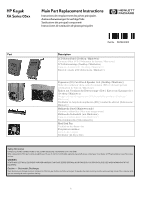
Main Part Replacement Instructions
Instructions de remplacement des pièces principales
Austauschanweisungen für wichtige Teile
Sostituzione dei principali componenti
Instrucciones de sustitución de piezas principales
HP Kayak
XA Series 05xx
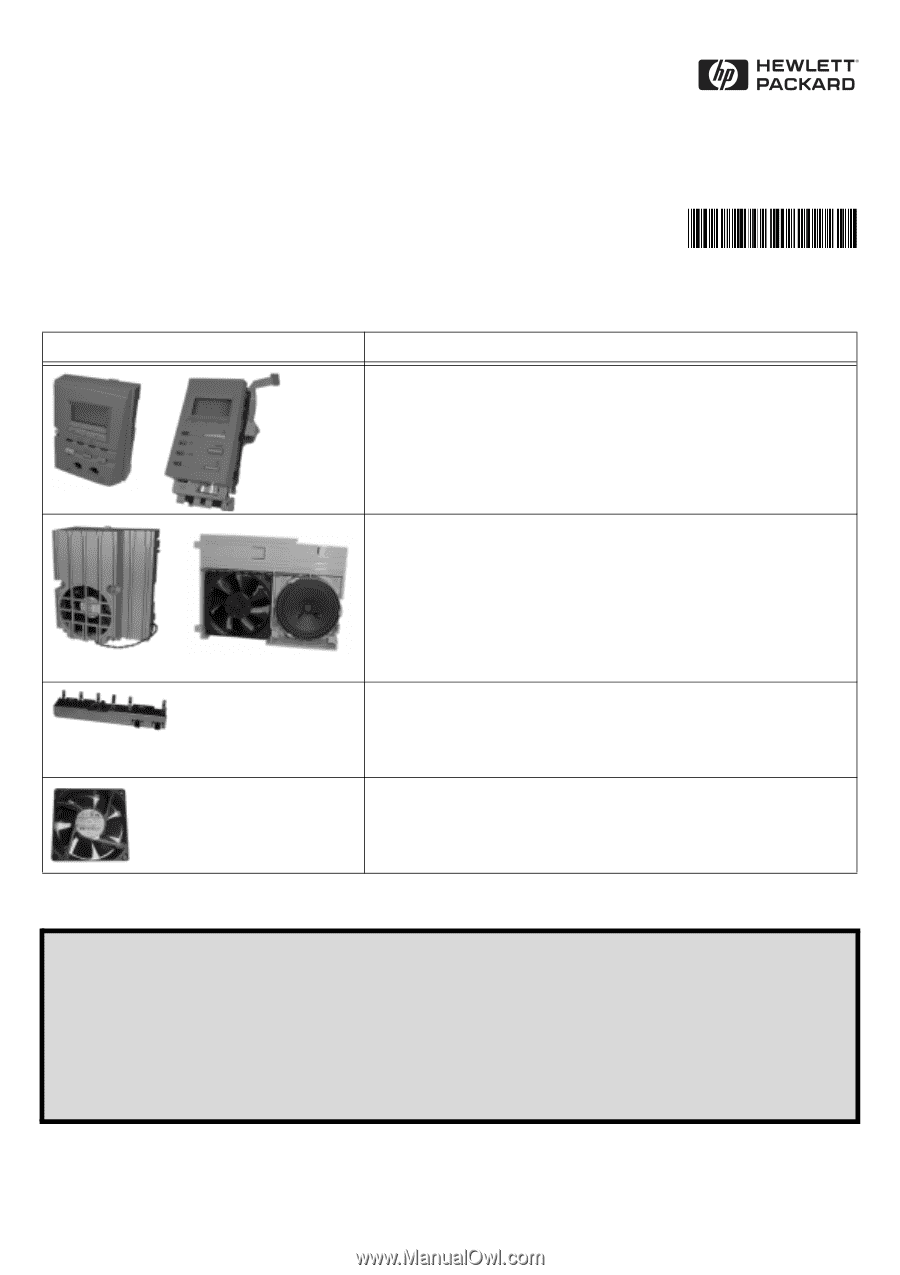
Part
Description
LCD Status Panel (Desktop / Minitower)
Panneau d’état LCD (Ordinateur de bureau / Mini-tour)
LCD-Statusanzeige (Desktop / Minitower)
Pannello di stato LCD (Desktop / Minitower)
Panel de estado LCD (Sobremesa / Minitorre)
Expansion (IO) Card Fan & Speaker Unit (Desktop / Minitower)
Unité du ventilateur de la carte d’extension (ES) et du haut-parleur
(Ordinateur de bureau / Mini-tour)
Einheit mit Ventilator für Erweiterungs- (E/A-) Karten und Lautsprecher
(Desktop / Minitower)
Gruppo scheda di espansione (I/O)/ventola/altoparlante (Desktop /
Minitower)
Ventilador de tarjeta de ampliación (ES) y unidad de altavoz (Sobremesa /
Minitorre)
Multimedia Panel (Minitower only)
Panneau multimédia (Mini-tour uniquement)
Multimedia-Bedienfeld (nur Minitower)
Pannello multimediale (solo Minitower)
Panel multimedia (Sólo minitorre)
Hard Disk Fan
Ventilateur du disque dur
Festplattenventilator
Ventola disco rigido
Ventilador del disco duro
Safety Information
UNPLUG ALL POWER CONNECTIONS TO THE COMPUTER BEFORE ATTEMPTING TO FIT THIS PART.
While replacement of this part is fairly straightforward, if you do not feel comfortable replacing it yourself, please contact your local dealer or HP representative to purchase repair
services.
WARNING
AS WITH ANY ELECTRICAL EQUIPMENT IMPROPER HANDLING CAN CAUSE SEVERE PERSONAL INJURY OR DEATH. CAUTION SHOULD BE USED WHEN WORKING WITH THIS
EQUIPMENT.
Caution — Electrostatic Discharges
Static electricity can damage electronic components. Don’t let your clothes touch the service part. To equalize the static electricity, rest the service part bag on top of the computer while
you are removing the service part from the bag.
Part No.
D6738-90910