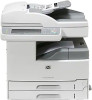
HP LaserJet M5000 LaserJet MFP - Imaging and Printing Security Best Practices
HP LaserJet M5000 Manual
 |
View all HP LaserJet M5000 manuals
Add to My Manuals
Save this manual to your list of manuals |
HP LaserJet M5000 manual content summary:
- HP LaserJet M5000 | LaserJet MFP - Imaging and Printing Security Best Practices - Page 1
HP Imaging and Printing Security Best Practices Configuring Security for Multiple LaserJet MFPs and Color LaserJet MFPs Version 5.0 for HP Web Jetadmin 10.1 or above • HP LaserJet M3027 MFP • HP LaserJet M3035 MFP • HP LaserJet 4345 MFP • HP LaserJet M4345 MFP • HP LaserJet M5025 MFP • - HP LaserJet M5000 | LaserJet MFP - Imaging and Printing Security Best Practices - Page 2
Features ...25 Encrypt all Web Communication 29 Encryption Strength 30 Error Handling ...31 IPX RCFG Support ...31 Job Timeout...32 Privacy Setting...32 Protocol Stacks ...33 Web Services Print...35 Apply your Changes 36 Configuring MFP Security Settings 37 Bootloader Password 37 Color Access - HP LaserJet M5000 | LaserJet MFP - Imaging and Printing Security Best Practices - Page 3
Printer Firmware Update 41 Secure Disk Encryption Mode 41 Apply the Changes 42 Configuring MFP Fax Settings 44 Configuring Fax Printing 44 Apply the Changes 45 Additional Fax Configuration 46 Configuring MFP Embedded Web Server Settings 48 Embedded Web Server Configuration Options 48 Apply - HP LaserJet M5000 | LaserJet MFP - Imaging and Printing Security Best Practices - Page 4
Network Page Options 76 Security Page Options 79 Final Configurations 84 Overall Limitations ...85 Chapter 8: Physical Security 86 Chapter 9: Appendix 1: Glossary of Terms and Acronyms 87 HP LaserJet and Color LaserJet MFP Security Checklist iii - HP LaserJet M5000 | LaserJet MFP - Imaging and Printing Security Best Practices - Page 5
NIST Checklist website. HP thanks NIST for its support in the process of creating this document. This enterprise networks. It includes step-by-step instructions to configure one or more MFPs on . Refer to the MFP User Guides and the HP Jetdirect Administrator Guide for more information. You can find - HP LaserJet M5000 | LaserJet MFP - Imaging and Printing Security Best Practices - Page 6
PC • One of each supported MFP with the latest updated security settings. See the user guides, admin guides, and help files for information of these settings can cause unexpected problems in your environment. Please be aware order. You should follow the instructions in this checklist exactly and - HP LaserJet M5000 | LaserJet MFP - Imaging and Printing Security Best Practices - Page 7
should have read the MFP user guide, the MFP administrator guide, the Jetdirect administrator guide, Web Jetadmin user guides, and help files. This checklist relies on these materials for necessary information. All of these guides are available by searching for them at hp.com. • MFPs: - HP LaserJet M5000 | LaserJet MFP - Imaging and Printing Security Best Practices - Page 8
® STRIDE model. • Chapter 3: Network Security for Multiple MFPs: The Network Security for Multiple MFPs chapter provides step-by-step instructions for configuring MFP security settings. • Chapter 5: Settings List: The Settings List chapter provides a bulleted list of the recommended settings - HP LaserJet M5000 | LaserJet MFP - Imaging and Printing Security Best Practices - Page 9
to log in to the email server to gain access to address books • Using another person's email credentials to have free use of an email service • Using another person's email credentials to view that person's email messages • Using another person's log on credentials for access to use MFPs or networks - HP LaserJet M5000 | LaserJet MFP - Imaging and Printing Security Best Practices - Page 10
You can minimize the risks from identity spoofing in the following ways: • Protect the from address field in the MFP Digital Sending and Fax configurations. • Protect MFP disk access. • Configure authentication. • Configure the administrator password. • Configure SNMPv3. Tampering with Data - HP LaserJet M5000 | LaserJet MFP - Imaging and Printing Security Best Practices - Page 11
supplier). • Close unused ports and protocols. • Configure all possible password settings. • Configure authentication. • Configure SNMPv3 for Web Jetadmin. Denial of Service Denial of service is any type of interference with normal use of an MFP. This can include any of the following: • Canceling or - HP LaserJet M5000 | LaserJet MFP - Imaging and Printing Security Best Practices - Page 12
to the MFP • Changing the network location of the MFP • Causing an error state that interrupts service • Changing access configurations Here are some methods of minimizing opportunities for denial of service on an MFP: • Lock the control panel. • Lock EWS configuration settings. • Close unused ports - HP LaserJet M5000 | LaserJet MFP - Imaging and Printing Security Best Practices - Page 13
that allows you to manage any number of MFPs and printers. It provides the ability to configure a wide variety of features and services on the network. Without proper security, Web Jetadmin allows malicious users the same conveniences for attacking your network. Thus, configuring security features - HP LaserJet M5000 | LaserJet MFP - Imaging and Printing Security Best Practices - Page 14
, it is possible to restore the MFPs to factory default settings. Without it, the only way to restore the MFPs is to involve an HPauthorized service technician to reset the entire MFP. You may wish to use a password vault program to organize and store all of the passwords. Here is a list - HP LaserJet M5000 | LaserJet MFP - Imaging and Printing Security Best Practices - Page 15
password. Getting started configuring MFP Security Settings This section provides instructions for configuring the MFPs for best-practice security. All the settings may not appear in HP Web Jetadmin if none of your MFPs supports them. Web Jetadmin displays only the options that apply to the MFPs you - HP LaserJet M5000 | LaserJet MFP - Imaging and Printing Security Best Practices - Page 16
Figure 1: Web Jetadmin showing the device list on the default view. 2. Check to see that the MFPs you wish to configure appear in the Device Model List. If they are not in the list, use the Discovery options to find the MFPs on your network. Note: This checklist does not include details on MFP - HP LaserJet M5000 | LaserJet MFP - Imaging and Printing Security Best Practices - Page 17
settings available for configuration. The Config tab contains all of the settings recommended in this checklist. Tip: If you are having a problem configuring a setting, try configuring it using the individual device's configuration page. You can also attempt to configure the setting using the - HP LaserJet M5000 | LaserJet MFP - Imaging and Printing Security Best Practices - Page 18
Follow these steps to use Web Jetadmin to verify your HP Secure Hard Disk is installed and configured: 1. In the device list view, add the columns for Secure Disk and Secure Disk Status if they are not visible. First, right click on the column area to the right of the existing columns. Then select - HP LaserJet M5000 | LaserJet MFP - Imaging and Printing Security Best Practices - Page 19
Figure 5: Shows how to add the Secure Disk and Secure Disk Status columns to the columns selected for display. 3. In the listing of printers, check the Secure Disk and Secure Disk Status columns. The Secure Disk column should indicate "Installed". The Secure Disk Status column should indicate " - HP LaserJet M5000 | LaserJet MFP - Imaging and Printing Security Best Practices - Page 20
Note: If your MFP is reporting an installed HP Secure Disk but its status is anything other than Encrypted it is recommended you resolve the issues with your HP Secure Disk before continuing this checklist. If you do not you may need to re-apply the entire checklist to the MFP. An example of an MFP - HP LaserJet M5000 | LaserJet MFP - Imaging and Printing Security Best Practices - Page 21
Figure 8: The Security category and SNMP Version Access Control settings. 2. On the SNMP Version Access Control menu, and select the Enable SNMPv3 checkbox (Figure 9). Figure 9: Shows Enable SNMPv3 selected. 3. Once Enable SNMPv3 has been selected, and fills in the New User, the New Authentication - HP LaserJet M5000 | LaserJet MFP - Imaging and Printing Security Best Practices - Page 22
is at least 8 characters. The New Privacy Passphrase field can be any word or phrase that is at least 8 characters. CAUTION: These instructions are for the initial configuration of SNMPv3. Once you finish this configuration, the MFPs will require these credentials whenever anyone attempts to access - HP LaserJet M5000 | LaserJet MFP - Imaging and Printing Security Best Practices - Page 23
4. Scroll down to the SNMPv1 Settings section, and select SNMPv1 disabled (Figure 11). Figure 11: The SNMP Version 3 Only setting. This setting limits all SNMP configuration communication to only SNMPv 3. Once applied your MFPs will not allow SNMPv1 SET and SNMPv2 GET. 5. Choose Apply at the bottom - HP LaserJet M5000 | LaserJet MFP - Imaging and Printing Security Best Practices - Page 24
Figure 12: The Configure Devices dialogue box. Chapter 3 HP LaserJet and Color LaserJet MFP Security Checklist 20 - HP LaserJet M5000 | LaserJet MFP - Imaging and Printing Security Best Practices - Page 25
6. Click the Configure Devices button to execute the configuration. The result of your configuration will be displayed when the configuration is complete (Figure 13). Figure 13: Shows a successful configuration result. If your configuration is not successful, you can click the Details button for - HP LaserJet M5000 | LaserJet MFP - Imaging and Printing Security Best Practices - Page 26
a job. Setting this timeout will help prevent jobs formed or sent incorrectly from tying up a print resource. To set this timeout follow the instructions below. 1. From the Device category, select the I/O Timeout to End Print Job menu (Figure 14). 2. Click checkbox to enable the I/O Timeout to End - HP LaserJet M5000 | LaserJet MFP - Imaging and Printing Security Best Practices - Page 27
Figure 15: The Job Hold Timeout options. Job Retention 1. From the Device category, select Job Retention (Figure 16). 2. Click checkbox to select Job Retention (Error! Reference source not found.), and select Enabled. Figure 16: The Job Retention options. This allows users to store print jobs and - HP LaserJet M5000 | LaserJet MFP - Imaging and Printing Security Best Practices - Page 28
Figure 17: The Configure Devices dialogue box. 2. Review your settings and then click the Configure Devices button to execute the configuration. Chapter 3 HP LaserJet and Color LaserJet MFP Security Checklist 24 - HP LaserJet M5000 | LaserJet MFP - Imaging and Printing Security Best Practices - Page 29
. The security features you will be configuring restrict what methods are available for communication with your MFP over the network. Follow the instructions below to view and configure these options. 1. Click the Network category on the Config tab to expand the configuration options (Figure 18 - HP LaserJet M5000 | LaserJet MFP - Imaging and Printing Security Best Practices - Page 30
Figure 19: The Enable Features option. 2. Next, select the print features you would like to enable or disable. The following table lists and explains the recommended settings for the Enable Features option: Feature EWS Config Recommended Setting Disabled*** ***NOTE: The recommendation is to - HP LaserJet M5000 | LaserJet MFP - Imaging and Printing Security Best Practices - Page 31
SLP Config FTP Printing Disabled Disabled LPD Printing Disabled 9100 Printing IPP Printing Enabled Disabled MDNS Config Disabled IPv4 Multicast Config Disabled WS-Discovery Disabled Disabling SLP Config prevents access to configuration settings and other features through SLP. Disabling - HP LaserJet M5000 | LaserJet MFP - Imaging and Printing Security Best Practices - Page 32
WARNING: You will want to enable WS-Discovery on this printer if the following apply: You are using an IPv6 only network, you use WS-Print to discover your devices, or operate in a Windows Vista/ Windows 7 centric environment. If you are unsure of this setting, we highly recommend testing its - HP LaserJet M5000 | LaserJet MFP - Imaging and Printing Security Best Practices - Page 33
Figure 20: Review your Enable Features Configuration selections before configuring your devices. Encrypt all Web Communication This setting requires web browsers to use HTTPS when contacting the MFPs. This ensures secure communications with the MFP EWS. To enable this feature: 1. Click Encrypt all - HP LaserJet M5000 | LaserJet MFP - Imaging and Printing Security Best Practices - Page 34
the Network category (Figure 22). Figure 22: The Encryption Strength option. 2. Click the Encryption Strength dropdown menu, and select the highest setting that your browser supports (Figure 23). Chapter 3 HP LaserJet and Color LaserJet MFP Security Checklist 30 - HP LaserJet M5000 | LaserJet MFP - Imaging and Printing Security Best Practices - Page 35
do a reboot; operations are halted. Choose the setting that best fits your security needs. Figure 24: The Error Handling option. IPX RCFG Support This setting prevents access to configuration settings through Novell NetWare linkages; however, you should enable it if your network uses these linkages - HP LaserJet M5000 | LaserJet MFP - Imaging and Printing Security Best Practices - Page 36
from jobs that lack proper end of job signals. The MFPs will be able to switch protocols to continue with other jobs. Not all MFPs support the Job Timeout option, so it will not appear for all models. To set the Job Timeout option: 1. Click Job Timeout (Figure 26). Figure 26 - HP LaserJet M5000 | LaserJet MFP - Imaging and Printing Security Best Practices - Page 37
• Local language selections used for viewing Web pages • Network communications protocols enabled • Network management interfaces enabled • Device discovery protocols enabled • Printing protocols enabled • TCP/IP configuration methods enabled • SNMP control methods enabled • Wireless configuration - HP LaserJet M5000 | LaserJet MFP - Imaging and Printing Security Best Practices - Page 38
Figure 28: The Protocol Stacks options. Chapter 3 HP LaserJet and Color LaserJet MFP Security Checklist 34 - HP LaserJet M5000 | LaserJet MFP - Imaging and Printing Security Best Practices - Page 39
computers. It should be disabled if not in use. Web Services Print This option enables or disables the Microsoft Services for Devices WSD Print services supported on the HP Jetdirect Print Server. 1. Click to select Web Services Print (Figure 29), and select Disabled. Figure 29: Enabling Web - HP LaserJet M5000 | LaserJet MFP - Imaging and Printing Security Best Practices - Page 40
Apply your Changes 1. Click the Apply button located in the bottom right hand corner to apply the settings to the selected devices. This will open the configure devices dialogue box (Figure 30). Figure 30: The Configure Devices dialogue box. 2. Review your settings and then click the Configure - HP LaserJet M5000 | LaserJet MFP - Imaging and Printing Security Best Practices - Page 41
Configuring MFP Security Settings The Security category includes many advanced security settings and password settings. If you are attempting to configure a setting that is in the Security category and not listed in this section, you should check the chapter on Advanced Security for multiple MFPs. - HP LaserJet M5000 | LaserJet MFP - Imaging and Printing Security Best Practices - Page 42
Color Access Control The Color Access Control options (Figure 32) allow you to manage the usage of color printing supplies within your organization. If you wish to restrict access to color printing you can configure these settings to match your policy. Figure 32: The Color Access Control options. - HP LaserJet M5000 | LaserJet MFP - Imaging and Printing Security Best Practices - Page 43
MFP while configuring this checklist using Web Jetadmin it is important to set the Embedded Web Password. To do this, follow these instructions. 1. Click Embedded Web Server Password under the Security category (Figure 34). Figure 34: The Embedded Web Server Password options. Chapter 3 HP LaserJet - HP LaserJet M5000 | LaserJet MFP - Imaging and Printing Security Best Practices - Page 44
number between 1 and 2147483647 that is at least nine digits in length, and repeat it in the Repeat PJL Password field. Note: If you have problems configuring this password try configuring it through the EWS. Chapter 3 HP LaserJet and Color LaserJet MFP Security Checklist 40 - HP LaserJet M5000 | LaserJet MFP - Imaging and Printing Security Best Practices - Page 45
HP Secure Hard Disk is installed. Automatic is the default and recommended mode. Note: If you are configuring multiple devices and are not sure whether a manual password has been set on any of those devices it is recommended you skip this step in the configuration. Chapter 3 HP LaserJet and Color - HP LaserJet M5000 | LaserJet MFP - Imaging and Printing Security Best Practices - Page 46
Figure 37: The Secure Disk Encryption Mode option. Apply the Changes 1. Click the Apply button located in the bottom right hand corner to apply the settings to the selected devices. This will open the configure devices dialogue box (Figure 38). Chapter 3 HP LaserJet and Color LaserJet MFP Security - HP LaserJet M5000 | LaserJet MFP - Imaging and Printing Security Best Practices - Page 47
Figure 38: The Configure Devices dialogue box. 2. Review your settings and then click the Configure Devices button to execute the configuration. Chapter 3 HP LaserJet and Color LaserJet MFP Security Checklist 43 - HP LaserJet M5000 | LaserJet MFP - Imaging and Printing Security Best Practices - Page 48
to fax print jobs. Configuring Fax Printing Follow these instructions to configure Fax Printing: Note: Be sure to configure the MFPs for fax capabilities before continuing with the instructions below. At the minimum, configure the modem settings for the country, - HP LaserJet M5000 | LaserJet MFP - Imaging and Printing Security Best Practices - Page 49
Note: This setting also enables PIN printing. 3. Select Store all Received Faxes. The Store all Received Faxes option holds incoming faxes for printing until someone enters the correct PIN number and selects the menu options at the control panel. This is considered the most secure mode of fax - HP LaserJet M5000 | LaserJet MFP - Imaging and Printing Security Best Practices - Page 50
2. Review your settings and then click the Configure Devices button to execute the configuration. Additional Fax Configuration Some of the newer MFPs or recently upgraded MFPs may contain options for setting and locking down the Fax speed-dial feature. This Fax feature is not yet accessible via Web - HP LaserJet M5000 | LaserJet MFP - Imaging and Printing Security Best Practices - Page 51
3. Set any speed-dials you wish to have by selecting the speed-dial number and clicking the Edit Speed Dial button (Figure 43). Figure 43: The Fax Speed Dials configuration button. 4. To keep speed-dial entries from being added or edited via the control panel input the number of the specific speed- - HP LaserJet M5000 | LaserJet MFP - Imaging and Printing Security Best Practices - Page 52
those managed in Web Jetadmin. Now, however, you should configure the settings below for security while EWS Config is enabled. Follow these instructions: 1. Click the Embedded Web Server category to select Embedded Web Server Configuration Options (Figure 45). Figure 45: The Embedded Web Server - HP LaserJet M5000 | LaserJet MFP - Imaging and Printing Security Best Practices - Page 53
does not apply to MFPs. Disabling it is only a best practice. Command Load and Execute enables the MFPs to install and run Chai services, such as workflow applications and job accounting solutions. You should disable it unless you are using installed applications on your MFPs. Chapter 3 HP - HP LaserJet M5000 | LaserJet MFP - Imaging and Printing Security Best Practices - Page 54
(enabled by default) Select to enable Leave blank to disable Continue Button allows the MFPs to resume after an error has been cleared. Print Service enables users to send print-ready files directly to an MFP without having the MFP installed on a computer. Apply the Changes 1. Click the Apply - HP LaserJet M5000 | LaserJet MFP - Imaging and Printing Security Best Practices - Page 55
External Access It is recommended that all external access to the file systems on your MFPs be disabled. To do so, follow these instructions: 1. Click the File System category to select File System External Access (Figure 47). Figure 47: The File System External Access options. 2. Disable all - HP LaserJet M5000 | LaserJet MFP - Imaging and Printing Security Best Practices - Page 56
will require the password whenever anyone or any device requests access to the storage devices. To set the File System password follow the instructions below: 1. Click to select File system Password (Figure 48). Figure 48: The File system Password option. 2. Type an 8 character password in the - HP LaserJet M5000 | LaserJet MFP - Imaging and Printing Security Best Practices - Page 57
be configured. If you are following this checklist in order this should not be an issue. To set the Secure File Erase Mode follow these instructions: 1. Click to select Secure File Erase Mode (Figure 49), and view the options in the dropdown menu. Figure 49: The Secure File Erase Mode setting - HP LaserJet M5000 | LaserJet MFP - Imaging and Printing Security Best Practices - Page 58
Figure 50: The Secure File Erase Mode setting. Apply the Changes 5. Click the Apply button located in the bottom right hand corner to apply the settings to the selected devices. This will open the configure devices dialogue box (Figure 51). Chapter 3 HP LaserJet and Color LaserJet MFP Security - HP LaserJet M5000 | LaserJet MFP - Imaging and Printing Security Best Practices - Page 59
Figure 51: The Configure Devices dialogue box. 6. Review your settings and then click the Configure Devices button to execute the configuration. Chapter 3 HP LaserJet and Color LaserJet MFP Security Checklist 55 - HP LaserJet M5000 | LaserJet MFP - Imaging and Printing Security Best Practices - Page 60
for other types of HP MFPs. You should configure the settings that appear in the instructions below. You may wish to configure the other settings as a safeguard, but they are ignored on devices that do not support them. Auto Reset Send Settings This setting governs how long after sending a job the - HP LaserJet M5000 | LaserJet MFP - Imaging and Printing Security Best Practices - Page 61
Default From Address HP recommends configuring the default from address to ensure that no one can send email using false or misleading identification. If you are using LDAP Authentication, the MFP will use the email address of the authenticated user to replace the default from address. To configure - HP LaserJet M5000 | LaserJet MFP - Imaging and Printing Security Best Practices - Page 62
Final Settings Some of the MFP settings should be configured independently from other settings and only at the end of this checklist. Follow these instructions for the final settings: Disabling Direct Ports The Disable Direct Ports feature disables the USB and Parallel ports on the MFPs. It ensures - HP LaserJet M5000 | LaserJet MFP - Imaging and Printing Security Best Practices - Page 63
Figure 55: The Disable Direct Ports option. 2. Click to select the Disable Direct Ports option to the right. 3. Select Yes. 4. Click Apply at the bottom of the page. 5. Wait for a few minutes to allow all of the MFPs to restart. Do not continue until all of them are at the READY state. Disabling EWS - HP LaserJet M5000 | LaserJet MFP - Imaging and Printing Security Best Practices - Page 64
Note: This setting disables configuration from the MFP EWS. It also disables all EWS-related settings from Web Jetadmin (they will disappear from Web Jetadmin menus). With this setting configured, the only way to make changes to the EWS settings again is to re-enable them using Web Jetadmin. Always - HP LaserJet M5000 | LaserJet MFP - Imaging and Printing Security Best Practices - Page 65
. If you are looking for information in this section that is not contained in this document you can refer to the MFP User Guides and the HP Jetdirect Administrator Guide for more information. You can find these documents and more information by searching for it at hp.com. Access Control List (ACL - HP LaserJet M5000 | LaserJet MFP - Imaging and Printing Security Best Practices - Page 66
Figure 57: The Configuration Categories Menu Network option. 2. Add an IP address or a net mask by filling in the IP Address or Mask fields. CAUTION: Be sure to include the IP address of the computer that is running Web Jetadmin (it can be a computer other than the one you are using). Otherwise, - HP LaserJet M5000 | LaserJet MFP - Imaging and Printing Security Best Practices - Page 67
that you plan to configure for the MFPs selected. Many of the options available (such as LDAP, Kerberos, and Digital Send Service) require additional solutions on the network for support. 2. Click the dropdown menu next to Log in at Walk Up, and select from the list (Figure 59). Chapter 4 HP - HP LaserJet M5000 | LaserJet MFP - Imaging and Printing Security Best Practices - Page 68
allowed to use a feature. Note: The DSS Secondary E-mail function and the DSS Workflow function require HP Digital Send Service to be installed on the Network. Digital Send Service is an additional solution offered at hp.com. Choose an authentication method for Future Installations as desired. This - HP LaserJet M5000 | LaserJet MFP - Imaging and Printing Security Best Practices - Page 69
PIN Authentication, and enter PINs as desired. Be sure to repeat the PINs exactly in the Confirm PIN fields. Note: If your network includes NTLM service, configure NTLM. This option specifies the authentication method to use when your MFP executes a send to folder job. We recommend using the highest - HP LaserJet M5000 | LaserJet MFP - Imaging and Printing Security Best Practices - Page 70
the MFP to use the LDAP address book; however, the SSL certificate options for both configurations appear on the Digital Sending page. Note: These instructions assume that the LDAP server is configured for SSL. If you have this feature available, you should go to the Digital Send page (see the - HP LaserJet M5000 | LaserJet MFP - Imaging and Printing Security Best Practices - Page 71
If you choose Simple for the bind method, usernames, email addresses, passwords, and other data will be sent over the LDAP protocol in clear text. Fill in the remaining fields according to your network configuration. If your network has Kerberos authentication capabilities, configure the Kerberos - HP LaserJet M5000 | LaserJet MFP - Imaging and Printing Security Best Practices - Page 72
Chapter 5: Settings List This section is a complete list of the settings recommended in this checklist. This section does not include instructions or explanations. It is intended to be used as a check-off list of the recommended settings to help ensure that you complete the entire configuration. - HP LaserJet M5000 | LaserJet MFP - Imaging and Printing Security Best Practices - Page 73
Encryption Strength to High. Configure Error Handling Disable IPX RCFG Support. Configure Job Timeout. Set the Privacy Setting as desired. IP. Disable DLC/LLC. Disable AppleTalk. Disable Web Services Print. Security Category Options Configure Bootloader Password. Configure Color - HP LaserJet M5000 | LaserJet MFP - Imaging and Printing Security Best Practices - Page 74
Go Button. Disable Command Invoke. Disable Command Download. Disable Command Load and Execute. Enable Continue Button. Disable Print Service. File System Page Options Configure File System External Access. Disable PJL. Disable PML. Disable NFS. Disable PostScript. Configure - HP LaserJet M5000 | LaserJet MFP - Imaging and Printing Security Best Practices - Page 75
Chapter 6: Default Settings: This chapter lists the default setting for each configuration in the checklist: Setting Configure HP Secure Hard Disk Configure SNMPv3 (Security page). I/O Timeout to End Print Job Configure Job Hold Timeout. Enable Job Retention. Configure Enable Features options (do - HP LaserJet M5000 | LaserJet MFP - Imaging and Printing Security Best Practices - Page 76
IPX RCFG Support. Configure Job Timeout. Set the privacy setting as desired. Configure Protocol Stacks. Disable IPX/SPX. Enabled Not Configured Not configured (See below) Enabled Enable TCP/IP. Disable DLC/LLC. Enabled Enabled Disable AppleTalk. Web Services Print. Configure Bootloader password. - HP LaserJet M5000 | LaserJet MFP - Imaging and Printing Security Best Practices - Page 77
Command Download. Disabled Disabled Enabled Enabled Enabled Disable Command Load and Execute. Enabled Enable Continue Button. Enabled Disable Print Service. Configure File System External Access. Disable PJL. Enabled (See below) Enabled Disable PML. Enabled Disable NFS. Enabled Enable - HP LaserJet M5000 | LaserJet MFP - Imaging and Printing Security Best Practices - Page 78
Configure Auto Reset Send Settings to Delay before resetting the default settings, and type a number of seconds to delay. Not configured, Delay default: 20 seconds Configure Default From Address. Select Prevent user from changing the Default From Address. Disable Direct Ports (wait for MFPs to - HP LaserJet M5000 | LaserJet MFP - Imaging and Printing Security Best Practices - Page 79
Chapter 7: Ramifications Raising the level of security on HP MFPs requires giving up some conveniences and usability. This section explains some of the compromises you can expect from configuring the settings recommended in this checklist. Keep in mind that this is not a comprehensive list. You - HP LaserJet M5000 | LaserJet MFP - Imaging and Printing Security Best Practices - Page 80
Hold Timeout. Network Page Options • Configure Enable Features options (do not disable EWS Config at this point). These options enable or disable various supported features for the MFP. These features are designed for access and convenience on the network, but they should be disabled when not in use - HP LaserJet M5000 | LaserJet MFP - Imaging and Printing Security Best Practices - Page 81
servers. Most enterprise networks include DNS servers and do not require this service. With this option disabled, a non-DNS network will not recognize find that the EWS are accessible only from web browsers that support that level of HTTPS communications. This checklist recommends disabling EWS - HP LaserJet M5000 | LaserJet MFP - Imaging and Printing Security Best Practices - Page 82
over the network in clear text. This setting is related to the EWS Encryption Strength setting explained earlier. Web browsers that do not support SSL and high encryption strength will not be able to access the MFP EWS. This checklist recommends disabling EWS Config during normal MFP operations - HP LaserJet M5000 | LaserJet MFP - Imaging and Printing Security Best Practices - Page 83
network includes older Apple or Macintosh computers. With it disabled MFPs will not appear on the network for these computers. Disable Web Services Print. This disables the Microsoft WSD Print services supported on the HP Jetdirect Print Server. If this feature is enabled someone with a host that - HP LaserJet M5000 | LaserJet MFP - Imaging and Printing Security Best Practices - Page 84
ensures that no one can send firmware updates to the MFPs. If this feature is disabled it may still be possible to update the firmware manually through the boot loader if you have not safeguarded this option. HP recommends updating firmware whenever it becomes available at hp.com. You should enable - HP LaserJet M5000 | LaserJet MFP - Imaging and Printing Security Best Practices - Page 85
the other one to be the same. • Disable Allow Use of Digital Send Service. HP Digital Sending Software is a useful tool for managing MFP digital sending. It is available for purchase at hp.com. HP recommends using Digital Send Service, but it is not covered in this checklist. Thus, this checklist - HP LaserJet M5000 | LaserJet MFP - Imaging and Printing Security Best Practices - Page 86
to pause operations, such as print jobs, indefinitely. Disabling the Go button removes it from the EWS preventing users from delaying jobs or even denying service to other users; however, users will be able to pause or resume their own jobs from the print driver or from the control panel. • Disable - HP LaserJet M5000 | LaserJet MFP - Imaging and Printing Security Best Practices - Page 87
NOTE: Some storage management tools, such as the Web Jetadmin Device Storage Manager (a Web Jetadmin add-on available in the Product Update navigation mode), use some of these protocols to access the file system. You might consider enabling these protocols only to update configurations and then - HP LaserJet M5000 | LaserJet MFP - Imaging and Printing Security Best Practices - Page 88
, such as color printing, by using alternative connections. This setting causes the MFPs to turn off and turn on. They will be out of service during this time. This is also the reason this setting should be configured independently of other setting configurations. If you attempt to configure this - HP LaserJet M5000 | LaserJet MFP - Imaging and Printing Security Best Practices - Page 89
• Disable EWS Config. Disabling EWS Config removes the EWS from the network. They become unavailable to everyone. This eliminates many risks to security. Since all of the EWS configuration settings are available in Web Jetadmin, there is no need to have them available anywhere else. Keep in mind, - HP LaserJet M5000 | LaserJet MFP - Imaging and Printing Security Best Practices - Page 90
and phone lines connected to the MFP • Access to digital sending services and features • Access to stored print jobs (depending on settings) Use a lock, such as a Kensington Lock, as recommended in the MFP User Guide. If you have purchased the EIO version of the HP Secure Hard Disk (J8019A), - HP LaserJet M5000 | LaserJet MFP - Imaging and Printing Security Best Practices - Page 91
email destinations or to network destinations. Faxing is also considered digital sending, but it is separate from the network functions. DSS Digital Send Service. DSS is an HP solution to enhance MFP digital sending functionality and security. For instance, it can encrypt the contents of digital - HP LaserJet M5000 | LaserJet MFP - Imaging and Printing Security Best Practices - Page 92
Term JDI Job Retention MFP PIN Scanner , ADF, or flatbed scanner SNMPv3 SSL Storage device WJA Description Jetdirect Inside. Many of the MFPs include internal Jetdirect hardware as standard equipment. Other MFPs, such as HP Color LaserJet 9500 MFPs require EIO Jetdirect cards for network - HP LaserJet M5000 | LaserJet MFP - Imaging and Printing Security Best Practices - Page 93
Microsoft® is a U.S. registered trademark of Microsoft Corporation. Adobe and PostScript are trademarks of Adobe Systems Incorporated. © 2016 Copyright HP Development Company, L.P.
-
 1
1 -
 2
2 -
 3
3 -
 4
4 -
 5
5 -
 6
6 -
 7
7 -
8
-
9
-
10
-
11
-
12
-
13
-
14
-
15
-
16
-
17
-
18
-
19
-
20
-
21
-
22
-
23
-
24
-
25
-
26
-
27
-
28
-
29
-
30
-
31
-
32
-
33
-
34
-
35
-
36
-
37
-
38
-
39
-
40
-
41
-
42
-
43
-
44
-
45
-
46
-
47
-
48
-
49
-
50
-
51
-
52
-
53
-
54
-
55
-
56
-
57
-
58
-
59
-
60
-
61
-
62
-
63
-
64
-
65
-
66
-
67
-
68
-
69
-
70
-
71
-
72
-
73
-
74
-
75
-
76
-
77
-
78
-
79
-
80
-
81
-
82
-
83
-
84
-
85
-
86
-
87
-
88
-
89
-
90
-
91
-
92
-
93
 |
 |

HP Imaging and Printing Security Best Practices
Configuring Security for Multiple LaserJet MFPs and Color
LaserJet MFPs
Version 5.0 for HP Web Jetadmin 10.1 or above
•
HP LaserJet M3027 MFP
•
HP LaserJet M3035 MFP
•
HP LaserJet 4345 MFP
•
HP LaserJet M4345 MFP
•
HP LaserJet M5025 MFP
•
HP LaserJet M5035 MFP
•
HP LaserJet 9040 MFP
•
HP LaserJet 9050 MFP
•
HP Color LaserJet 4730 MFP
•
HP Color LaserJet CM4730 MFP
•
HP Color LaserJet 9500 MFP
•
HP Color LaserJet CM3530 MFP
•
HP Color LaserJet CM6030 MFP
•
HP Color LaserJet CM6040 MFP
©
2016 Copyright HP
Development Company, L.P.