HP LaserJet P3000 HP LaserJet P3005 - Software Technical Reference - Page 340
Deleting a job-storage print job, E‑mail Alerts, RETRIEVE JOB, DELETE
 |
View all HP LaserJet P3000 manuals
Add to My Manuals
Save this manual to your list of manuals |
Page 340 highlights
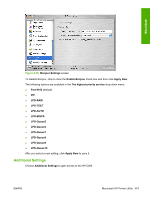
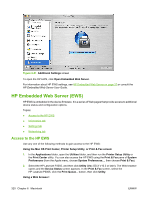
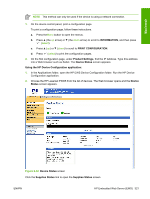
7. If a PIN number is assigned to the job, press (up) or (down) to select the first digit of the PIN, and then press (select). The number in the device control-panel display changes to an asterisk. Repeat this step for each of the remaining three digits of the PIN number. If no PIN number is assigned to the job, continue with the next step. 8. Press (up) or (down) to select the number of copies to print. 9. Press (select) to print the job. Deleting a job-storage print job Sometimes it is necessary to delete a print job from the device memory. You can do this from the device control panel. 1. Press theMenu button to open the menus. 2. Press (the up arrow) or (the down arrow) until RETRIEVE JOB is highlighted on the device control panel, and then press (select). 3. Press (up) or (down) to scroll to your user name, and then press (select). 4. Press (up) or (down) to scroll to the job name, and then press (select). 5. Press (up) or (down) until DELETE is highlighted on the device control panel, and then press (select). 6. Press (select). 7. If a PIN number is assigned to the job, press (up) or (down) to select the first digit of the PIN, and then press (select). The number in the device control-panel display changes to an asterisk. Repeat this step for each of the remaining three digits of the PIN number. If no PIN number is assigned to the job, continue with the next step. 8. Press (select) to delete the job. E-mail Alerts The E-mail Alerts screen is available if the HP LaserJet P3005 printer is installed over a network connection. It is not available when the MFP is installed over a USB connection. Choose E-mail Alerts to configure the HP LaserJet P3005 printer to send e-mail notifications to users. If a user name and password have been set, you might need to obtain them from the IT administrator. For more information, see the HP Embedded Web Server User Guide. 316 Chapter 6 Macintosh ENWW
-
 1
1 -
2
-
3
-
4
-
5
-
6
-
7
-
8
-
9
-
10
-
11
-
12
-
13
-
14
-
15
-
16
-
17
-
18
-
19
-
20
-
21
-
22
-
23
-
24
-
25
-
26
-
27
-
28
-
29
-
30
-
31
-
32
-
33
-
34
-
35
-
36
-
37
-
38
-
39
-
40
-
41
-
42
-
43
-
44
-
45
-
46
-
47
-
48
-
49
-
50
-
51
-
52
-
53
-
54
-
55
-
56
-
57
-
58
-
59
-
60
-
61
-
62
-
63
-
64
-
65
-
66
-
67
-
68
-
69
-
70
-
71
-
72
-
73
-
74
-
75
-
76
-
77
-
78
-
79
-
80
-
81
-
82
-
83
-
84
-
85
-
86
-
87
-
88
-
89
-
90
-
91
-
92
-
93
-
94
-
95
-
96
-
97
-
98
-
99
-
100
-
101
-
102
-
103
-
104
-
105
-
106
-
107
-
108
-
109
-
110
-
111
-
112
-
113
-
114
-
115
-
116
-
117
-
118
-
119
-
120
-
121
-
122
-
123
-
124
-
125
-
126
-
127
-
128
-
129
-
130
-
131
-
132
-
133
-
134
-
135
-
136
-
137
-
138
-
139
-
140
-
141
-
142
-
143
-
144
-
145
-
146
-
147
-
148
-
149
-
150
-
151
-
152
-
153
-
154
-
155
-
156
-
157
-
158
-
159
-
160
-
161
-
162
-
163
-
164
-
165
-
166
-
167
-
168
-
169
-
170
-
171
-
172
-
173
-
174
-
175
-
176
-
177
-
178
-
179
-
180
-
181
-
182
-
183
-
184
-
185
-
186
-
187
-
188
-
189
-
190
-
191
-
192
-
193
-
194
-
195
-
196
-
197
-
198
-
199
-
200
-
201
-
202
-
203
-
204
-
205
-
206
-
207
-
208
-
209
-
210
-
211
-
212
-
213
-
214
-
215
-
216
-
217
-
218
-
219
-
220
-
221
-
222
-
223
-
224
-
225
-
226
-
227
-
228
-
229
-
230
-
231
-
232
-
233
-
234
-
235
-
236
-
237
-
238
-
239
-
240
-
241
-
242
-
243
-
244
-
245
-
246
-
247
-
248
-
249
-
250
-
251
-
252
-
253
-
254
-
255
-
256
-
257
-
258
-
259
-
260
-
261
-
262
-
263
-
264
-
265
-
266
-
267
-
268
-
269
-
270
-
271
-
272
-
273
-
274
-
275
-
276
-
277
-
278
-
279
-
280
-
281
-
282
-
283
-
284
-
285
-
286
-
287
-
288
-
289
-
290
-
291
-
292
-
293
-
294
-
295
-
296
-
297
-
298
-
299
-
300
-
301
-
302
-
303
-
304
-
305
-
306
-
307
-
308
-
309
-
310
-
311
-
312
-
313
-
314
-
315
-
316
-
317
-
318
-
319
-
320
-
321
-
322
-
323
-
324
-
325
-
326
-
327
-
328
-
329
-
330
-
331
-
332
-
333
-
334
-
 335
335 -
 336
336 -
 337
337 -
 338
338 -
 339
339 -
 340
340 -
 341
341 -
 342
342 -
 343
343 -
 344
344 -
 345
345 -
346
-
347
-
348
-
349
-
350
-
351
-
352
-
353
-
354
-
355
-
356
-
357
-
358
-
359
-
360
-
361
-
362
-
363
-
364
-
365
-
366
-
367
-
368
-
369
-
370
-
371
-
372
-
373
-
374
-
375
-
376
-
377
-
378
-
379
-
380
-
381
-
382
-
383
-
384
-
385
-
386
-
387
-
388
-
389
-
390
-
391
-
392
-
393
-
394
-
395
-
396
-
397
-
398
-
399
-
400
-
401
-
402
-
403
-
404
-
405
-
406
 |
 |
