HP LaserJet Pro CP1025 HP LaserJet Pro CP1020 - User Guide - Page 126
Print a cleaning Calibrate the product to align colors, Check the print cartridges
 |
View all HP LaserJet Pro CP1025 manuals
Add to My Manuals
Save this manual to your list of manuals |
Page 126 highlights
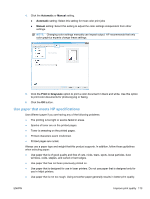
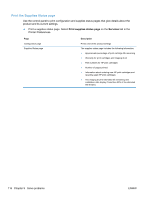
Print a cleaning page Print a cleaning page to remove dust and excess toner from the paper path if you are having any of the following problems: ● Specks of toner are on the printed pages. ● Toner is smearing on the printed pages. ● Repeated marks occur on the printed pages. Use the following procedure to print a cleaning page. 1. Make sure that the product is idle and the Ready light is on. 2. Load paper in the input tray. 3. In the Windows system tray, right-click the Device Settings icon and then click the product name. 4. Click the Device Settings button. 5. Click the Print Cleaning Page button. NOTE: The cleaning process takes about 2 minutes. The cleaning page stops periodically during the cleaning process. Do not turn the product off until the cleaning process has finished. You might need to repeat the cleaning process several times to thoroughly clean the product. Calibrate the product to align colors If you experience any print-quality problems, calibrate the product. 1. Make sure that the product is idle and the Ready light is on. 2. Load paper in the input tray. 3. In the Windows system tray, right-click the Device Settings icon and then click the product name. 4. Click the Device Settings button. 5. Click the Calibrate Now button. Check the print cartridges Check each print cartridge, and replace it if necessary, if you are having any of the following problems: ● The printing is too light or seems faded in areas. ● Printed pages have small unprinted areas. ● Printed pages have streaks or bands. If you determine that you need to replace a print cartridge, print the Supplies Status Page to find the part number for the correct genuine HP print cartridge. 114 Chapter 9 Solve problems ENWW
-
 1
1 -
2
-
3
-
4
-
5
-
6
-
7
-
8
-
9
-
10
-
11
-
12
-
13
-
14
-
15
-
16
-
17
-
18
-
19
-
20
-
21
-
22
-
23
-
24
-
25
-
26
-
27
-
28
-
29
-
30
-
31
-
32
-
33
-
34
-
35
-
36
-
37
-
38
-
39
-
40
-
41
-
42
-
43
-
44
-
45
-
46
-
47
-
48
-
49
-
50
-
51
-
52
-
53
-
54
-
55
-
56
-
57
-
58
-
59
-
60
-
61
-
62
-
63
-
64
-
65
-
66
-
67
-
68
-
69
-
70
-
71
-
72
-
73
-
74
-
75
-
76
-
77
-
78
-
79
-
80
-
81
-
82
-
83
-
84
-
85
-
86
-
87
-
88
-
89
-
90
-
91
-
92
-
93
-
94
-
95
-
96
-
97
-
98
-
99
-
100
-
101
-
102
-
103
-
104
-
105
-
106
-
107
-
108
-
109
-
110
-
111
-
112
-
113
-
114
-
115
-
116
-
117
-
118
-
119
-
120
-
 121
121 -
 122
122 -
 123
123 -
 124
124 -
 125
125 -
 126
126 -
 127
127 -
 128
128 -
 129
129 -
 130
130 -
 131
131 -
132
-
133
-
134
-
135
-
136
-
137
-
138
-
139
-
140
-
141
-
142
-
143
-
144
-
145
-
146
-
147
-
148
-
149
-
150
-
151
-
152
-
153
-
154
-
155
-
156
-
157
-
158
-
159
-
160
-
161
-
162
-
163
-
164
-
165
-
166
-
167
-
168
-
169
-
170
-
171
-
172
-
173
-
174
 |
 |