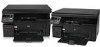
HP LaserJet Pro M1132 HP LaserJet M1319 MFP Series - Software Technical Refere - Page 164
Cleaning Print Density, Auto-Off Console, Device Settings, Start, HP LaserJet, Cleaning Utility
 |
View all HP LaserJet Pro M1132 manuals
Add to My Manuals
Save this manual to your list of manuals |
Page 164 highlights
Cleaning Page Use the Cleaning Page feature to remove excess toner and paper particles that accumulate on the fuser assembly and rollers. Follow these steps to print a Cleaning Page. 1. On the Device Settings tab, press the Start button in the Cleaning Page section. The HP LaserJet Cleaning Utility starts. 2. Make sure the product is idle and the Ready LED on the product is on. 3. Load overhead transparency or copier grade paper (18lb - 24lb or 70g/m2 - 90g/m2) with a smooth surface. 4. Press the OK button. The cleaning process will take about two minutes to finish. Print Density Use the Print Density setting to optimize and improve image quality. The default setting for Print Density is 3. Auto-Off Console Auto-Off is an energy-saving feature of this product. After a user-specified time period, the product automatically reduces its power consumption (Auto-Off). The product returns to the ready state when a button is pressed or a print job is received. When the product is in Auto-Off mode, all of the control-panel LEDs and the power button backlight LED are off. Auto-Off is enabled by default and the default time interval setting is five minutes. Change Auto-Off settings by selecting a time interval in the Auto-off after: drop-down menu. Disable Auto-Off by deselecting Automatically turn off device after inactivity. NOTE: Although the product lights are off in Auto-Off mode, the product will work normally when it receives a print job. 148 Chapter 4 HP host based print driver for Windows ENWW
-
 1
1 -
2
-
3
-
4
-
5
-
6
-
7
-
8
-
9
-
10
-
11
-
12
-
13
-
14
-
15
-
16
-
17
-
18
-
19
-
20
-
21
-
22
-
23
-
24
-
25
-
26
-
27
-
28
-
29
-
30
-
31
-
32
-
33
-
34
-
35
-
36
-
37
-
38
-
39
-
40
-
41
-
42
-
43
-
44
-
45
-
46
-
47
-
48
-
49
-
50
-
51
-
52
-
53
-
54
-
55
-
56
-
57
-
58
-
59
-
60
-
61
-
62
-
63
-
64
-
65
-
66
-
67
-
68
-
69
-
70
-
71
-
72
-
73
-
74
-
75
-
76
-
77
-
78
-
79
-
80
-
81
-
82
-
83
-
84
-
85
-
86
-
87
-
88
-
89
-
90
-
91
-
92
-
93
-
94
-
95
-
96
-
97
-
98
-
99
-
100
-
101
-
102
-
103
-
104
-
105
-
106
-
107
-
108
-
109
-
110
-
111
-
112
-
113
-
114
-
115
-
116
-
117
-
118
-
119
-
120
-
121
-
122
-
123
-
124
-
125
-
126
-
127
-
128
-
129
-
130
-
131
-
132
-
133
-
134
-
135
-
136
-
137
-
138
-
139
-
140
-
141
-
142
-
143
-
144
-
145
-
146
-
147
-
148
-
149
-
150
-
151
-
152
-
153
-
154
-
155
-
156
-
157
-
158
-
 159
159 -
 160
160 -
 161
161 -
 162
162 -
 163
163 -
 164
164 -
 165
165 -
 166
166 -
 167
167 -
 168
168 -
 169
169 -
170
-
171
-
172
-
173
-
174
-
175
-
176
-
177
-
178
-
179
-
180
-
181
-
182
-
183
-
184
-
185
-
186
-
187
-
188
-
189
-
190
-
191
-
192
-
193
-
194
 |
 |