HP LaserJet Pro MFP M426-M427 User Guide - Page 167
Check the image adjustment settings, Optimize for text or pictures, Edge-to-edge copying, Settings
 |
View all HP LaserJet Pro MFP M426-M427 manuals
Add to My Manuals
Save this manual to your list of manuals |
Page 167 highlights
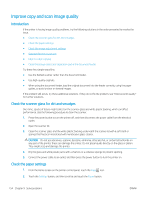
3. From the list of paper sizes, touch the name of the paper size that is in the tray. 4. From the list of paper types, touch the name of the paper type that is in the tray. Check the image adjustment settings 1. From the Home screen, touch the Copy icon. 2. Touch the Settings button, and then scroll to and touch the Image Adjustment button. 3. Touch the name of the setting you want to adjust. ● Lightness: Adjusts the lightness/darkness setting. ● Contrast: Adjusts the contrast between the lightest and darkest areas of the image. ● Sharpen: Adjusts clarity of text characters. ● Background Removal: Adjusts the darkness of the background of the image. This is especially useful for original documents that are printed on colored paper. 4. Touch the - or + buttons to adjust the value for the setting, and then touch the OK button. 5. Adjust another setting, or touch the back arrow to return to the main copy menu. Optimize for text or pictures 1. From the Home screen on the printer control panel, touch the Copy icon. 2. Touch the Settings button, and then scroll to and touch the Optimize button. 3. Touch the name of the setting you want to adjust. ● Auto Select: Use this setting when you are not concerned about the quality of the copy. This is the default setting. ● Mixed: Use this setting for documents that contain a mixture of text and graphics. ● Text: Use this setting for documents that contain mostly text. ● Picture: Use this setting for documents that contain mostly graphics. Edge-to-edge copying The printer cannot print fully edge-to-edge. There is a 4 mm (1/6 inch) unprintable border around the page. Considerations for printing or scanning documents with cropped edges: ● When the original is smaller than the output size, move the original 4 mm (1/6 inch) away from the corner indicated by the icon on the scanner. Recopy or scan in this position. ● When the original is the size of the printed output that you want, use the Reduce/Enlarge feature to reduce the image so the copy is not cropped. ENWW Improve copy and scan image quality 155
-
 1
1 -
2
-
3
-
4
-
5
-
6
-
7
-
8
-
9
-
10
-
11
-
12
-
13
-
14
-
15
-
16
-
17
-
18
-
19
-
20
-
21
-
22
-
23
-
24
-
25
-
26
-
27
-
28
-
29
-
30
-
31
-
32
-
33
-
34
-
35
-
36
-
37
-
38
-
39
-
40
-
41
-
42
-
43
-
44
-
45
-
46
-
47
-
48
-
49
-
50
-
51
-
52
-
53
-
54
-
55
-
56
-
57
-
58
-
59
-
60
-
61
-
62
-
63
-
64
-
65
-
66
-
67
-
68
-
69
-
70
-
71
-
72
-
73
-
74
-
75
-
76
-
77
-
78
-
79
-
80
-
81
-
82
-
83
-
84
-
85
-
86
-
87
-
88
-
89
-
90
-
91
-
92
-
93
-
94
-
95
-
96
-
97
-
98
-
99
-
100
-
101
-
102
-
103
-
104
-
105
-
106
-
107
-
108
-
109
-
110
-
111
-
112
-
113
-
114
-
115
-
116
-
117
-
118
-
119
-
120
-
121
-
122
-
123
-
124
-
125
-
126
-
127
-
128
-
129
-
130
-
131
-
132
-
133
-
134
-
135
-
136
-
137
-
138
-
139
-
140
-
141
-
142
-
143
-
144
-
145
-
146
-
147
-
148
-
149
-
150
-
151
-
152
-
153
-
154
-
155
-
156
-
157
-
158
-
159
-
160
-
161
-
 162
162 -
 163
163 -
 164
164 -
 165
165 -
 166
166 -
 167
167 -
 168
168 -
 169
169 -
 170
170 -
 171
171 -
 172
172 -
173
-
174
-
175
-
176
-
177
-
178
-
179
-
180
-
181
-
182
-
183
-
184
-
185
-
186
 |
 |
