HP LaserJet Pro MFP M426-M427 User Guide - Page 8

Advanced configuration with HP Embedded Web Server EWS and HP Device Toolbox Windows

Page 8 highlights

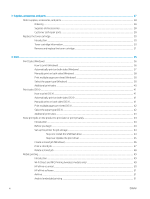
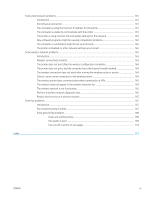
Step three: Add contacts to the E-mail Address Book 74 Step four: Configure the default E-mail Options 74 Set up the Scan to E-mail feature on a Mac 75 Step one: Access the HP Embedded Web Server (EWS 75 Method one: Use a Web browser to open the HP Embedded Web Server (EWS) ...75 Method two: Use the HP Utility to open the HP Embedded Web Server (EWS) ...75 Step two: Configure the Scan to E-mail feature 75 Step three: Add contacts to the E-mail Address Book 77 Step four: Configure the default E-mail Options 77 Scan to email ...79 Additional scan tasks ...80 7 Fax ...81 Set up to send and receive faxes ...82 Before starting ...82 Step 1: Identify the phone connection type 82 Step 2: Set up the fax ...83 Dedicated phone line ...83 Shared voice/fax line ...84 Shared voice/fax line with an answering machine 85 Step 3: Configure the fax time, date, and header 86 HP Fax Setup Wizard ...87 Printer control panel ...87 HP Embedded Web Server (EWS) and HP Device Toolbox (Windows 87 Step 4: Run a fax test ...88 Send a fax ...89 Fax from the flatbed scanner ...89 Fax from the document feeder ...90 Use speed dials and group-dial entries ...90 Send a fax from the software ...91 Send a fax from a third-party software program, such as Microsoft Word 91 Additional fax tasks ...92 8 Manage the printer ...93 Use HP Web Services applications ...94 Change the printer connection type (Windows) ...95 Advanced configuration with HP Embedded Web Server (EWS) and HP Device Toolbox (Windows 96 Advanced configuration with HP Utility for OS X ...99 Open HP Utility ...99 vi ENWW

  • 1
  • 2
  • 3
  • 4
  • 5
  • 6
  • 7
  • 8
  • 9
  • 10
  • 11
  • 12
  • 13
  • 14
  • 15
  • 16
  • 17
  • 18
  • 19
  • 20
  • 21
  • 22
  • 23
  • 24
  • 25
  • 26
  • 27
  • 28
  • 29
  • 30
  • 31
  • 32
  • 33
  • 34
  • 35
  • 36
  • 37
  • 38
  • 39
  • 40
  • 41
  • 42
  • 43
  • 44
  • 45
  • 46
  • 47
  • 48
  • 49
  • 50
  • 51
  • 52
  • 53
  • 54
  • 55
  • 56
  • 57
  • 58
  • 59
  • 60
  • 61
  • 62
  • 63
  • 64
  • 65
  • 66
  • 67
  • 68
  • 69
  • 70
  • 71
  • 72
  • 73
  • 74
  • 75
  • 76
  • 77
  • 78
  • 79
  • 80
  • 81
  • 82
  • 83
  • 84
  • 85
  • 86
  • 87
  • 88
  • 89
  • 90
  • 91
  • 92
  • 93
  • 94
  • 95
  • 96
  • 97
  • 98
  • 99
  • 100
  • 101
  • 102
  • 103
  • 104
  • 105
  • 106
  • 107
  • 108
  • 109
  • 110
  • 111
  • 112
  • 113
  • 114
  • 115
  • 116
  • 117
  • 118
  • 119
  • 120
  • 121
  • 122
  • 123
  • 124
  • 125
  • 126
  • 127
  • 128
  • 129
  • 130
  • 131
  • 132
  • 133
  • 134
  • 135
  • 136
  • 137
  • 138
  • 139
  • 140
  • 141
  • 142
  • 143
  • 144
  • 145
  • 146
  • 147
  • 148
  • 149
  • 150
  • 151
  • 152
  • 153
  • 154
  • 155
  • 156
  • 157
  • 158
  • 159
  • 160
  • 161
  • 162
  • 163
  • 164
  • 165
  • 166
  • 167
  • 168
  • 169
  • 170
  • 171
  • 172
  • 173
  • 174
  • 175
  • 176
  • 177
  • 178
  • 179
  • 180
  • 181
  • 182
  • 183
  • 184
  • 185
  • 186

Step three: Add contacts to the E-mail Address Book
............................................................
74
Step four: Configure the default E-mail Options
......................................................................
74
Set up the Scan to E-mail feature on a Mac
..................................................................................................
75
Step one: Access the HP Embedded Web Server (EWS)
.........................................................
75
Method one: Use a Web browser to open the HP Embedded Web Server
(EWS)
..........................................................................................................................
75
Method two: Use the HP Utility to open the HP Embedded Web Server
(EWS)
..........................................................................................................................
75
Step two: Configure the Scan to E-mail feature
.......................................................................
75
Step three: Add contacts to the E-mail Address Book
............................................................
77
Step four: Configure the default E-mail Options
......................................................................
77
Scan to email
..........................................................................................................................................................................
79
Additional scan tasks
.............................................................................................................................................................
80
7
Fax
.............................................................................................................................................................................................................
81
Set up to send and receive faxes
.........................................................................................................................................
82
Before starting
...................................................................................................................................................
82
Step 1: Identify the phone connection type
..................................................................................................
82
Step 2: Set up the fax
........................................................................................................................................
83
Dedicated phone line
....................................................................................................................
83
Shared voice/fax line
....................................................................................................................
84
Shared voice/fax line with an answering machine
..................................................................
85
Step 3: Configure the fax time, date, and header
.........................................................................................
86
HP Fax Setup Wizard
....................................................................................................................
87
Printer control panel
.....................................................................................................................
87
HP Embedded Web Server (EWS) and HP Device Toolbox (Windows)
.................................
87
Step 4: Run a fax test
........................................................................................................................................
88
Send a fax
................................................................................................................................................................................
89
Fax from the flatbed scanner
..........................................................................................................................
89
Fax from the document feeder
.......................................................................................................................
90
Use speed dials and group-dial entries
.........................................................................................................
90
Send a fax from the software
..........................................................................................................................
91
Send a fax from a third-party software program, such as Microsoft Word
.............................................
91
Additional fax tasks
...............................................................................................................................................................
92
8
Manage the printer
.................................................................................................................................................................................
93
Use HP Web Services applications
.......................................................................................................................................
94
Change the printer connection type (Windows)
................................................................................................................
95
Advanced configuration with HP Embedded Web Server (EWS) and HP Device Toolbox (Windows)
.......................
96
Advanced configuration with HP Utility for OS X
...............................................................................................................
99
Open HP Utility
...................................................................................................................................................
99
vi
ENWW