HP NC382m HP Broadcom iSCSI Boot for NC382x Adapters User Guide - Page 10
Installation using iSCSI driver - performance
 |
View all HP NC382m manuals
Add to My Manuals
Save this manual to your list of manuals |
Page 10 highlights
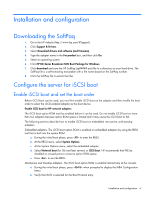
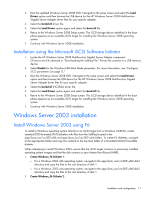
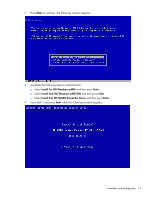
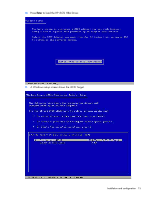
1. The Microsoft Windows Automated Installation Kit (AIK) file (6001.18000.080118-1840kb3aikl_en.iso) is designed to help perform unattended Windows installations. Select this link to download the AIK "Automated Installation Kit for Windows 2008 (http://www.microsoft.com/downloads/details.aspx?FamilyID=94BB6E34-D890-4932-81A55B50C657DE08&displaylang=en)." 2. After downloading the AIK file, burn the ISO image to a DVD. 3. Insert the DVD into the CD/DVD drive, and then select Windows AIK Setup to install AIK from the installation window. 4. Copy of the entire contents of the Windows 2008 DVD to a folder labeled W2K8 DVD. 5. From the Windows desktop, start the command prompt in the Windows AIK by selecting Start -> All Programs -> Microsoft Windows AIK -> Windows PE Tools Command Prompt. 6. Create the following work folders using the Mkdir command. Mkdir HPNicUpdate Mkdir HPNicUpdate\drivers Mkdir HPNicUpdate\wim 7. Use the following command to copy the boot WIM image from the Windows Server 2008 media DVD folder to the WIM work folder. copy \sources\boot.wim HPNicUpdate\wim 8. Locate the HP CP00xxxx.exe Windows 2008 Multifunction Gigabit Server Adapter driver component file that was obtained from "Downloading the SoftPaq (on page 6)." \HPNicUpdate\drivers 9. Create a folder as a share point and attach the WIM Image to it using the following MKDIR command: mkdir HPNicUpdate\MountPoint 10. From the Windows AIK command window, mount the boot WIM using the following command: imagex /mountrw HPNicUpdate\Wim\boot.wim 2 HPNicUpdate\MountPoint The WIM boot image appears under the MountPoint folder. 11. Add the HP Multifunction Gigabit Server Adapter drivers for your specific adapter to the boot image using the following commands: peimg /inf=.\HPNicUpdate\drivers\evbd.inf /image=.\HPNicUpdate\MountPoint\Windows peimg /inf=.\HPNicUpdate\drivers\bxois.inf /image=.\HPNicUpdate\MountPoint\Windows 12. Save the changes to the WIM using the following command: imagex/unmount/commit.\HPNicUpdate\MountPoint 13. Replace the original sources\boot.wim image (located in the W2K8 DVD folder you created in step 2) with the HPNicUpdate\Wim\boot.wim image and then create a new DVD image. Installation using iSCSI driver 1. Locate the HP Windows Server 2008 Multifunction Gigabit Server Adapter component CPxxxxxx.exe file obtained in "Downloading the SoftPaq File." Extract the contents to a USB memory device. 2. Select Enable for the Windows HBA Boot Mode parameter. For more information, see "Configure iSCSi parameters (on page 7)." Installation and configuration 10
-
 1
1 -
2
-
3
-
4
-
 5
5 -
 6
6 -
 7
7 -
 8
8 -
 9
9 -
 10
10 -
 11
11 -
 12
12 -
 13
13 -
 14
14 -
 15
15 -
16
-
17
-
18
-
19
-
20
-
21
-
22
-
23
-
24
-
25
 |
 |