HP P2015dn HP LaserJet P2015 - Software Technical Reference - Page 231
Installable Options, Collation in Printer, Tray 3, Duplex Unit, Continue, Printer, Printer List
 |
UPC - 882780492462
View all HP P2015dn manuals
Add to My Manuals
Save this manual to your list of manuals |
Page 231 highlights
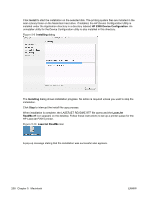
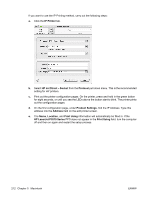
6. Click Add. The Installable Options screen appears. Figure 5-15 Installable Options screen 7. In the Collation in Printer drop-down menu, select one of the following options, depending on the device configuration: ● Yes - Total RAM > 96 MB or Hard Disk ● No - Total RAM < 96 MB and No Hard Disk 8. If the device has the optional 250-sheet tray 3, select Tray 3. 9. If the device has a duplex unit (a standard feature on the HP LaserJet P2015dn and the HP LaserJet P2015x models), select the Duplex Unit check box. 10. After selecting the installable options, click Continue. The device name appears in the Printer List and the setup is complete. Figure 5-16 Printer List screen Macintosh ENWW Macintosh install and uninstall instructions 213
-
 1
1 -
2
-
3
-
4
-
5
-
6
-
7
-
8
-
9
-
10
-
11
-
12
-
13
-
14
-
15
-
16
-
17
-
18
-
19
-
20
-
21
-
22
-
23
-
24
-
25
-
26
-
27
-
28
-
29
-
30
-
31
-
32
-
33
-
34
-
35
-
36
-
37
-
38
-
39
-
40
-
41
-
42
-
43
-
44
-
45
-
46
-
47
-
48
-
49
-
50
-
51
-
52
-
53
-
54
-
55
-
56
-
57
-
58
-
59
-
60
-
61
-
62
-
63
-
64
-
65
-
66
-
67
-
68
-
69
-
70
-
71
-
72
-
73
-
74
-
75
-
76
-
77
-
78
-
79
-
80
-
81
-
82
-
83
-
84
-
85
-
86
-
87
-
88
-
89
-
90
-
91
-
92
-
93
-
94
-
95
-
96
-
97
-
98
-
99
-
100
-
101
-
102
-
103
-
104
-
105
-
106
-
107
-
108
-
109
-
110
-
111
-
112
-
113
-
114
-
115
-
116
-
117
-
118
-
119
-
120
-
121
-
122
-
123
-
124
-
125
-
126
-
127
-
128
-
129
-
130
-
131
-
132
-
133
-
134
-
135
-
136
-
137
-
138
-
139
-
140
-
141
-
142
-
143
-
144
-
145
-
146
-
147
-
148
-
149
-
150
-
151
-
152
-
153
-
154
-
155
-
156
-
157
-
158
-
159
-
160
-
161
-
162
-
163
-
164
-
165
-
166
-
167
-
168
-
169
-
170
-
171
-
172
-
173
-
174
-
175
-
176
-
177
-
178
-
179
-
180
-
181
-
182
-
183
-
184
-
185
-
186
-
187
-
188
-
189
-
190
-
191
-
192
-
193
-
194
-
195
-
196
-
197
-
198
-
199
-
200
-
201
-
202
-
203
-
204
-
205
-
206
-
207
-
208
-
209
-
210
-
211
-
212
-
213
-
214
-
215
-
216
-
217
-
218
-
219
-
220
-
221
-
222
-
223
-
224
-
225
-
 226
226 -
 227
227 -
 228
228 -
 229
229 -
 230
230 -
 231
231 -
 232
232 -
 233
233 -
 234
234 -
 235
235 -
 236
236 -
237
-
238
-
239
-
240
-
241
-
242
-
243
-
244
-
245
-
246
-
247
-
248
-
249
-
250
-
251
-
252
-
253
-
254
-
255
-
256
-
257
-
258
-
259
-
260
-
261
-
262
-
263
-
264
-
265
-
266
-
267
-
268
-
269
-
270
-
271
-
272
-
273
-
274
-
275
-
276
-
277
-
278
-
279
-
280
-
281
-
282
-
283
-
284
 |
 |
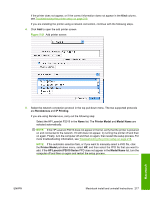
6.
Click
Add
. The
Installable Options
screen appears.
Figure 5-15
Installable Options
screen
7.
In the
Collation in Printer
drop-down menu, select one of the following options, depending on the
device configuration:
●
Yes – Total RAM > 96 MB or Hard Disk
●
No – Total RAM < 96 MB and No Hard Disk
8.
If the device has the optional 250-sheet tray 3, select
Tray 3
.
9.
If the device has a duplex unit (a standard feature on the HP LaserJet P2015dn and the
HP LaserJet P2015x models), select the
Duplex Unit
check box.
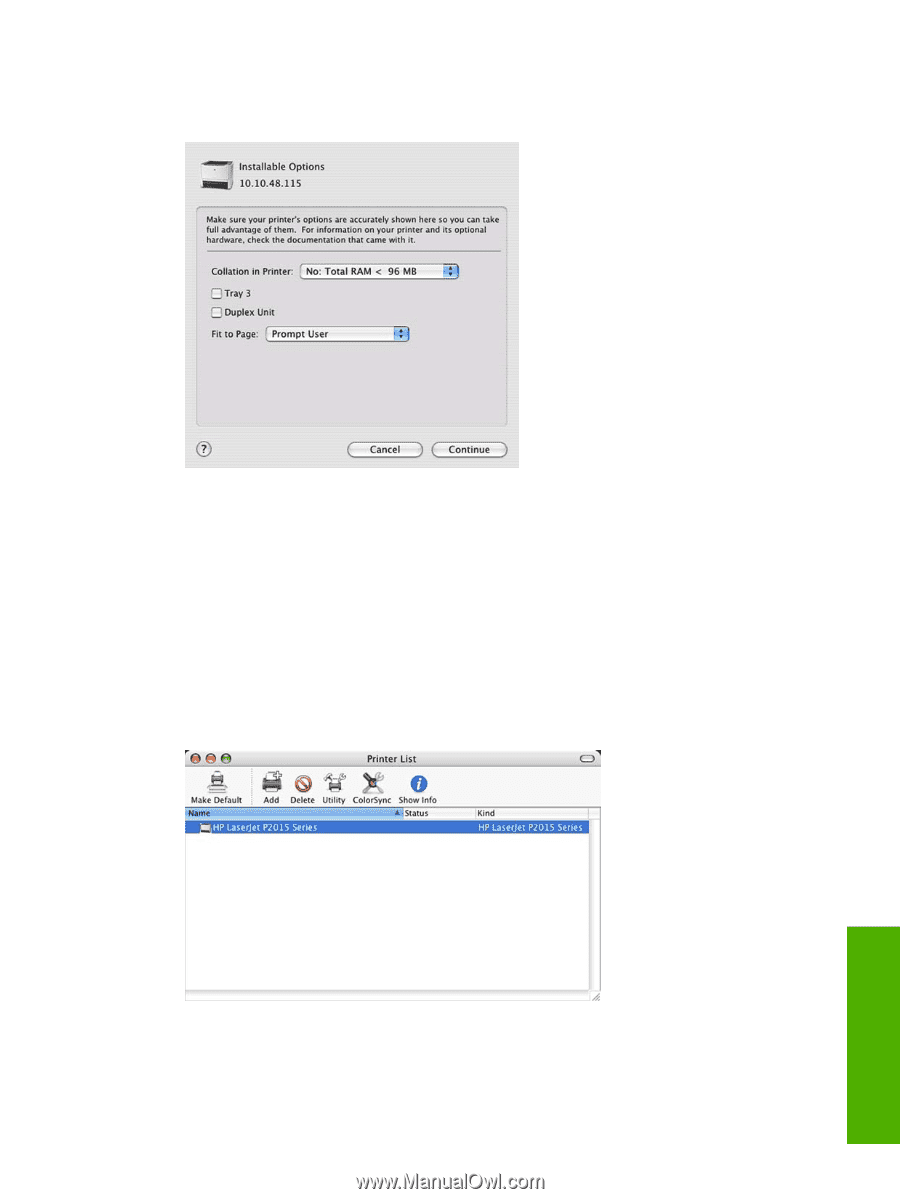
10.
After selecting the installable options, click
Continue
. The device name appears in the
Printer
List
and the setup is complete.
Figure 5-16
Printer List
screen
ENWW
Macintosh install and uninstall instructions
213
Macintosh