HP Pavilion 10-n100 Maintenance and Service Guide - Page 54
Hard drive (select products only
 |
View all HP Pavilion 10-n100 manuals
Add to My Manuals
Save this manual to your list of manuals |
Page 54 highlights
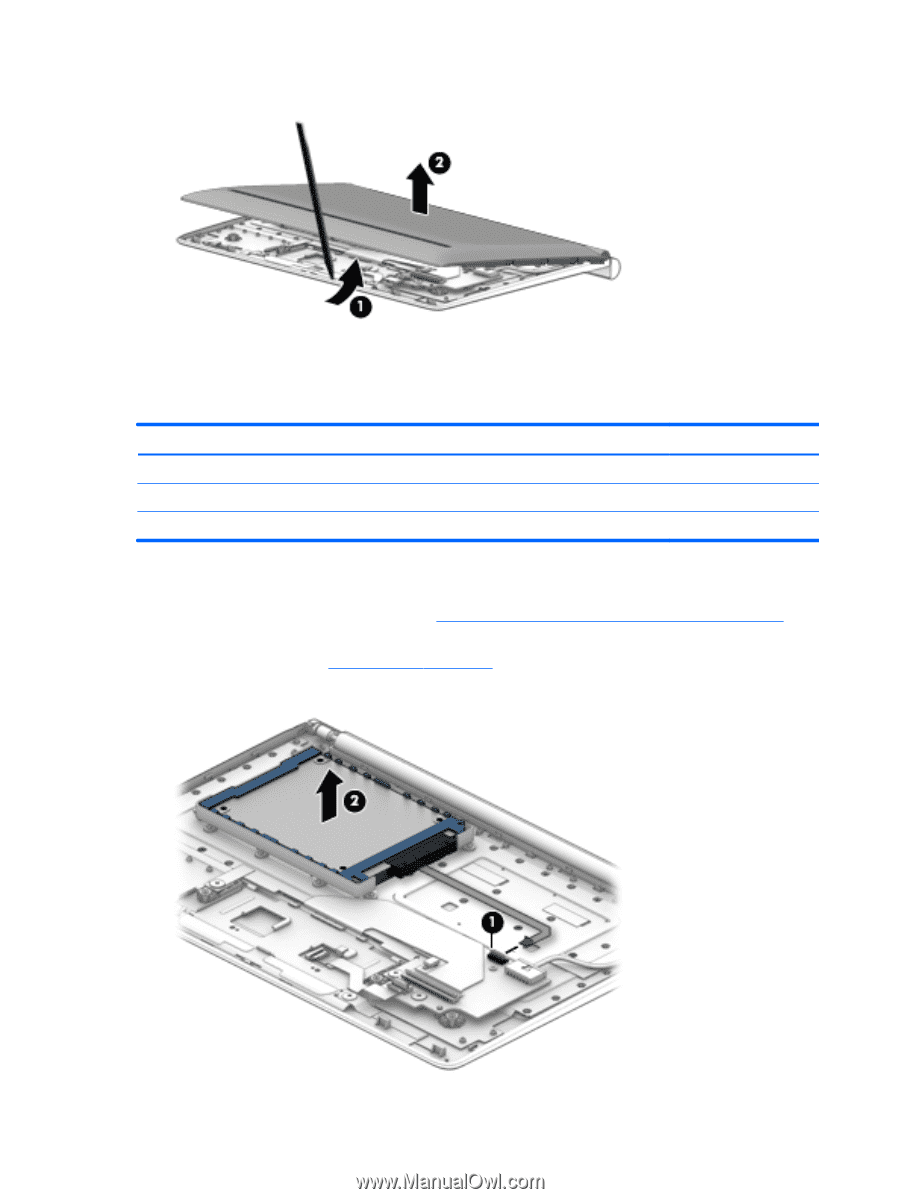
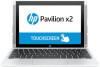
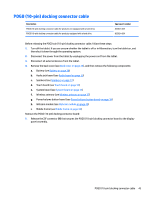
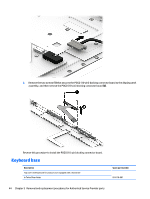
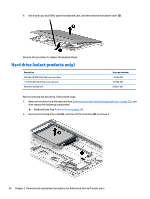
4. Use a nylon pry tool (1) to open the keyboard case, and then remove the bottom cover (2). Reverse this procedure to replace the keyboard base. Hard drive (select products only) Description 500 GB 5400 RPM SATA RAW 7mm hard drive 1 TB 5400 RPM SATA RAW 7mm hard drive Hard drive hardware kit Spare part number 778186-005 762990-005 833637-001 Before removing the hard drive, follow these steps: 1. Remove the tablet from the keyboard (see Releasing the tablet from the keyboard base on page 25), and then remove the following components: ▲ Keyboard base (see Keyboard base on page 44). 2. Disconnect the hard drive cable(1), and then lift the hard drive (2) to remove it. 46 Chapter 5 Removal and replacement procedures for Authorized Service Provider parts
-
 1
1 -
2
-
3
-
4
-
5
-
6
-
7
-
8
-
9
-
10
-
11
-
12
-
13
-
14
-
15
-
16
-
17
-
18
-
19
-
20
-
21
-
22
-
23
-
24
-
25
-
26
-
27
-
28
-
29
-
30
-
31
-
32
-
33
-
34
-
35
-
36
-
37
-
38
-
39
-
40
-
41
-
42
-
43
-
44
-
45
-
46
-
47
-
48
-
 49
49 -
 50
50 -
 51
51 -
 52
52 -
 53
53 -
 54
54 -
 55
55 -
 56
56 -
 57
57 -
 58
58 -
 59
59 -
60
-
61
-
62
-
63
-
64
-
65
-
66
-
67
-
68
-
69
-
70
-
71
-
72
-
73
-
74
-
75
-
76
-
77
-
78
-
79
-
80
-
81
-
82
-
83
-
84
-
85
-
86
-
87
-
88
 |
 |