HP Pavilion dv7-4200 Notebook Essentials - Windows 7 - Page 26
Step 2: Purchase and install a wireless router
 |
View all HP Pavilion dv7-4200 manuals
Add to My Manuals
Save this manual to your list of manuals |
Page 26 highlights
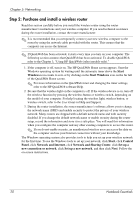
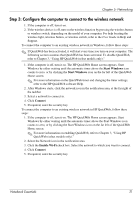
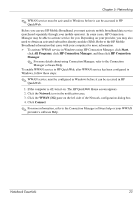
Chapter 5: Networking Step 2: Purchase and install a wireless router Read this section carefully before you install the wireless router using the router manufacturer's instructions and your wireless computer. If you need technical assistance during the router installation, contact the router manufacturer. ✎ It is recommended that you temporarily connect your new wireless computer to the router by using the network cable provided with the router. This ensures that the computer can access the Internet. ✎ If QuickWeb has been activated, it starts every time you turn on your computer. The following section assumes that QuickWeb has been activated. To disable QuickWeb, refer to the Chapter 3, "Using HP QuickWeb (select models only)." 1. If the computer is off, turn it on. The HP QuickWeb Home screen appears. Start the Windows operating system by waiting until the automatic timer above the Start Windows icon counts to zero or by clicking on the Start Windows icon on the far left of the QuickWeb Home screen. ✎ For more information on the QuickWeb timer and changing the timer settings, refer to the HP QuickWeb software Help. 2. Be sure that the wireless light on the computer is off. If the wireless device is on, turn off the wireless function by pressing the wireless button or wireless switch, depending on the model of your computer. For help locating the wireless light, wireless button, or wireless switch, refer to the User Guide in Help and Support. 3. During the router installation, the router manufacturer's software allows you to change the network name (SSID) and enable security to protect the privacy of your wireless network. Many routers are shipped with a default network name and with security disabled. If you change the default network name or enable security during the router setup, record the information and store it in a safe place. You will need this information when you configure the computer and any other existing computers to access the router. ✎ If you do not enable security, an unauthorized wireless user can access the data on the computer and use your Internet connection without your knowledge. The Windows operating system also provides tools to help you set up your wireless network for the first time. To use the Windows tools to set up your network, click Start, click Control Panel, click Network and Internet, click Network and Sharing Center, click Set up a new connection or network, click Set up a new network, and then click Next. Follow the on-screen instructions. 20 Notebook Essentials
-
 1
1 -
2
-
3
-
4
-
5
-
6
-
7
-
8
-
9
-
10
-
11
-
12
-
13
-
14
-
15
-
16
-
17
-
18
-
19
-
20
-
 21
21 -
 22
22 -
 23
23 -
 24
24 -
 25
25 -
 26
26 -
 27
27 -
 28
28 -
 29
29 -
 30
30 -
 31
31 -
32
-
33
-
34
-
35
-
36
-
37
-
38
-
39
-
40
-
41
-
42
-
43
-
44
-
45
-
46
-
47
-
48
-
49
-
50
 |
 |