HP Photosmart 715 HP Photosmart 715 digital camera - (English) User Guide - Page 11
Setup - digital camera
 |
View all HP Photosmart 715 manuals
Add to My Manuals
Save this manual to your list of manuals |
Page 11 highlights
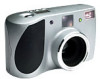
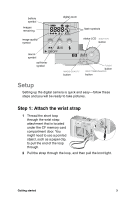
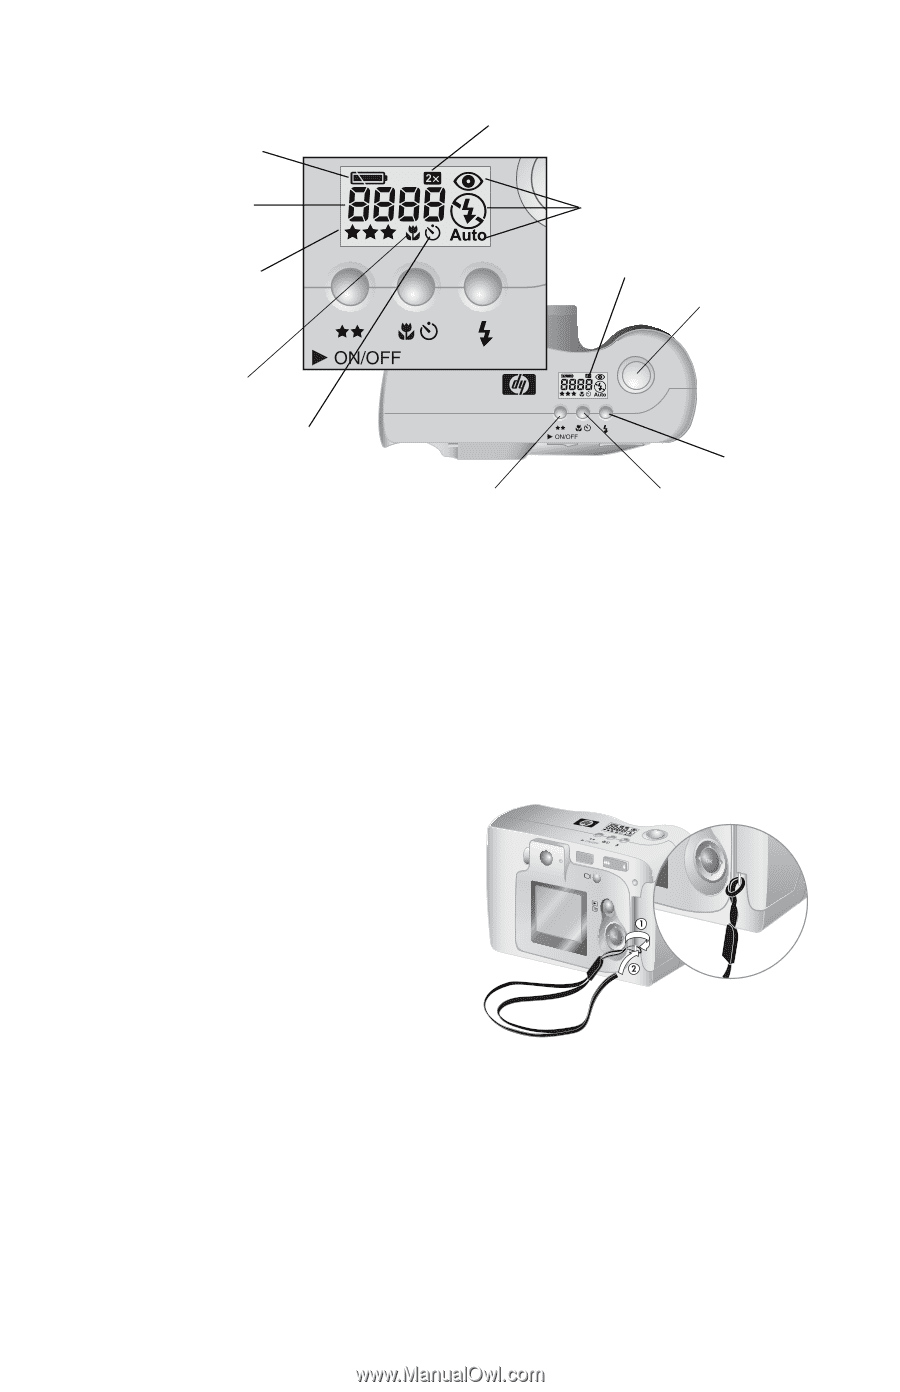
battery symbol images remaining image quality symbol digital zoom flash symbols status LCD SHUTTER button macro symbol self-timer symbol IMAGE QUALITY button FLASH button SELF-TIMER/MACRO button Setup Setting up the digital camera is quick and easy-follow these steps and you will be ready to take pictures. Step 1: Attach the wrist strap 1 Thread the short loop through the wrist strap attachment that is located under the CF memory card compartment door. You might need to use a pointed object, such as a paper clip, to pull the end of the loop through. 2 Pull the strap through the loop, and then pull the knot tight. Getting started 3
-
 1
1 -
2
-
3
-
4
-
5
-
 6
6 -
 7
7 -
 8
8 -
 9
9 -
 10
10 -
 11
11 -
 12
12 -
 13
13 -
 14
14 -
 15
15 -
 16
16 -
17
-
18
-
19
-
20
-
21
-
22
-
23
-
24
-
25
-
26
-
27
-
28
-
29
-
30
-
31
-
32
-
33
-
34
-
35
-
36
-
37
-
38
-
39
-
40
-
41
-
42
-
43
-
44
-
45
-
46
-
47
-
48
-
49
-
50
-
51
-
52
-
53
-
54
-
55
-
56
-
57
-
58
-
59
-
60
-
61
-
62
-
63
-
64
-
65
-
66
-
67
-
68
-
69
-
70
-
71
-
72
-
73
-
74
-
75
-
76
-
77
-
78
-
79
-
80
-
81
-
82
-
83
-
84
 |
 |
Getting started
3
Setup
Setting up the digital camera is quick and easy—follow these
steps and you will be ready to take pictures.
Step 1: Attach the wrist strap
1
Thread the short loop
through the wrist strap
attachment that is located
under the CF memory card
compartment door. You
might need to use a pointed
object, such as a paper clip,
to pull the end of the loop
through.
2
Pull the strap through the loop, and then pull the knot tight.
macro
symbol
self-timer
symbol
image quality
symbol
images
remaining
battery
symbol
digital zoom
flash symbols
SELF
-
TIMER
/
MACRO
button
FLASH
button
IMAGE
QUALITY
button
SHUTTER
button
status LCD