HP Photosmart D7500 User Guide - Page 71
Save photos to your computer, To create special projects, Found, Create, Album s, Panorama Prints - series software
 |
View all HP Photosmart D7500 manuals
Add to My Manuals
Save this manual to your list of manuals |
Page 71 highlights
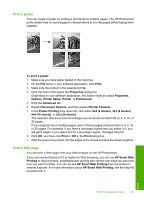
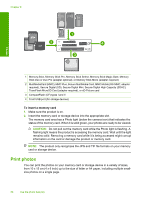
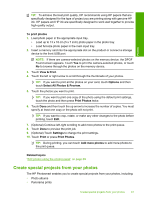
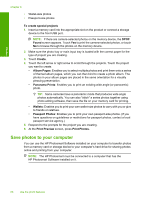
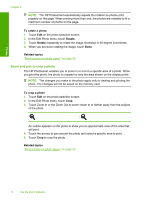
Photos Chapter 8 • Wallet-size photos • Passport-size photos To create special projects 1. Insert a memory card into the appropriate slot on the product or connect a storage device to the front USB port. NOTE: If there are camera-selected photos on the memory device, the DPOF Found screen appears. Touch Yes to print the camera-selected photos, or touch No to browse through the photos on the memory device. 2. Make sure the photo tray or main input tray is loaded with the correct paper for the type of project you are creating. 3. Touch Create. 4. Touch the left arrow or right arrow to scroll through the projects. Touch the project you want to create. • Album Pages: Enables you to select multiple photos and print them onto a series of themed album pages, which you can then bind to create a photo album. The photos in your album pages are placed in the same orientation for a visually pleasing presentation. • Panorama Prints: Enables you to print an existing wide angle (or panoramic) photo. TIP: Some cameras have a panoramic mode that produces wide angle photos automatically. You can also "stitch" a series photos together using photo editing software, then save the file on your memory card for printing. • Wallets: Enables you to print your own wallet-size photos to carry with you or give to friends or relatives. • Passport Photos: Enables you to print your own passport-size photos. (If you have questions on guidelines or restrictions for passport photos, contact a local passport service agency.) 5. Respond to the prompts for the project you are creating. 6. At the Print Preview screen, press Print Photos. Save photos to your computer You can use the HP Photosmart Software installed on your computer to transfer photos from a memory card or storage device to your computer's hard drive for sharing photos online and printing from your computer. NOTE: The HP Photosmart must be connected to a computer that has the HP Photosmart Software installed on it. 68 Use the photo features
-
 1
1 -
2
-
3
-
4
-
5
-
6
-
7
-
8
-
9
-
10
-
11
-
12
-
13
-
14
-
15
-
16
-
17
-
18
-
19
-
20
-
21
-
22
-
23
-
24
-
25
-
26
-
27
-
28
-
29
-
30
-
31
-
32
-
33
-
34
-
35
-
36
-
37
-
38
-
39
-
40
-
41
-
42
-
43
-
44
-
45
-
46
-
47
-
48
-
49
-
50
-
51
-
52
-
53
-
54
-
55
-
56
-
57
-
58
-
59
-
60
-
61
-
62
-
63
-
64
-
65
-
 66
66 -
 67
67 -
 68
68 -
 69
69 -
 70
70 -
 71
71 -
 72
72 -
 73
73 -
 74
74 -
 75
75 -
 76
76 -
77
-
78
-
79
-
80
-
81
-
82
-
83
-
84
-
85
-
86
-
87
-
88
-
89
-
90
-
91
-
92
-
93
-
94
-
95
-
96
-
97
-
98
-
99
-
100
-
101
-
102
-
103
-
104
-
105
-
106
-
107
-
108
-
109
-
110
-
111
-
112
-
113
-
114
-
115
-
116
-
117
-
118
-
119
-
120
-
121
-
122
-
123
-
124
-
125
-
126
-
127
-
128
-
129
-
130
-
131
-
132
-
133
-
134
-
135
-
136
-
137
-
138
-
139
-
140
-
141
-
142
-
143
-
144
-
145
-
146
-
147
-
148
-
149
-
150
-
151
-
152
-
153
-
154
-
155
-
156
-
157
-
158
-
159
-
160
-
161
-
162
-
163
-
164
-
165
-
166
-
167
-
168
-
169
-
170
-
171
-
172
-
173
-
174
-
175
-
176
-
177
-
178
-
179
-
180
-
181
-
182
-
183
-
184
-
185
-
186
-
187
-
188
-
189
-
190
-
191
-
192
-
193
-
194
-
195
-
196
-
197
-
198
-
199
-
200
-
201
-
202
-
203
-
204
-
205
-
206
-
207
-
208
-
209
-
210
-
211
-
212
-
213
-
214
-
215
-
216
-
217
-
218
-
219
-
220
-
221
-
222
-
223
-
224
-
225
-
226
-
227
-
228
-
229
-
230
-
231
-
232
-
233
-
234
-
235
-
236
-
237
 |
 |
