HP Photosmart Premium Fax e-All-in-One Printer - C410 User Guide - Page 157
Advanced Fax Setup, Error Correction Mode
 |
View all HP Photosmart Premium Fax e-All-in-One Printer - C410 manuals
Add to My Manuals
Save this manual to your list of manuals |
Page 157 highlights
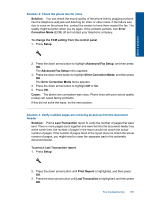
Solve a problem Solution 2: Check the phone line for noise Solution: You can check the sound quality of the phone line by plugging a phone into the telephone wall jack and listening for static or other noise. If the failure was due to noise on the phone line, contact the sender to have them resend the fax. The quality might be better when you try again. If the problem persists, turn Error Correction Mode (ECM) off and contact your telephone company. To change the ECM setting from the control panel 1. Press Setup. 2. Press the down arrow button to highlight Advanced Fax Setup, and then press OK. The Advanced Fax Setup menu appears. 3. Press the down arrow button to highlight Error Correction Mode, and then press OK. The Error Correction Mode menu appears. 4. Press the down arrow button to highlight Off or On. 5. Press OK. Cause: The phone line connection was noisy. Phone lines with poor sound quality (noise) can cause faxing problems. If this did not solve the issue, try the next solution. Solution 3: Verify multiple pages are not being picked up from the document feeeder Solution: Print a Last Transaction report to verify the number of pages that were sent. If two or more pages stuck together and were fed into the document feeder tray at the same time, the number of pages in the report would not match the actual number of pages. If the number of pages listed in the report does not match the actual number of pages, you might need to clean the separator pad in the automatic document feeder. To print a Last Transaction report 1. Press Setup. 2. Press the down arrow button until Print Report is highlighted, and then press OK. 3. Press the down arrow button until Last Transaction is highlighted, and then press OK. Fax troubleshooting 155
-
 1
1 -
2
-
3
-
4
-
5
-
6
-
7
-
8
-
9
-
10
-
11
-
12
-
13
-
14
-
15
-
16
-
17
-
18
-
19
-
20
-
21
-
22
-
23
-
24
-
25
-
26
-
27
-
28
-
29
-
30
-
31
-
32
-
33
-
34
-
35
-
36
-
37
-
38
-
39
-
40
-
41
-
42
-
43
-
44
-
45
-
46
-
47
-
48
-
49
-
50
-
51
-
52
-
53
-
54
-
55
-
56
-
57
-
58
-
59
-
60
-
61
-
62
-
63
-
64
-
65
-
66
-
67
-
68
-
69
-
70
-
71
-
72
-
73
-
74
-
75
-
76
-
77
-
78
-
79
-
80
-
81
-
82
-
83
-
84
-
85
-
86
-
87
-
88
-
89
-
90
-
91
-
92
-
93
-
94
-
95
-
96
-
97
-
98
-
99
-
100
-
101
-
102
-
103
-
104
-
105
-
106
-
107
-
108
-
109
-
110
-
111
-
112
-
113
-
114
-
115
-
116
-
117
-
118
-
119
-
120
-
121
-
122
-
123
-
124
-
125
-
126
-
127
-
128
-
129
-
130
-
131
-
132
-
133
-
134
-
135
-
136
-
137
-
138
-
139
-
140
-
141
-
142
-
143
-
144
-
145
-
146
-
147
-
148
-
149
-
150
-
151
-
 152
152 -
 153
153 -
 154
154 -
 155
155 -
 156
156 -
 157
157 -
 158
158 -
 159
159 -
 160
160 -
 161
161 -
 162
162 -
163
-
164
-
165
-
166
-
167
-
168
-
169
-
170
-
171
-
172
-
173
-
174
-
175
-
176
-
177
-
178
-
179
-
180
-
181
-
182
-
183
-
184
-
185
-
186
-
187
-
188
-
189
-
190
-
191
-
192
-
193
-
194
-
195
-
196
-
197
-
198
-
199
-
200
-
201
-
202
-
203
-
204
-
205
-
206
-
207
-
208
-
209
-
210
-
211
-
212
-
213
-
214
-
215
-
216
-
217
-
218
-
219
-
220
-
221
-
222
-
223
-
224
-
225
-
226
-
227
-
228
-
229
-
230
-
231
-
232
-
233
-
234
-
235
-
236
-
237
-
238
-
239
-
240
-
241
-
242
-
243
-
244
-
245
-
246
-
247
-
248
-
249
-
250
-
251
-
252
-
253
-
254
-
255
-
256
-
257
-
258
-
259
-
260
-
261
-
262
-
263
-
264
 |
 |
