HP ProBook 6565b HP ProtectTools Getting Started - Windows 7 and Windows Vista - Page 77
Shredding, which assets to confirm before shredding, and which assets to exclude from shredding.
 |
View all HP ProBook 6565b manuals
Add to My Manuals
Save this manual to your list of manuals |
Page 77 highlights
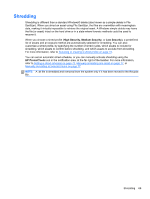
Shredding Shredding is different than a standard Windows® delete (also known as a simple delete in File Sanitizer). When you shred an asset using File Sanitizer, the files are overwritten with meaningless data, making it virtually impossible to retrieve the original asset. A Windows simple delete may leave the file (or asset) intact on the hard drive or in a state where forensic methods could be used to recover it. When you choose a shred profile (High Security, Medium Security, or Low Security), a predefined list of assets and an erasure method are automatically selected for shredding. You can also customize a shred profile, by specifying the number of shred cycles, which assets to include for shredding, which assets to confirm before shredding, and which assets to exclude from shredding. For more information, refer to Selecting or creating a shred profile on page 73. You can set an automatic shred schedule, or you can manually activate shredding using the HP ProtectTools icon in the notification area, at the far right of the taskbar. For more information, refer to Setting a shred schedule on page 72, Manually shredding one asset on page 77, or Manually shredding all selected items on page 77. NOTE: A .dll file is shredded and removed from the system only if it has been moved to the Recycle Bin. Shredding 69
-
 1
1 -
2
-
3
-
4
-
5
-
6
-
7
-
8
-
9
-
10
-
11
-
12
-
13
-
14
-
15
-
16
-
17
-
18
-
19
-
20
-
21
-
22
-
23
-
24
-
25
-
26
-
27
-
28
-
29
-
30
-
31
-
32
-
33
-
34
-
35
-
36
-
37
-
38
-
39
-
40
-
41
-
42
-
43
-
44
-
45
-
46
-
47
-
48
-
49
-
50
-
51
-
52
-
53
-
54
-
55
-
56
-
57
-
58
-
59
-
60
-
61
-
62
-
63
-
64
-
65
-
66
-
67
-
68
-
69
-
70
-
71
-
 72
72 -
 73
73 -
 74
74 -
 75
75 -
 76
76 -
 77
77 -
 78
78 -
 79
79 -
 80
80 -
 81
81 -
 82
82 -
83
-
84
-
85
-
86
-
87
-
88
-
89
-
90
-
91
-
92
-
93
-
94
-
95
-
96
-
97
-
98
-
99
-
100
-
101
-
102
-
103
-
104
-
105
-
106
-
107
-
108
-
109
-
110
-
111
-
112
-
113
-
114
-
115
-
116
-
117
-
118
-
119
-
120
-
121
-
122
-
123
-
124
 |
 |