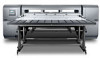
HP Scitex FB700 HP Scitex FB500 and FB700 Printer Series - User Guide - Page 20
Quick Load, Multi-sheet N-UP, Measure Media Type, Measure only on first load, Sheet Ready
 |
View all HP Scitex FB700 manuals
Add to My Manuals
Save this manual to your list of manuals |
Page 20 highlights
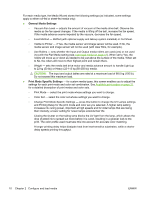
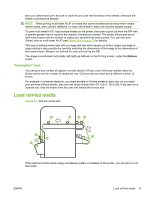
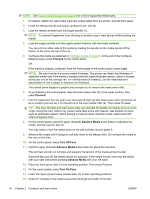
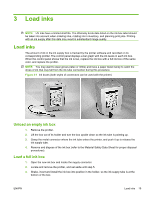
When you select a Measure Media option, the Measure Media Type menu appears. This enables you to select a trade-off between image placement accuracy and throughput. ● Minimal - measures the media width once, locates leading edge near the user side on subsequent loads. ● Standard - measures the media width once, estimates skew by locating the leading edge near the user and service sides on subsequent loads. ● One Edge - on first load, measures both edges; on subsequent loads, measures the left edge only. ● Maximal - on every load, measures the media width at two points to estimate skew, finds the leading edge near the user side. If the print job has wide margins, you can increase throughput with Minimal or One Edge. For edge-to-edge printing, increase accuracy by selecting Standard or Maximal. 4. Press a Measure Media Type option. After you select a Measure Media Type option, a message appears to remind you to load the same number of sheets with every N-UP group, until they have all been printed. Press Proceed to dismiss this message and return to the printer options menu. Quick Load After printing is complete, you can reload a sheet of the same media type and dimensions without reconfiguring the media. Use Quick Load or Load: NOTE: This option is available if you select Measure only on first load from the Measure Media Frequency menu (see Use the camera to locate the sheets on page 13). 1. Press Load on the Home Page screen. The control panel displays a menu with a Quick Load and Load option. ● To load a sheet of media with the same media type with the same dimensions as the previous job, press Quick Load. ● To load a sheet of media with the same media type with the same dimensions as the previous job, but different flatness, thickness, or number of N-UP sheets, press Load. The control panel allows you to respecify these options. 2. Place the media onto the media drive belt, and push it flush against the media alignment bar, then left along the media alignment bar until it touches the leftmost alignment pin. At this point, the control panel allows you to adjust the vacuum fans and head height off the media. 3. Press Sheet Ready on the control panel. The printer is ready to receive the next job from the RIP or Stored Jobs on the printer. Multi-sheet N-UP Multi-sheet N-UP allows you to print a multiple-copy job on multiple sheets across the belt, and multiple rows of sheets, until the job is complete. Use the built-in media alignment pins for quick positioning of the sheets across the printer's width. Align the left side of each sheet with one of the pins, with a small space from the right edge of the sheet to the next pin, to allow for variations in sheet dimensions. Alternatively, if you position the pins with zero clearance between the sheets and 14 Chapter 2 Configure and load media ENWW
-
 1
1 -
2
-
3
-
4
-
5
-
6
-
7
-
8
-
9
-
10
-
11
-
12
-
13
-
14
-
 15
15 -
 16
16 -
 17
17 -
 18
18 -
 19
19 -
 20
20 -
 21
21 -
 22
22 -
 23
23 -
 24
24 -
 25
25 -
26
-
27
-
28
-
29
-
30
-
31
-
32
-
33
-
34
-
35
-
36
-
37
-
38
-
39
-
40
-
41
-
42
-
43
-
44
-
45
-
46
-
47
-
48
-
49
-
50
-
51
-
52
-
53
-
54
-
55
-
56
-
57
-
58
-
59
-
60
-
61
-
62
-
63
-
64
-
65
-
66
-
67
-
68
-
69
-
70
-
71
-
72
-
73
-
74
-
75
-
76
-
77
-
78
-
79
-
80
-
81
-
82
-
83
-
84
-
85
-
86
-
87
-
88
-
89
-
90
-
91
-
92
-
93
-
94
-
95
-
96
-
97
-
98
-
99
-
100
-
101
-
102
 |
 |
