HP T5735 Troubleshooting Guide: HP t5730 and t5735 Thin Client - Page 12
Rear Panel Components, Installing the Antenna (Wireless Models), CAUTION
 |
UPC - 883585606238
View all HP T5735 manuals
Add to My Manuals
Save this manual to your list of manuals |
Page 12 highlights
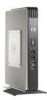
Rear Panel Components (1) Line-out audio connector (5) Serial connector (2) Ethernet RJ-45 connector (6) DVI-D connector (3) Universal serial bus (USB) connectors (4) (7) VGA connector (4) PS/2 connectors (2) (8) Power connector For more information, see the model-specific QuickSpecs at http://h18004.www1.hp.com/products/quickspecs/ QuickSpecs_Archives/QuickSpecs_Archives.html. Installing the Antenna (Wireless Models) ▲ Screw the antenna in place on top of the thin client. CAUTION: To prevent damage to the antenna mounting, do not overtighten the antenna. 4 Chapter 1 Product Description
-
 1
1 -
2
-
3
-
4
-
5
-
6
-
 7
7 -
 8
8 -
 9
9 -
 10
10 -
 11
11 -
 12
12 -
 13
13 -
 14
14 -
 15
15 -
 16
16 -
 17
17 -
18
-
19
-
20
-
21
-
22
-
23
-
24
-
25
-
26
-
27
-
28
-
29
-
30
-
31
-
32
-
33
-
34
-
35
-
36
-
37
-
38
-
39
-
40
-
41
-
42
-
43
-
44
-
45
-
46
-
47
-
48
-
49
 |
 |

Rear Panel Components
(1)
Line-out audio connector
(5)
Serial connector
(2)
Ethernet RJ-45 connector
(6)
DVI-D connector
(3)
Universal serial bus (USB) connectors (4)
(7)
VGA connector
(4)
PS/2 connectors (2)
(8)
Power connector
For more information, see the model-specific QuickSpecs at
products/quickspecs/
QuickSpecs_Archives/QuickSpecs_Archives.html
.
Installing the Antenna (Wireless Models)
▲
Screw the antenna in place on top of the thin client.
CAUTION:
To prevent damage to the antenna mounting, do not overtighten the antenna.
4
Chapter 1
Product Description