HP Tc2120 hp server tc2120 troubleshooting guide - Page 11
Basic Video Troubleshooting Guidelines, clearing CMOS
 |
UPC - 808736945332
View all HP Tc2120 manuals
Add to My Manuals
Save this manual to your list of manuals |
Page 11 highlights
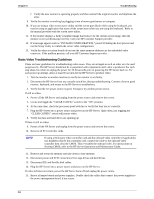
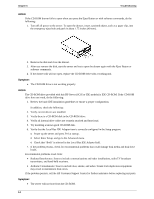
Chapter 6 Troubleshooting f. Verify the new monitor is operating properly and then reinstall the original monitor and duplicate the error. 9. Verify the monitor is working by plugging it into a known-good server or computer. 10. If you are using a video screen saver utility and the screen goes blank while using the keyboard, you may be using an application that turns off the screen even when you are using the keyboard. Refer to the manual provided with the screen saver utility. 11. If the monitor displays a badly scrambled image that looks to be the current screen image, then the monitor is not synchronizing correctly. Call your HP Customer Support provider. 12. If a message appears such as "INVALID CONFIGURATION," press F10 during the boot process and run the Setup Utility to confirm the server video configuration. 13. Verify the other accessory boards do not use the same memory addresses as the embedded video connector. If the problem persists, call your HP Customer Support provider. Basic Video Troubleshooting Guidelines These are basic guidelines for troubleshooting video issues. They are arranged in such an order as to be used progressively. The HP Server should not be re-populated with components until video is produced. For each step taken, be certain to unplug the power for 30-60 seconds prior to powering the HP Server back on. For each power up attempt, allow at least 60 seconds for the HP Server to produce video. 1. Test the monitor on another machine to verify the monitor is not faulty. 2. Disconnect the HP Server from any console switch box during troubleshooting. Connect a known good monitor, keyboard, and mouse to the HP Server to troubleshoot. 3. Verify that the AC power source is good. If suspect, try another power source. If still no video: 4. Power off the HP Server and unplug form the power source and remove the covers. 5. Locate and toggle the "CLEAR CONFIG" switch to the "ON" position. 6. At the same time, check the processor speed switches to verify that they are set correctly. 7. Plug the HP Server into a power source and power on the HP Server. Quite often, just toggling the "CLEAR CONFIG" switch will restore video. 8. Verify that fans and hard drives are spinning up. If there is still no video: 9. Power off the HP Server and unplug form the power source and remove the covers. 10. Remove all PCI controller cards. NOTE If using a third-party video controller card and the onboard video controller (if applicable) was disabled, remove this controller card, connect the cable to the onboard video controller then clear the CMOS. This re-enables the onboard video. For instructions on clearing CMOS, refer to the HP Server Operations and Maintenance Guide. 11. Remove and reseat the memory and take down to base memory. 12. Disconnect power and SCSI connections from tape drives and hard drives. 13. Disconnect IDE and flexible disk cables. 14. Plug the HP Server into a power source and power on the HP Server. If video still does not return, power the HP Server back off and unplug the power cord/s. 15. Reseat all major boards and power supplies. Double check the cables that connect the power supplies to the power management board, if one exists. 10
-
 1
1 -
2
-
3
-
4
-
5
-
 6
6 -
 7
7 -
 8
8 -
 9
9 -
 10
10 -
 11
11 -
 12
12 -
 13
13 -
 14
14 -
 15
15 -
 16
16 -
17
-
18
-
19
-
20
-
21
 |
 |
