HP Vectra XE310 hp vectra xe310, upgrade guide - Page 13
Installing a Memory Module, Upgrading and Replacing PC Hardware, For your safety
 |
View all HP Vectra XE310 manuals
Add to My Manuals
Save this manual to your list of manuals |
Page 13 highlights
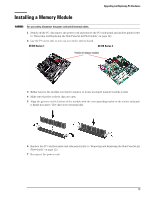
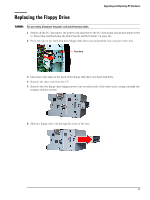
Upgrading and Replacing PC Hardware Installing a Memory Module WARNING For your safety, disconnect the power cord and all external cables. 1 Switch off the PC, disconnect the power cord and remove the PC's side panel and air flow guide (refer to "Removing and Replacing the Side Panel & Air Flow Guide" on page 12). 2 Lay the PC on its side so you can access the system board. XE310 Series 1 XE310 Series 2 Position of memory modules 3 Either remove the module you want to replace or locate an empty memory module socket. 4 Make sure that the socket's clips are open. 5 Align the grooves on the bottom of the module with the corresponding marks on the socket and push it firmly into place. The clips close automatically. 6 Replace the PC's air flow guide and side panel (refer to "Removing and Replacing the Side Panel & Air Flow Guide" on page 12). 7 Reconnect the power cord. 13
-
 1
1 -
2
-
3
-
4
-
5
-
6
-
7
-
 8
8 -
 9
9 -
 10
10 -
 11
11 -
 12
12 -
 13
13 -
 14
14 -
 15
15 -
 16
16 -
 17
17 -
 18
18 -
19
-
20
-
21
-
22
-
23
-
24
-
25
-
26
-
27
-
28
 |
 |
