HP Vectra XU 5/XX HP Vectra XU PC Series - Setting Up Guide - Page 23
Installing an Upgrade Processor
 |
View all HP Vectra XU 5/XX manuals
Add to My Manuals
Save this manual to your list of manuals |
Page 23 highlights
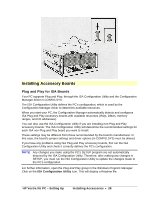
Installing an Upgrade Processor There are two ZIF (Zero Insertion Force) sockets on the PC's system board. These sockets allow upgrade processors to be installed easily. The PC is shipped with one Pentium processor installed, which can be upgraded as follows: • A second (dual) Pentium processor can be installed in the empty ZIF socket. This installation will require jumper J24 to be changed. • An OverDrive for Pentium processor can be installed in the empty ZIF socket. This installation will require the system board switches to be changed. Check with your dealer for supported upgrade processors, and information about operating systems which support dual processing. CAUTION Static electricity can damage electronic components. Turn all equipment OFF. Avoid wearing wool or polyester and don't let your clothes touch the accessory. To equalize the static electricity, rest the accessory bag on top of the power supply while you are removing the accessory from the bag. Handle the accessory as little as possible and with care. To install a dual Pentium processor: A second Pentium is supported only by certain advanced operating systems (Windows NT, Unix, OS/2). Drivers are also required to use a second processor. These drivers are supplied by HP or by the operating system vendor. 1. Remove the PC's cover and power supply, as described earlier in this chapter. 2. Unlock the empty ZIF socket by raising the locking lever. 3. Position the second processor over the empty ZIF socket, aligning the processor and socket corner markers correctly. 4. Place the processor into the socket. If the processor is not seated correctly, do NOT press it into the socket. Lift it out and try again. 5. Lower the ZIF socket lever to lock the processor into place. HP Vectra XU PC - Setting Up Installing Accessories • 23
-
 1
1 -
2
-
3
-
4
-
5
-
6
-
7
-
8
-
9
-
10
-
11
-
12
-
13
-
14
-
15
-
16
-
17
-
 18
18 -
 19
19 -
 20
20 -
 21
21 -
 22
22 -
 23
23 -
 24
24 -
 25
25 -
 26
26 -
 27
27 -
 28
28 -
29
-
30
-
31
-
32
-
33
-
34
-
35
-
36
-
37
-
38
-
39
-
40
-
41
-
42
-
43
-
44
-
45
-
46
-
47
-
48
-
49
-
50
-
51
-
52
-
53
-
54
-
55
-
56
-
57
-
58
-
59
-
60
-
61
-
62
-
63
-
64
-
65
-
66
-
67
-
68
-
69
-
70
-
71
-
72
-
73
-
74
-
75
-
76
-
77
 |
 |
