HP Z620 HP Workstations - CRU Dataport DX115 kit installation - Page 10
HP Z620 Manual
 |
View all HP Z620 manuals
Add to My Manuals
Save this manual to your list of manuals |
Page 10 highlights
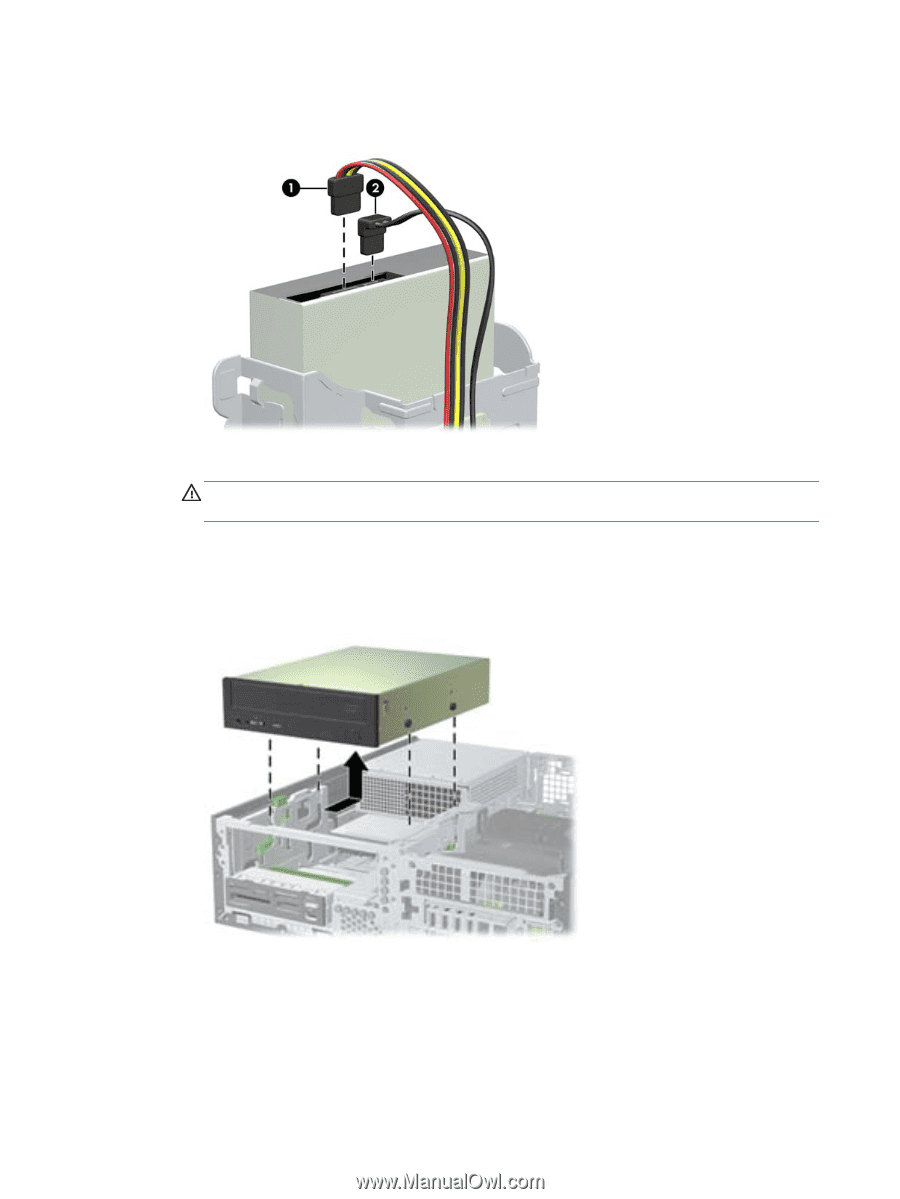
b. Disconnect the power cable (1) and data cable (2) from the rear of the optical drive. Figure 6 Removing the cables c. Rotate the drive cage back down to its normal position. CAUTION: Check clearances on the cables when you rotate the drive cage. The cage may pinch the cables and damage them if they are not routed correctly. d. Press down on the green drive retainer button located on the left side of the drive to disengage the drive from the drive cage. While pressing the drive retainer button, slide the drive back until it stops, then lift it up and out of the drive cage. Figure 7 Removing the optical drive 6 CRU Dataport DX115 kit installation ENWW
-
 1
1 -
2
-
3
-
4
-
 5
5 -
 6
6 -
 7
7 -
 8
8 -
 9
9 -
 10
10 -
 11
11 -
 12
12 -
 13
13 -
 14
14 -
 15
15 -
16
-
17
-
18
-
19
-
20
-
21
-
22
 |
 |
b.
Disconnect the power cable (1) and data cable (2) from the rear of the optical drive.
Figure 6
Removing the cables
c.
Rotate the drive cage back down to its normal position.
CAUTION:
Check clearances on the cables when you rotate the drive cage. The cage may
pinch the cables and damage them if they are not routed correctly.
d.
Press down on the green drive retainer button located on the left side of the drive to
disengage the drive from the drive cage. While pressing the drive retainer button, slide the
drive back until it stops, then lift it up and out of the drive cage.
Figure 7
Removing the optical drive
6
CRU Dataport DX115 kit installation
ENWW