HP d248 Hardware Reference Guide - HP Compaq Business Desktop d228 and d248 Mi - Page 23
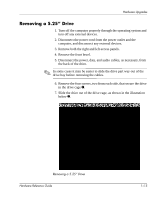
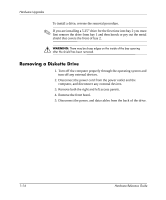
Removing a 3.5” Hard Drive, installed 3.5 drives.
 |
View all HP d248 manuals
Add to My Manuals
Save this manual to your list of manuals |
Page 23 highlights
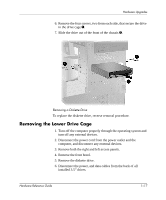
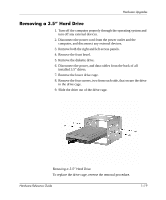
Hardware Upgrades Removing a 3.5" Hard Drive 1. Turn off the computer properly through the operating system and turn off any external devices. 2. Disconnect the power cord from the power outlet and the computer, and disconnect any external devices. 3. Remove both the right and left access panels. 4. Remove the front bezel. 5. Remove the diskette drive. 6. Disconnect the power, and data cables from the back of all installed 3.5" drives. 7. Remove the lower drive cage. 8. Remove the four screws, two from each side, that secure the drive in the drive cage. 9. Slide the drive out of the drive cage. Removing a 3.5" Hard Drive To replace the drive cage, reverse the removal procedure. Hardware Reference Guide 1-19
-
 1
1 -
2
-
3
-
4
-
5
-
6
-
7
-
8
-
9
-
10
-
11
-
12
-
13
-
14
-
15
-
16
-
17
-
 18
18 -
 19
19 -
 20
20 -
 21
21 -
 22
22 -
 23
23 -
 24
24 -
 25
25 -
 26
26 -
 27
27 -
 28
28 -
29
-
30
-
31
-
32
-
33
-
34
-
35
-
36
-
37
-
38
 |
 |

Hardware Reference Guide
1–19
Hardware Upgrades
Removing a 3.5” Hard Drive
1. Turn off the computer properly through the operating system and
turn off any external devices.
2. Disconnect the power cord from the power outlet and the
computer, and disconnect any external devices.
3. Remove both the right and left access panels.
4. Remove the front bezel.
5. Remove the diskette drive.
6. Disconnect the power, and data cables from the back of all
installed 3.5” drives.
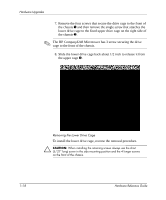
7. Remove the lower drive cage.
8.
Remove the four screws, two from each side, that secure the drive
in the drive cage.
9. Slide the drive out of the drive cage.
Removing a 3.5” Hard Drive
To replace the drive cage, reverse the removal procedure.