HP t5400 Troubleshooting Guide: HP t5400 Thin Client
HP t5400 - Thin Client Manual
 |
View all HP t5400 manuals
Add to My Manuals
Save this manual to your list of manuals |
HP t5400 manual content summary:
- HP t5400 | Troubleshooting Guide: HP t5400 Thin Client - Page 1
Troubleshooting Guide HP t5400 Thin Client - HP t5400 | Troubleshooting Guide: HP t5400 Thin Client - Page 2
document contains proprietary information that is protected by copyright. No part of this document may be photocopied, reproduced, or translated to another language without the prior written consent of Hewlett-Packard Company. Troubleshooting Guide Thin Client First Edition (October 2010) Document - HP t5400 | Troubleshooting Guide: HP t5400 Thin Client - Page 3
About This Book WARNING! Text set off in this manner indicates that failure to follow directions could result in bodily harm or loss of life. CAUTION: Text set off in this manner indicates that failure to follow directions could result in damage to equipment or loss of information. NOTE: Text set - HP t5400 | Troubleshooting Guide: HP t5400 Thin Client - Page 4
iv About This Book - HP t5400 | Troubleshooting Guide: HP t5400 Thin Client - Page 5
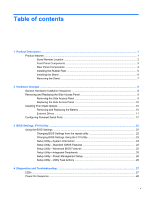
Thin Client Options ...10 Removing and Replacing the Battery 10 External Drives ...11 Configuring Powered Serial Ports ...12 3 BIOS Settings, (F10) Utility ...22 Using the BIOS Settings ...22 Changing BIOS Settings from the repset utility 22 Changing BIOS Settings Using the F10 Utility 23 Setup - HP t5400 | Troubleshooting Guide: HP t5400 Thin Client - Page 6
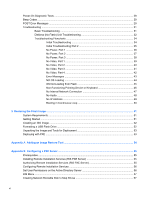
...28 Beep Codes ...29 POST Error Messages ...29 Troubleshooting ...31 Basic Troubleshooting ...31 Diskless (No-Flash) Unit Troubleshooting 32 Troubleshooting Flowcharts 34 Initial Troubleshooting 34 Initial Troubleshooting Part 2 35 No Power, Part 1 36 No Power, Part 2 37 No Power, Part 3 38 - HP t5400 | Troubleshooting Guide: HP t5400 Thin Client - Page 7
58 DCHP Server ...58 FTP Server ...58 Description ...59 Host Settings ...59 Select Image to Update ...60 Appendix D System BIOS ...62 Restoring a Corrupt BIOS ...62 Updating a BIOS ...62 Appendix E Electrostatic Discharge ...64 Preventing Electrostatic Damage ...64 Grounding Methods ...64 Appendix - HP t5400 | Troubleshooting Guide: HP t5400 Thin Client - Page 8
viii - HP t5400 | Troubleshooting Guide: HP t5400 Thin Client - Page 9
using HP Management Solutions The following features are specific to the t5400 thin client: ● Intel Atom 425 single core processor ● Intel PCH NM10 chipset ● Integrated graphics, selectable at 64/128/256MB ● DDR3 SODIMM, 1 socket, up to 4 GB NOTE: 1Rx16 and 2Rx8 SODIMMS not supported ● front - HP t5400 | Troubleshooting Guide: HP t5400 Thin Client - Page 10
Serial Number Location Every thin client includes a unique serial number located as shown in the following illustration. Figure 1-1 Serial number location 2 Chapter 1 Product Description - HP t5400 | Troubleshooting Guide: HP t5400 Thin Client - Page 11
Panel Components For more information, http://www.hp.com and search for your specific thin client model to find the model-specific QuickSpecs. Figure 1-2 Front panel components (1) Power button (2) Flash activity LED (3) Line-out (headphone) audio connector (4) Line-in (microphone) connector - HP t5400 | Troubleshooting Guide: HP t5400 Thin Client - Page 12
http://www.hp.com and search for your specific thin client model to find the model-specific QuickSpecs. Figure 1-3 Rear panel components (1) Ethernet RJ-45 connector (2) Serial connectors (4) (3) Parallel connector (4) PS/2 connectors (2) (5) Cable lock slot (6) Power connector (7) VGA - HP t5400 | Troubleshooting Guide: HP t5400 Thin Client - Page 13
. To install the rubber feet: 1. Locate the VESA (Video Electronics Standards Association) holes in the left side of the thin client. CAUTION: If you use the thin client in a horizontal orientation without the rubber feet, it may slide and result in equipment damage. 2. Remove the feet from their - HP t5400 | Troubleshooting Guide: HP t5400 Thin Client - Page 14
you wish to use the thin client in a vertical orientation, you should install the stand for stability. To install the stand: 1. Turn unit upside down. 2. Locate the slots on the bottom of the unit into which the tabs on the stand fit. Position the stand with the wide part toward the front of - HP t5400 | Troubleshooting Guide: HP t5400 Thin Client - Page 15
Removing the Stand To remove the stand: 1. Turn unit upside down. 2. Press the tab (1), then slide the stand toward the rear of the thin client and lift it off the unit (2). Figure 1-6 Removing the stand Product features 7 - HP t5400 | Troubleshooting Guide: HP t5400 Thin Client - Page 16
. NOTE: Option kits include more detailed installation instructions. 6. Replace the side access panel. See Removing and Replacing the Side Access Panel on page 9. 7. Reconnect any external devices and power cords. 8. Turn on the monitor, the thin client, and any devices you want to test. 8 Chapter - HP t5400 | Troubleshooting Guide: HP t5400 Thin Client - Page 17
. NOTE: You can download select hardware drivers from HP. Go to http://www.hp.com and search for your specific thin client model. 10. Reconfigure the thin client, if necessary. Removing and Replacing the Side Access Panel Removing the Side Access Panel WARNING! Before removing the side access panel - HP t5400 | Troubleshooting Guide: HP t5400 Thin Client - Page 18
Before beginning the replacement process, review General Hardware Installation Sequence on page 8 for procedures you should follow before and after installing or replacing hardware. WARNING! Before removing the side access panel, ensure that the thin client is turned off and the power cord is - HP t5400 | Troubleshooting Guide: HP t5400 Thin Client - Page 19
, visit http://www.hp.com and search for your specific thin client model, or refer to the instructions that accompany the option. For more information about available options, visit the HP Web site http://www.hp.com and search for your specific thin client model. Installing Thin Client Options 11 - HP t5400 | Troubleshooting Guide: HP t5400 Thin Client - Page 20
, COM 2, COM 3, and COM 4, are standard on the thin client. COM 1 is a standard, non-powered serial port that cannot be configured. Some devices use a powered serial port. If the serial port is configured as a powered port, devices that support a powered serial interface do not require an external - HP t5400 | Troubleshooting Guide: HP t5400 Thin Client - Page 21
Before beginning the configuration process, review General Hardware Installation Sequence on page 8 for procedures you should follow before and after installing or replacing hardware. WARNING! Before removing the side access panel, ensure that the thin client is turned off and the power cord is - HP t5400 | Troubleshooting Guide: HP t5400 Thin Client - Page 22
Figure 2-4 Serial Port Jumper Locations on the System Board on page 13 and Table 2-3 Configuring Serial Port Power on page 15 for Jumper locations and supported configurations. Table 2-1 COM Port Default Configuration pin # COM1 COM2 pin 1 DCD +5V pin 2 RXD RXD pin 3 TXD TXD pin 4 DTR - HP t5400 | Troubleshooting Guide: HP t5400 Thin Client - Page 23
To prevent severe equipment damage, carefully verify the location of the COM Port Jumper before you configure it. See Figure 2-4 Serial Port Jumper Locations on the System Board on page 13 for System Board on page 13. Table 2-3 Configuring Serial Port Power Configuring Powered Serial Ports 15 - HP t5400 | Troubleshooting Guide: HP t5400 Thin Client - Page 24
Table 2-3 Configuring Serial Port Power (continued) 16 Chapter 2 Hardware Changes - HP t5400 | Troubleshooting Guide: HP t5400 Thin Client - Page 25
Table 2-3 Configuring Serial Port Power (continued) Configuring Powered Serial Ports 17 - HP t5400 | Troubleshooting Guide: HP t5400 Thin Client - Page 26
Table 2-3 Configuring Serial Port Power (continued) 18 Chapter 2 Hardware Changes - HP t5400 | Troubleshooting Guide: HP t5400 Thin Client - Page 27
Table 2-3 Configuring Serial Port Power (continued) Configuring Powered Serial Ports 19 - HP t5400 | Troubleshooting Guide: HP t5400 Thin Client - Page 28
Table 2-3 Configuring Serial Port Power (continued) 20 Chapter 2 Hardware Changes - HP t5400 | Troubleshooting Guide: HP t5400 Thin Client - Page 29
Table 2-3 Configuring Serial Port Power (continued) Configuring Powered Serial Ports 21 - HP t5400 | Troubleshooting Guide: HP t5400 Thin Client - Page 30
F12 Boot Integrated Audio Network Controller Serial Port 1 Serial Port 2 Serial Port 3 Serial Port 4 Parallel Port PWRON After PWR-Fail Wake-on-PME BIOS Wake Up Asset Tag No Setup Password Default week & time User input (18 chars) User input (8 chars max) 22 Chapter 3 BIOS Settings, (F10) Utility - HP t5400 | Troubleshooting Guide: HP t5400 Thin Client - Page 31
Power-On Password Parallel Mode ECP Mode Use DMA USB Controller External USB Ports Halt On Security Option USB Keyboard Support USB Mouse Support blank ECP/EPP DMA3 Enabled Enabled All, but Keyboard Setup Enabled Disabled User input (8 chars max) Standard, EPP, ECP DMA1 Disabled Disabled No Errors - HP t5400 | Troubleshooting Guide: HP t5400 Thin Client - Page 32
on page 25 Setup Utility-Power Management Setup on page 26 Setup Utility-System Information NOTE: Support for specific Setup options may vary depending on the hardware configuration. Table 3-2 Setup Utility-System Information Option Description Product Name (view only) Processor Type (view - HP t5400 | Troubleshooting Guide: HP t5400 Thin Client - Page 33
Utility-Advanced BIOS Features Table 3-4 Setup Utility-Advanced BIOS Features Option Description Quick Power-on Self Test External Ports Default is enabled. USB Keyboard Support Allows use of USB keyboard under DOS. Default is enabled. USB Mouse Support Allows use of USB Mouse under DOS - HP t5400 | Troubleshooting Guide: HP t5400 Thin Client - Page 34
Setup Utility-Power Management Setup Table 3-6 Setup Utility-Power Management Setup Option Description PWRON After PWRFail When power is lost and comes back, the option determines what power state the system should go to. Options are Off, On, and Former-Sts. Default is Former-Sts. Wake on PME - HP t5400 | Troubleshooting Guide: HP t5400 Thin Client - Page 35
on the top, rear panel of the thin client. The LEDs are visible when the connector is installed. Blinking green indicates network activity, and amber indicates a 100MB speed connection. IDE LED is Off When the unit is powered on and the flash activity light is off, then there is no access - HP t5400 | Troubleshooting Guide: HP t5400 Thin Client - Page 36
block code initializes the hardware to a known state, then performs basic power-on diagnostic tests to determine the integrity of the hardware. Initialization performs the following functions: 1. Initializes CPU and memory controller. 2. Initializes VGA software. 3. Initializes and configures all - HP t5400 | Troubleshooting Guide: HP t5400 Thin Client - Page 37
type and location of the memory error. Override enabled - Defaults loaded If the system cannot boot using the current CMOS configuration, the BIOS can override the current configuration with a set of BIOS defaults designed for the most stable, minimal performance system operations. Beep Codes 29 - HP t5400 | Troubleshooting Guide: HP t5400 Thin Client - Page 38
. Error: Non-System disk or disk error The BIOS was unable to find a suitable boot device. For the t5000 Series, this may mean an uninitialized or corrupt ATA Flash. Reflash the unit. For more information, refer to Restoring the Flash Image on page 51. 30 Chapter 4 Diagnostics and Troubleshooting - HP t5400 | Troubleshooting Guide: HP t5400 Thin Client - Page 39
power supply cable and testing it. 4. If network LEDs still do not light and you know the power supply is good, then re-image the unit. 5. If network LEDs still do not light, run the IP configuration procedure. 6. If network LEDs still do not light, have the unit serviced. Troubleshooting - HP t5400 | Troubleshooting Guide: HP t5400 Thin Client - Page 40
green (assuming the monitor is Energy Star compliant). If the monitor is defective, replace it with a working monitor and repeat testing. 3. Re-image the thin client unit and power on the monitor again. 4. Test the thin client unit on a known working monitor. If the monitor does not display video - HP t5400 | Troubleshooting Guide: HP t5400 Thin Client - Page 41
: Non-system disk or disk error. Replace and press any key when ready. Pressing any key will restart the boot cycle. 3. If you are running in a Linux environment, an error message will appear on the screen if there is no Client IP. ERROR: Non-system disk or disk error. Replace and press any key when - HP t5400 | Troubleshooting Guide: HP t5400 Thin Client - Page 42
Flowcharts Initial Troubleshooting Start Intial Troubleshooting Is there No power? Yes Is there No video? Yes Go to No Power Go to No Video Beeps, No LEDs, or error Yes Go to Error Messages Is the OS No loading? Go to No OS Loading Yes Go to next page t5000 Troubleshooting Flow - HP t5400 | Troubleshooting Guide: HP t5400 Thin Client - Page 43
Initial Troubleshooting Part 2 B Continued from Initial Troubleshooting Keyboard/ mouse working? Yes NIC working? Yes Go to No Non-functioning pointing device or keyboard Go to No No internal network connector Audio No working? Go to No audio Yes Windows No desktop displayed but can - HP t5400 | Troubleshooting Guide: HP t5400 Thin Client - Page 44
, then from brick to system. Yes Ensure power strip or UPS is turned on. Turn computer off. Plug No power cord into different active wall outlet. Restart thin client and return to start of this chart. Go to next page t5000 Troubleshooting Flow Chart No Power, Part 2 36 Chapter 4 Diagnostics and - HP t5400 | Troubleshooting Guide: HP t5400 Thin Client - Page 45
No Power, Part 2 Plug directly into AC outlet PoweNr o LED on? Yes Done No Reseat AC adapter in thin client and at power source Power on? No Yes Done Power outlet active? No Try different outlet Yes Go to next page t5000 Troubleshooting Flow Chart No Power, Part 3 Troubleshooting 37 - HP t5400 | Troubleshooting Guide: HP t5400 Thin Client - Page 46
No Power, Part 3 38 Chapter 4 Diagnostics and Troubleshooting - HP t5400 | Troubleshooting Guide: HP t5400 Thin Client - Page 47
No Video, Part 1 Troubleshooting 39 - HP t5400 | Troubleshooting Guide: HP t5400 Thin Client - Page 48
monitor Note: 3. Turn off and unplug thin client before reconnecting cables. Video Yes Done OK? No Does unit have added memory upgrades? No Yes Go to next page t5000 Troubleshooting Flow Chart No Video, Part 2 Have the unit serviced. NOTE: Refer to the Warranty for coverage information - HP t5400 | Troubleshooting Guide: HP t5400 Thin Client - Page 49
errordefaults loaded Yes Done Yes No Turn off the computer and disconnect power. Replace components in system one at a time starting with Flash. Test system after each replacement for video or beeps. Go to next page t5000 Troubleshooting Flow Chart No Video, Part 4 Troubleshooting 41 - HP t5400 | Troubleshooting Guide: HP t5400 Thin Client - Page 50
power supply even when the power switch is turned off. To prevent damage to the unit, disconnect the power cord from the power source or the unit before beginning disassembly procedures. See codes No or beeps? Integrated video? Yes Turn off the computer and disconnect power. Replace components - HP t5400 | Troubleshooting Guide: HP t5400 Thin Client - Page 51
Error Messages Error Messages Beeps, CPU or Keyboard Lights, or POST error messages Caution: Power is continuous to the system board and power supply even when the power switch is turned off. To prevent damage to the unit, disconnect the power cord from the power source or the unit before - HP t5400 | Troubleshooting Guide: HP t5400 Thin Client - Page 52
No Internal Network Connection Note: If USB diskette drive present and diskette installed, system will not boot from other USB device. 44 Chapter 4 Diagnostics and Troubleshooting - HP t5400 | Troubleshooting Guide: HP t5400 Thin Client - Page 53
models Using t5000 F10 Setup, change boot priority to factory defaults. 1. USB Device 2. Flash* 3. Network *Check "Amount of Flash memory" in image using the Recovery process. Boot from Flash? Yes Done No Service the unit Note: Refer to the Warranty for coverage information. Troubleshooting - HP t5400 | Troubleshooting Guide: HP t5400 Thin Client - Page 54
operating properly. Reseat keyboard or mouse and disconnect other devices. F10 Setup to enable USB controller. Press Ctrl+Alt+Del to reboot. Reimage Working? Yes Done Yes Done No Service the unit Note: Refer to the Warranty for coverage information. 46 Chapter 4 Diagnostics and Troubleshooting - HP t5400 | Troubleshooting Guide: HP t5400 Thin Client - Page 55
or green LED on NIC connector indicates an active jack. Keyboard or mouse working? No Replace cable or have jack activated. NIC configured in OS? No Reimage using recovery process. Yes OK? Yes Done No Call your local HP Call Center for a diagnosis. To locate a local phone number, visit the - HP t5400 | Troubleshooting Guide: HP t5400 Thin Client - Page 56
speakers Turn up volume for internal and external speakers. Restore image using the Recovery process. Audio? Yes N Take the following actions: 1. Reseat speaker cable. 2. Replace speaker. Note: Refer to Warranty for coverage information. Done N Audio? Yes Done 48 Chapter 4 Diagnostics and - HP t5400 | Troubleshooting Guide: HP t5400 Thin Client - Page 57
. Ping N Loopback OK? Yes Done Yes Ping N Gateway OK? Yes Thin client have a valid IP address? N Reimage device using restore Reboot unit and server. Ping Server by name OK? N Contact Server Administrator to verify DCHP, DNS services started. Replace network cable. Yes Done - HP t5400 | Troubleshooting Guide: HP t5400 Thin Client - Page 58
that Altiris 5.6 Deployment server is being used. Reboot the thin client Boot Yes OK? Done Yes Boot OK? Service the unit. Note: Refer to the Warranty for coverage information. No No Reimage the system. Reboot the thin client t5000 Troubleshooting Flow Chart End 50 Chapter 4 Diagnostics and - HP t5400 | Troubleshooting Guide: HP t5400 Thin Client - Page 59
computer running Microsoft Windows 2000 Professional or Microsoft Windows XP Professional ● One or more HP Compaq t5000 Series Thin Clients ● CD-R or CD-RW drive (if using the ISO Image option) ● 512-MB USB flash device for Windows XP Embedded (if using the USB format) or Linux. This restore method - HP t5400 | Troubleshooting Guide: HP t5400 Thin Client - Page 60
thin client following the restore process, it may take approximately 15 minutes to unbundle the software before the Windows Desktop is displayed. Creating an ISO Image 1. Click ISO Image the USB drive does not appear in the list, click Update Drives, then scroll through the list again.) During the - HP t5400 | Troubleshooting Guide: HP t5400 Thin Client - Page 61
thin client during this process. 5. Restart the thin client. 6. When prompted Do you want to continue? [Y/N] click Y to begin the image restore process on the thin client. Unpacking the Image and press Enter. Refer to Configuring a PXE Server on page 55 for instructions about setting up a PXE Server - HP t5400 | Troubleshooting Guide: HP t5400 Thin Client - Page 62
New > Job. 4. Enter a unique name for the job that you will use to deploy the original thin client image. 5. Click the name of the new job. 6. Near the upper right side of the screen, click Solution (http://www.altiris.com/support/documentation) for more detailed information. 54 Appendix A Adding an - HP t5400 | Troubleshooting Guide: HP t5400 Thin Client - Page 63
B Configuring a PXE Server Prerequisites The services listed below must be running, and they may be running on different servers: ● Domain Name Service (DNS) ● Active Directory DHCP ● Remote Installation Services (RIS) on Microsoft Windows 2000 Server This documentation covers RIS setup, and assumes - HP t5400 | Troubleshooting Guide: HP t5400 Thin Client - Page 64
8. Click OK. 9. Log off from the DHCP Server. Configuring Remote Installation Services Use the default option to have RIS install on second hard 3. Click Next. 4. Select Respond to client computers requesting service. 5. Click Next. 6. Insert the Windows 2000 Professional CD into the CD-ROM drive - HP t5400 | Troubleshooting Guide: HP t5400 Thin Client - Page 65
to the Microsoft Web site for instructions about creating a network bootable diskette. For More Information Thin client documentation (including white papers discussing software deployment methods): http://welcome.hp.com/country/us/en/support.html?pageDisplay=support. Type your model number into the - HP t5400 | Troubleshooting Guide: HP t5400 Thin Client - Page 66
share to an HP thin client system running the WES operating system. For FTP Image Update to function properly, it requires the following available free space on the client: ● Approximately 200MB of flash ● Approximately 250MB of RAM FTP Image Update over wireless is not supported For greater usage - HP t5400 | Troubleshooting Guide: HP t5400 Thin Client - Page 67
Description The HP FTP Image Update Client can only be run by an administrator on an HP thin client system which has license to run XP Embedded operating system. Host Settings There are two ways to specify host settings: 1. You can manually enter settings by clearing the Get Host Settings from DHCP - HP t5400 | Troubleshooting Guide: HP t5400 Thin Client - Page 68
operation. If you click Yes, the HP FTP Image Update Client confirms that the flash drive has at least 200MB free to host the WinPE image. If the flash drive does not, the following error message is displayed. If the flash device has enough memory, the update client starts the download of the WinPE - HP t5400 | Troubleshooting Guide: HP t5400 Thin Client - Page 69
Select Image to Update 61 - HP t5400 | Troubleshooting Guide: HP t5400 Thin Client - Page 70
Thin Client t5000 Series System BIOS Softpaq (for the product being restored) on diskette or USB flash drive NOTE: The BIOS recovery procedure works the same from USB floppy diskette or USB flash drive. To restore a corrupted BIOS, complete the following instructions: 1. Place the latest BIOS image - HP t5400 | Troubleshooting Guide: HP t5400 Thin Client - Page 71
update the system BIOS on individual PCs through the Linux environment. To determine the BIOS family, version, and date on the thin client, press F10 during system power-on to run the F10 Setup utility, then select System Information. To update the system BIOS, complete the following instructions - HP t5400 | Troubleshooting Guide: HP t5400 Thin Client - Page 72
or installing electrostatic-sensitive parts: ● Use a wrist strap connected by a ground cord to a grounded Thin Client chassis. Wrist straps HP authorized dealer, reseller, or service provider. NOTE: For more information about static electricity, contact an HP authorized dealer, reseller, or service - HP t5400 | Troubleshooting Guide: HP t5400 Thin Client - Page 73
F Specifications Table F-1 HP t5400 Thin Clients Dimensions Width Height (without stand) ° F per hour) Nonoperating -30° to 60° C -22° to 140° F (max. rate of change is 20° C per hour or 36° F per hour) *Specifications are at sea level with altitude derating of 1° C/300 m (1.8° F/1000 ft) to - HP t5400 | Troubleshooting Guide: HP t5400 Thin Client - Page 74
Table F-1 HP t5400 Thin Clients (continued) Power Supply Operating Voltage Range Rated Line Frequency Power Output (maximum) Rated Output Current (maximum) Output Voltage 100-240 VAC 50-60 Hz 65 W 3.42 A +19 V DC 100-240 VAC 50-60 Hz 65 W 3.42 A +19 V DC 66 Appendix F Specifications - HP t5400 | Troubleshooting Guide: HP t5400 Thin Client - Page 75
Index A access panel removing 9 replacing 10 adding an image restore tool 54 altitude specifications 65 authorizing Remote Installation Services 55 B basic troubleshooting 31 battery, replacing 10 beep codes 29 BIOS restoring 62 updating 62 C cable routing slot 4 cautions static electricity 8 - HP t5400 | Troubleshooting Guide: HP t5400 Thin Client - Page 76
down 8 side access panel replacing 10 specifications altitude 65 dimensions 65 hardware 65 humidity 65 power output 66 power supply 66 rated output current 66 relative humidity 65 temperature 65 thin client 65 weight 65 stand installing 6 removing 7 troubleshooting 31 U updating a BIOS 62 USB drive
-
 1
1 -
 2
2 -
 3
3 -
 4
4 -
 5
5 -
 6
6 -
 7
7 -
8
-
9
-
10
-
11
-
12
-
13
-
14
-
15
-
16
-
17
-
18
-
19
-
20
-
21
-
22
-
23
-
24
-
25
-
26
-
27
-
28
-
29
-
30
-
31
-
32
-
33
-
34
-
35
-
36
-
37
-
38
-
39
-
40
-
41
-
42
-
43
-
44
-
45
-
46
-
47
-
48
-
49
-
50
-
51
-
52
-
53
-
54
-
55
-
56
-
57
-
58
-
59
-
60
-
61
-
62
-
63
-
64
-
65
-
66
-
67
-
68
-
69
-
70
-
71
-
72
-
73
-
74
-
75
-
76
 |
 |

Troubleshooting Guide
HP t5400 Thin Client