HP t5400 Troubleshooting Guide: HP t5400 Thin Client - Page 13
Installing the Rubber Feet, CAUTION,
 |
View all HP t5400 manuals
Add to My Manuals
Save this manual to your list of manuals |
Page 13 highlights
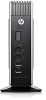
Installing the Rubber Feet You may want to use your thin client in a horizontal orientation. You can install rubber feet on the left side of the unit to help keep the unit safely in place. To install the rubber feet: 1. Locate the VESA (Video Electronics Standards Association) holes in the left side of the thin client. CAUTION: If you use the thin client in a horizontal orientation without the rubber feet, it may slide and result in equipment damage. 2. Remove the feet from their backing. 3. Align the feet with their holes and press them in securely. Figure 1-4 Installing the rubber feet Product features 5
-
 1
1 -
2
-
3
-
4
-
5
-
6
-
7
-
 8
8 -
 9
9 -
 10
10 -
 11
11 -
 12
12 -
 13
13 -
 14
14 -
 15
15 -
 16
16 -
 17
17 -
 18
18 -
19
-
20
-
21
-
22
-
23
-
24
-
25
-
26
-
27
-
28
-
29
-
30
-
31
-
32
-
33
-
34
-
35
-
36
-
37
-
38
-
39
-
40
-
41
-
42
-
43
-
44
-
45
-
46
-
47
-
48
-
49
-
50
-
51
-
52
-
53
-
54
-
55
-
56
-
57
-
58
-
59
-
60
-
61
-
62
-
63
-
64
-
65
-
66
-
67
-
68
-
69
-
70
-
71
-
72
-
73
-
74
-
75
-
76
 |
 |

Installing the Rubber Feet
You may want to use your thin client in a horizontal orientation. You can install rubber feet on the left
side of the unit to help keep the unit safely in place.
To install the rubber feet:
1.
Locate the VESA (Video Electronics Standards Association) holes in the left side of the thin
client.
CAUTION:
If you use the thin client in a horizontal orientation without the rubber feet, it may
slide and result in equipment damage.
2.
Remove the feet from their backing.
3.
Align the feet with their holes and press them in securely.
Figure 1-4
Installing the rubber feet
Product features
5