Hitachi 51M200 Owners Guide - Page 13
Connecting External Audio Devices
 |
View all Hitachi 51M200 manuals
Add to My Manuals
Save this manual to your list of manuals |
Page 13 highlights
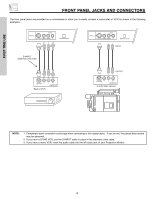
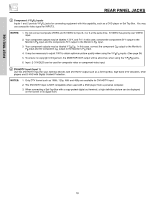
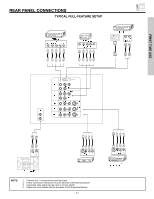
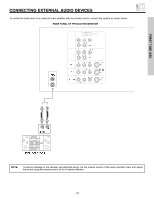
FIRST TIME USE CONNECTING EXTERNAL AUDIO DEVICES To control the audio level of an external audio amplifier with the remote control, connect the system as shown below. REAR PANEL OF PROJECTION MONITOR AUDIO TO HI-FI L R INPUT 1 INPUT 2 INPUT 3 DVI-HDTV PR PB Y R (MONO)/L AUDIO PR PB Y/VIDEO R (MONO)/L AUDIO R (MONO)/L VIDEO S-VIDEO INPUT 4 R (MONO)/L VIDEO S-VIDEO R L VIDEO MONITOR OUT AUDIO S-VIDEO LR INPUT Stereo SystemAmplifier NOTE: To prevent damage to the speaker and distorted sound, set the volume control of the audio amplifier lower and adjust the sound using the remote control of the Projection Monitor. 13
-
 1
1 -
2
-
3
-
4
-
5
-
6
-
7
-
 8
8 -
 9
9 -
 10
10 -
 11
11 -
 12
12 -
 13
13 -
 14
14 -
 15
15 -
 16
16 -
 17
17 -
 18
18 -
19
-
20
-
21
-
22
-
23
-
24
-
25
-
26
-
27
-
28
-
29
-
30
-
31
-
32
-
33
-
34
-
35
-
36
-
37
-
38
-
39
-
40
-
41
-
42
-
43
-
44
-
45
-
46
-
47
-
48
-
49
-
50
-
51
-
52
-
53
-
54
-
55
-
56
-
57
-
58
-
59
-
60
-
61
-
62
-
63
-
64
 |
 |
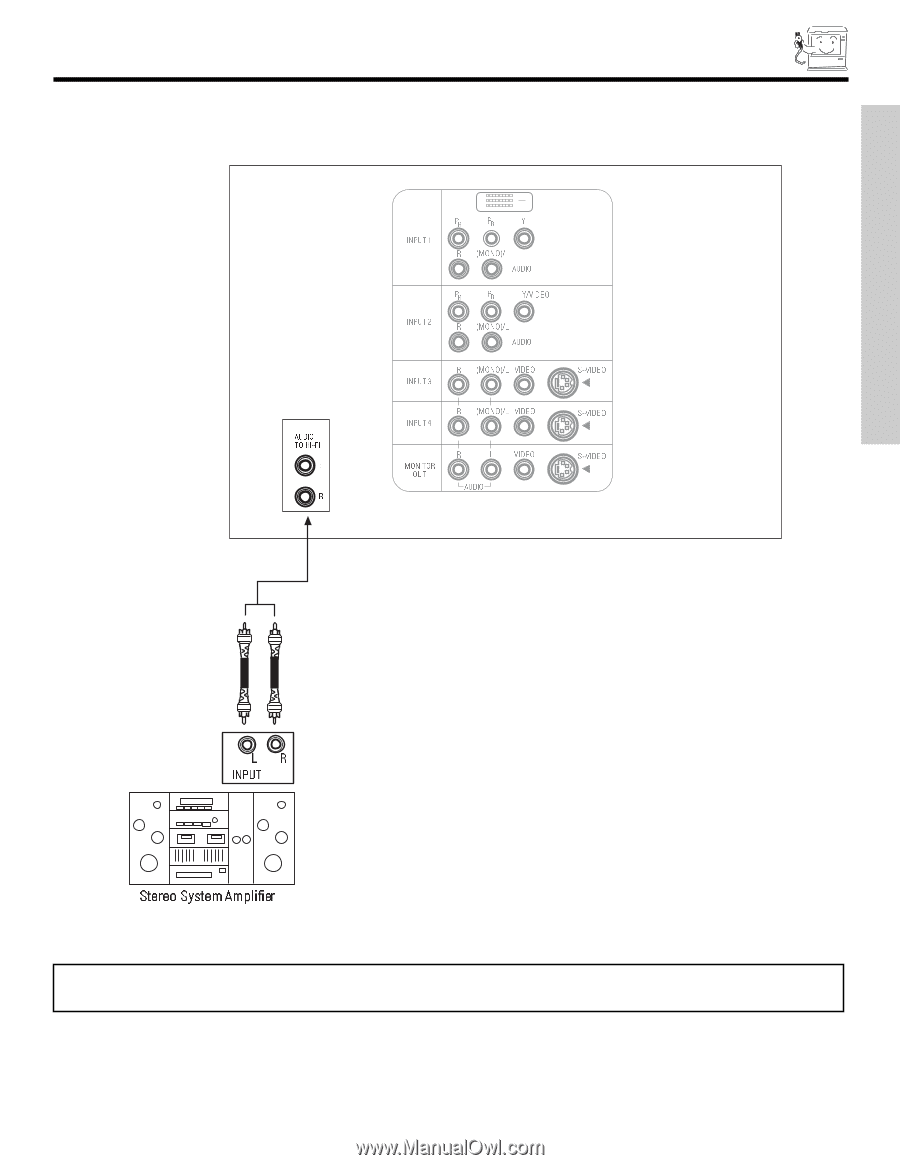
FIRST TIME USE
13
CONNECTING EXTERNAL AUDIO DEVICES
To control the audio level of an external audio amplifier with the remote control, connect the system as shown below.
NOTE:
To prevent damage to the speaker and distorted sound, set the volume control of the audio amplifier lower and adjust
the sound using the remote control of the Projection Monitor.
REAR PANEL OF PROJECTION MONITOR
DVI-HDTV